
In between home renovation projects this fall, I slipped in a little personal project. I was tired of bottling five gallon batches of beer and figured I deserved to have some homebrew on draft. We’re also big seltzer drinkers so I was certainly drawn to the possibility of force carbonating non-alcoholic drinks at home as well.
In the decision between a kegerator (a portmanteau of keg and refrigerator) versus a keezer (keg/freezer) I ultimately decided on the keezer due to the lower cost per cubic foot, the ability to complete the project without drilling through or otherwise permanently modifying the unit (thus keeping the warranty), and the ease of keeping the CO2 tank on the compressor hump inside for neatness.
Most of the online guides I found were lacking in detail especially at key decision points so here’s what I worked out. This is not a cheap project, the chest freezer and all the hardware to convert it cost me about $800, which is significantly less expensive than commercial options. The CO2 tank and kegs are an additional cost, but those don’t come with the commercial units either.
Parts list and tools
Here’s a complete list of what I purchased:
| Item | Purchase Location |
| Hisense 7 cu ft chest freezer (LFC070N6AWE) | Lowe’s |
| Taprite 12218 dual-gauge CO2 regulator | Amazon |
| (4x) Kegco SH316NA-518-ASC Beer Shank, 5 1/8″, Stainless Steel | Amazon |
| Ferroday 4-way 5/16″ gas manifold | Amazon |
| 5/16″ ID red gas tubing, 25 feet | Amazon |
| EVABarrier 4mm ID tubing, 39 feet | MoreBeer.com |
| (4x) Ferroday flared swivel connectors for ball lock kegs | Amazon |
| Inkbird ITC-308 Digital Temperature Controller | Amazon |
| (4x) MrBrew 304 stainless steel “upgraded” beer faucet | Amazon |
| MrBrew plastic tap handles, 5 pack | Amazon |
| Yaebrew 19″ stainless steel drip tray | Amazon |
| (20x) Adjustable 6–12mm stainless steel hose clamps | Amazon |
| (2x) 8 foot 2×4 | Hardware Store |
| R5 (or higher) foam insulation board | Hardware Store |
| (4x) Inside corner bracket w/ screws | Hardware Store |
| Liquid nails adhesive | Hardware Store |
| Silicone caulk | Hardware Store |
| Teflon tape | Hardware Store |
| Expanding spray foam | Hardware Store |
| Wood glue | Hardware Store |
Tools required:
- Miter saw
- Screwdrivers
- Drill
- Utility knife
- 7/8″ spade bit
- Adjustable wrench
- Ratchet strap or corner clamps
- Caulk gun
Starting the build
First, I unscrewed the hinges from the lid in preparation for removing it. One of the hinges is spring-loaded to keep the lid open. If it folds shut it will be difficult to open again. I ran a zip tie through it to hold it in the open position, which will come in handy later:

The other hinge without a spring can be removed and easily folds out of the way:
On the back of the freezer is a wire going into a little plastic cover, unscrew the cover, there should be enough slack to raise the lid up 4″, as well as to turn the lid and leave it leaning against the freezer while you work on it. I’m pretty sure this only powers the light in the lid, so if you want a collar taller than 4″ you could almost certainly disconnect this:
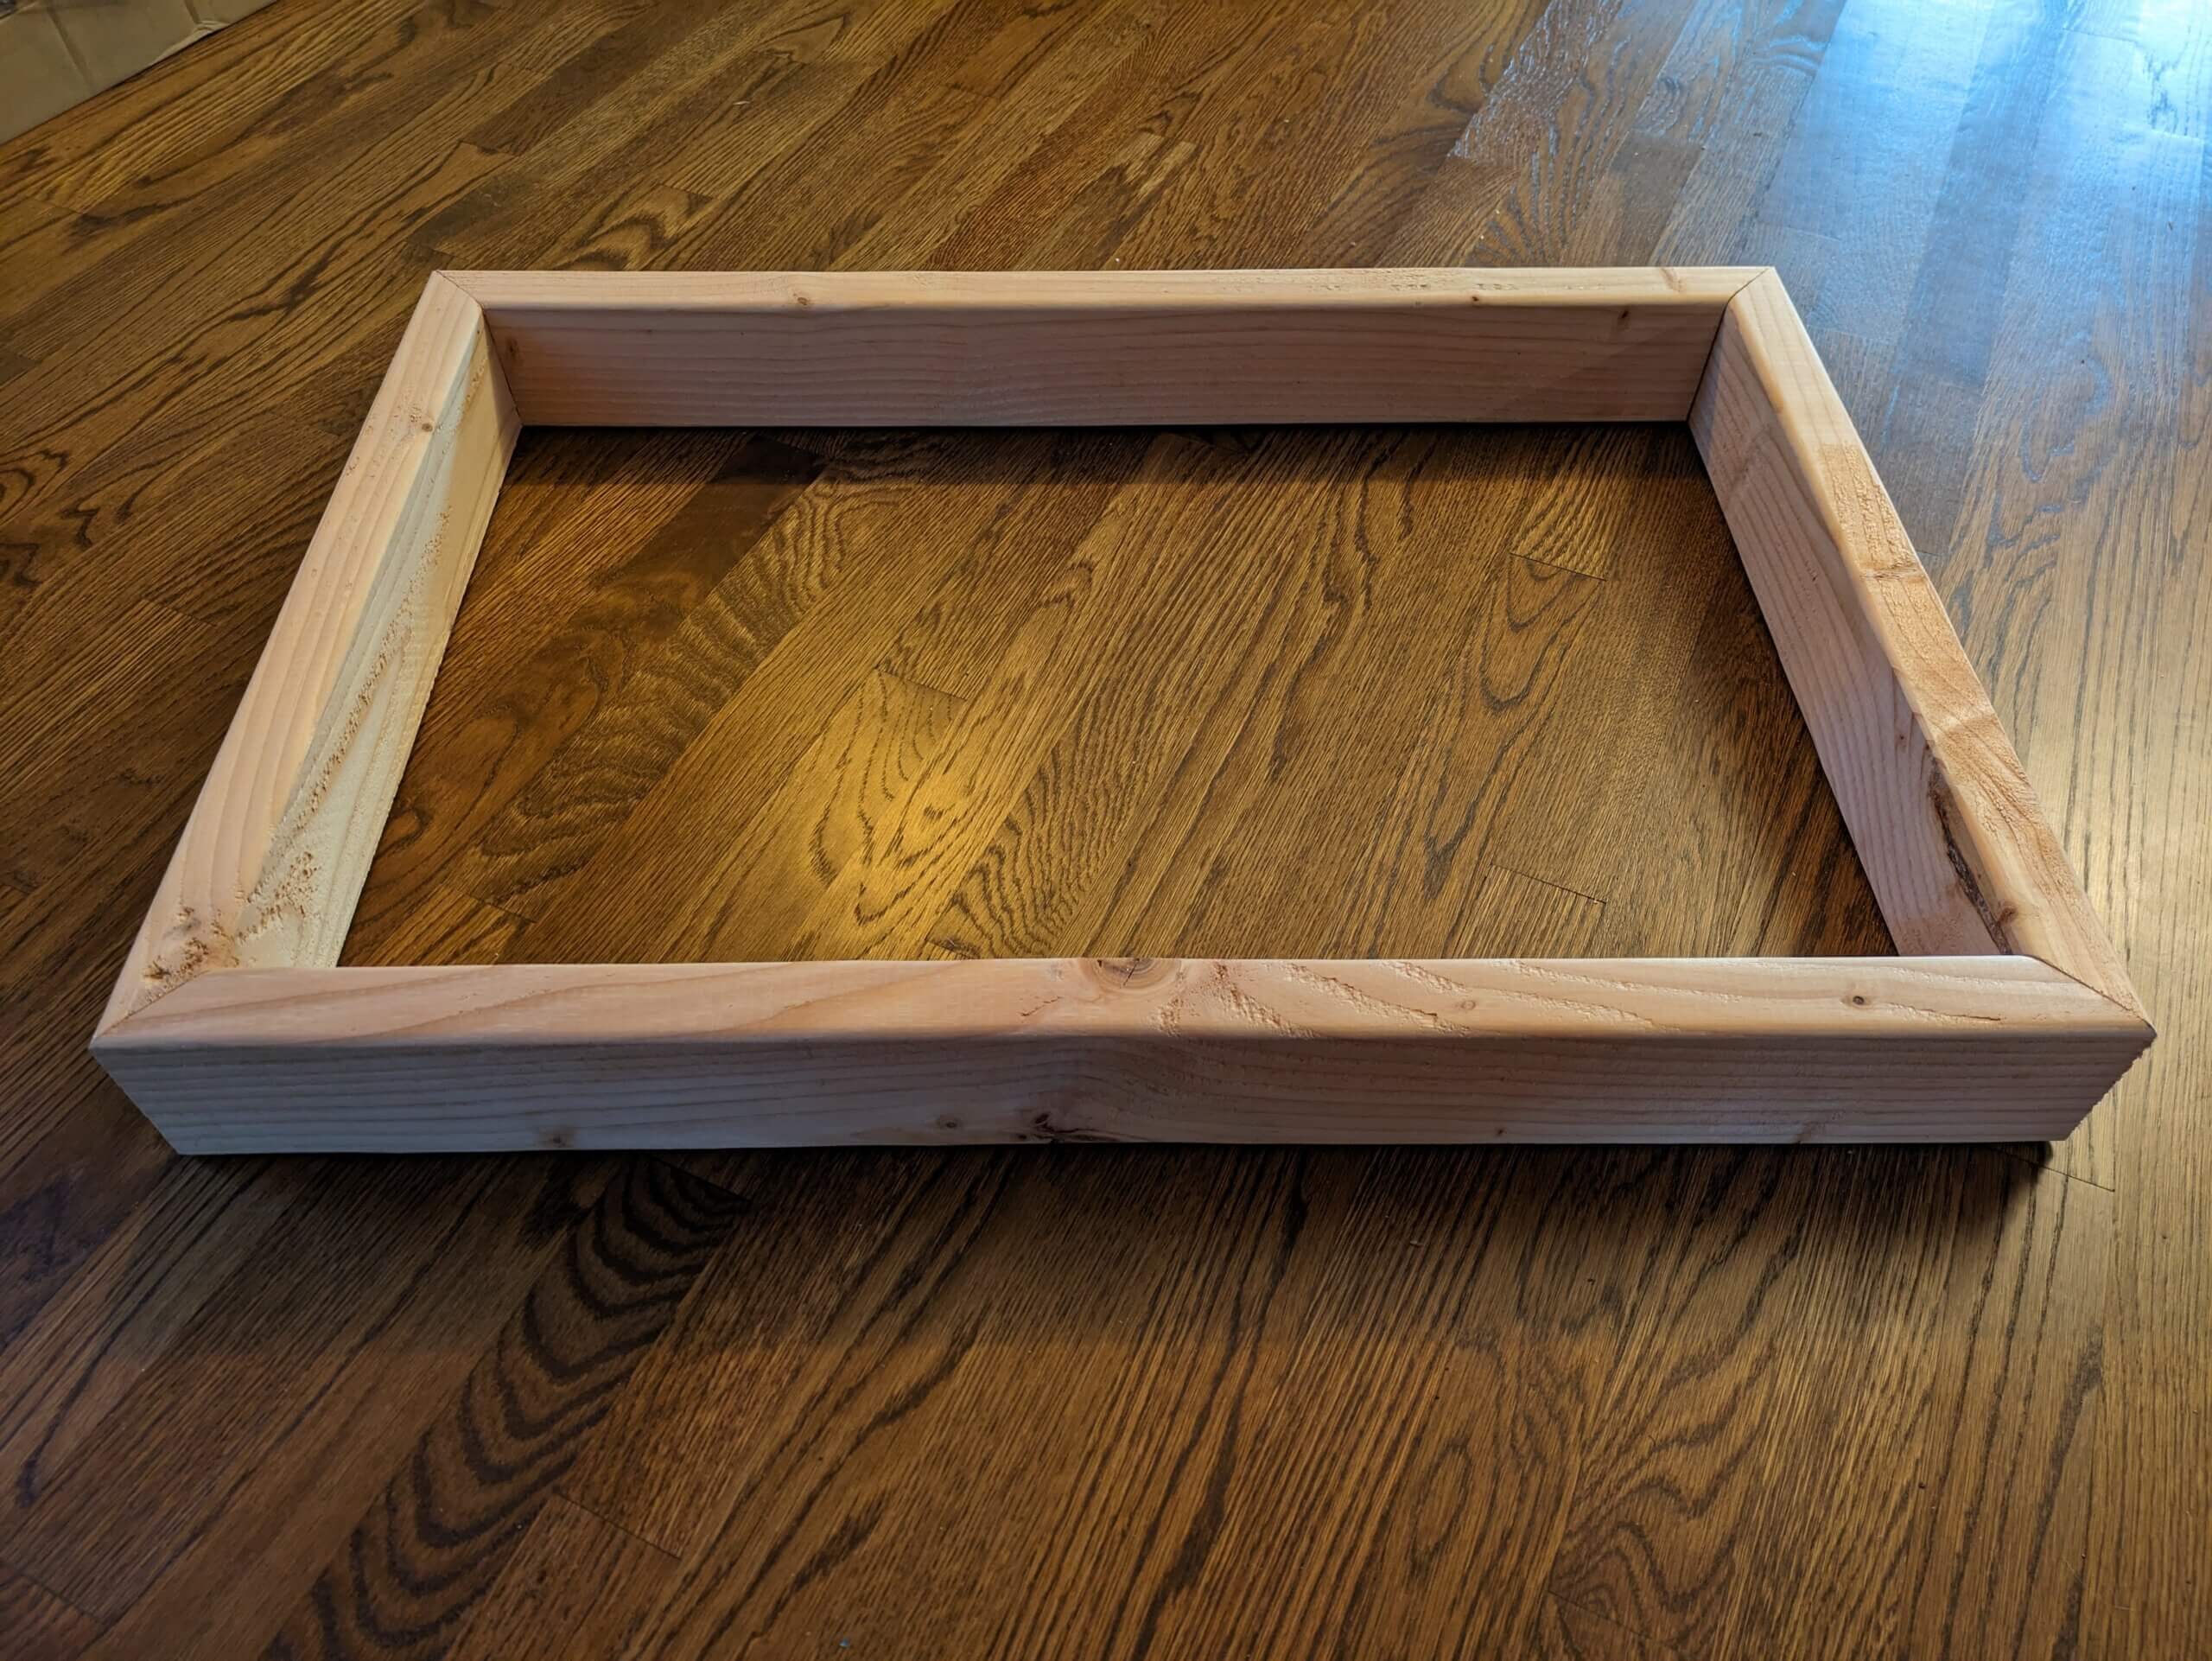
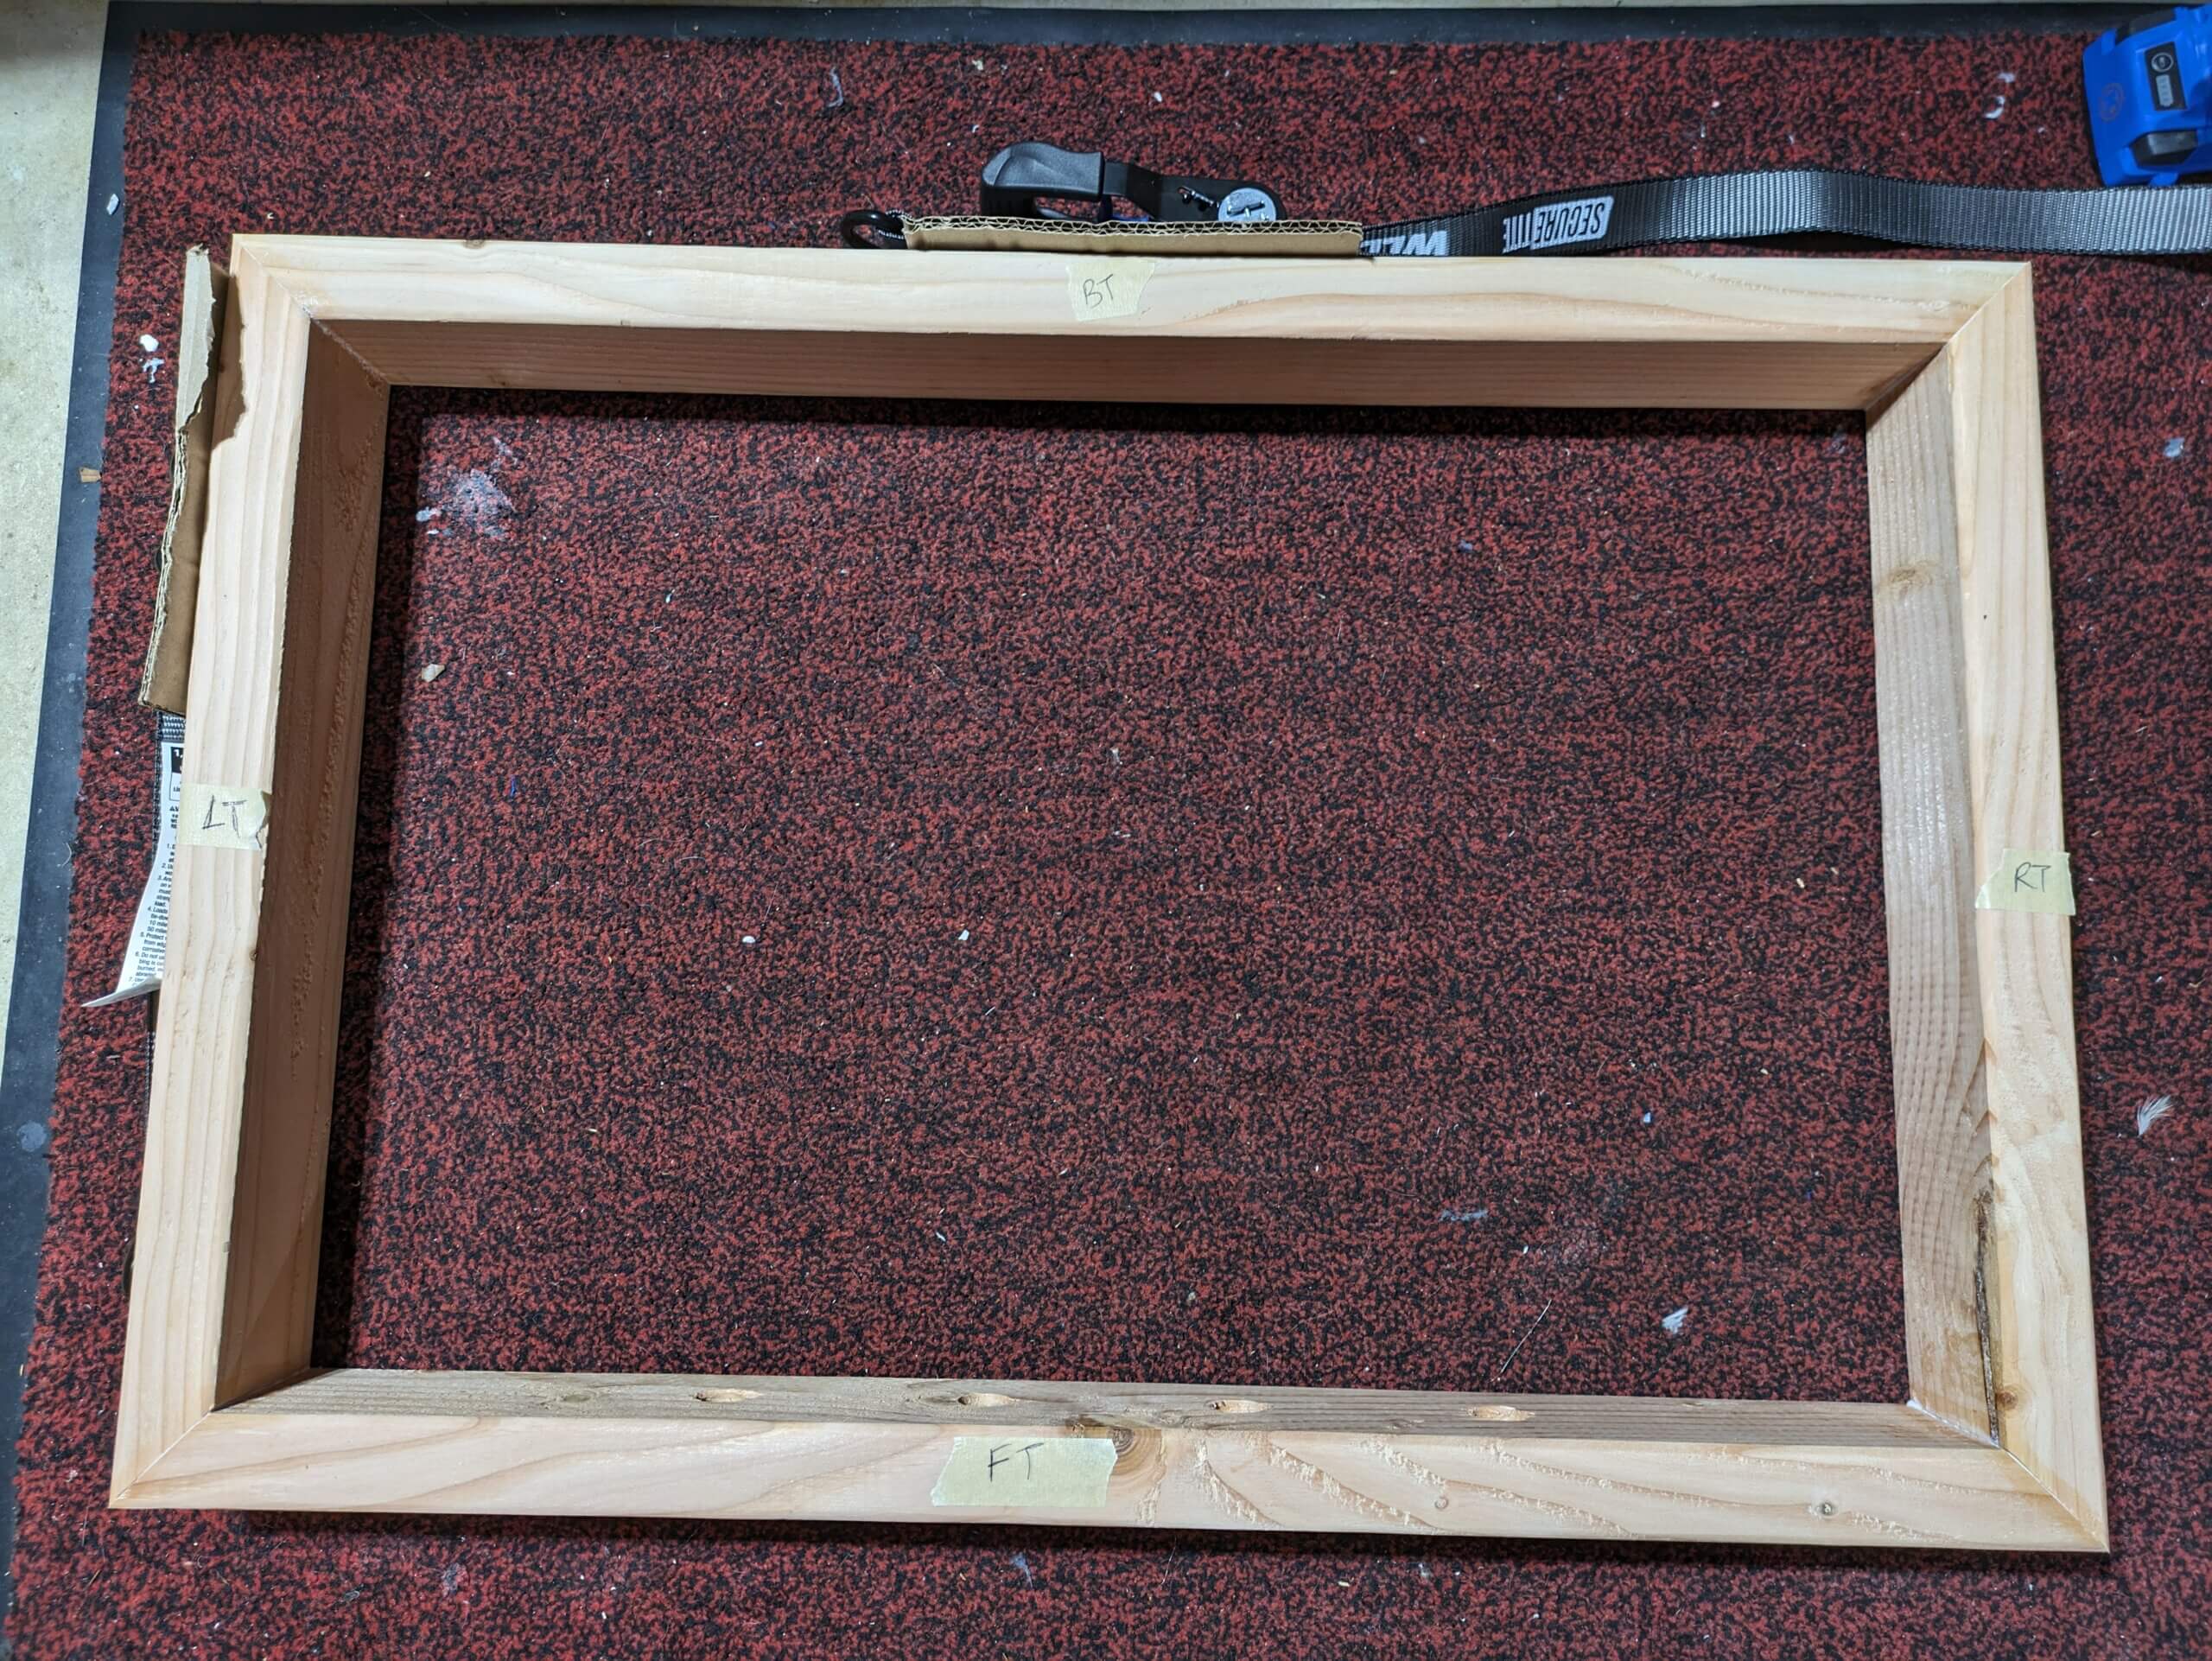
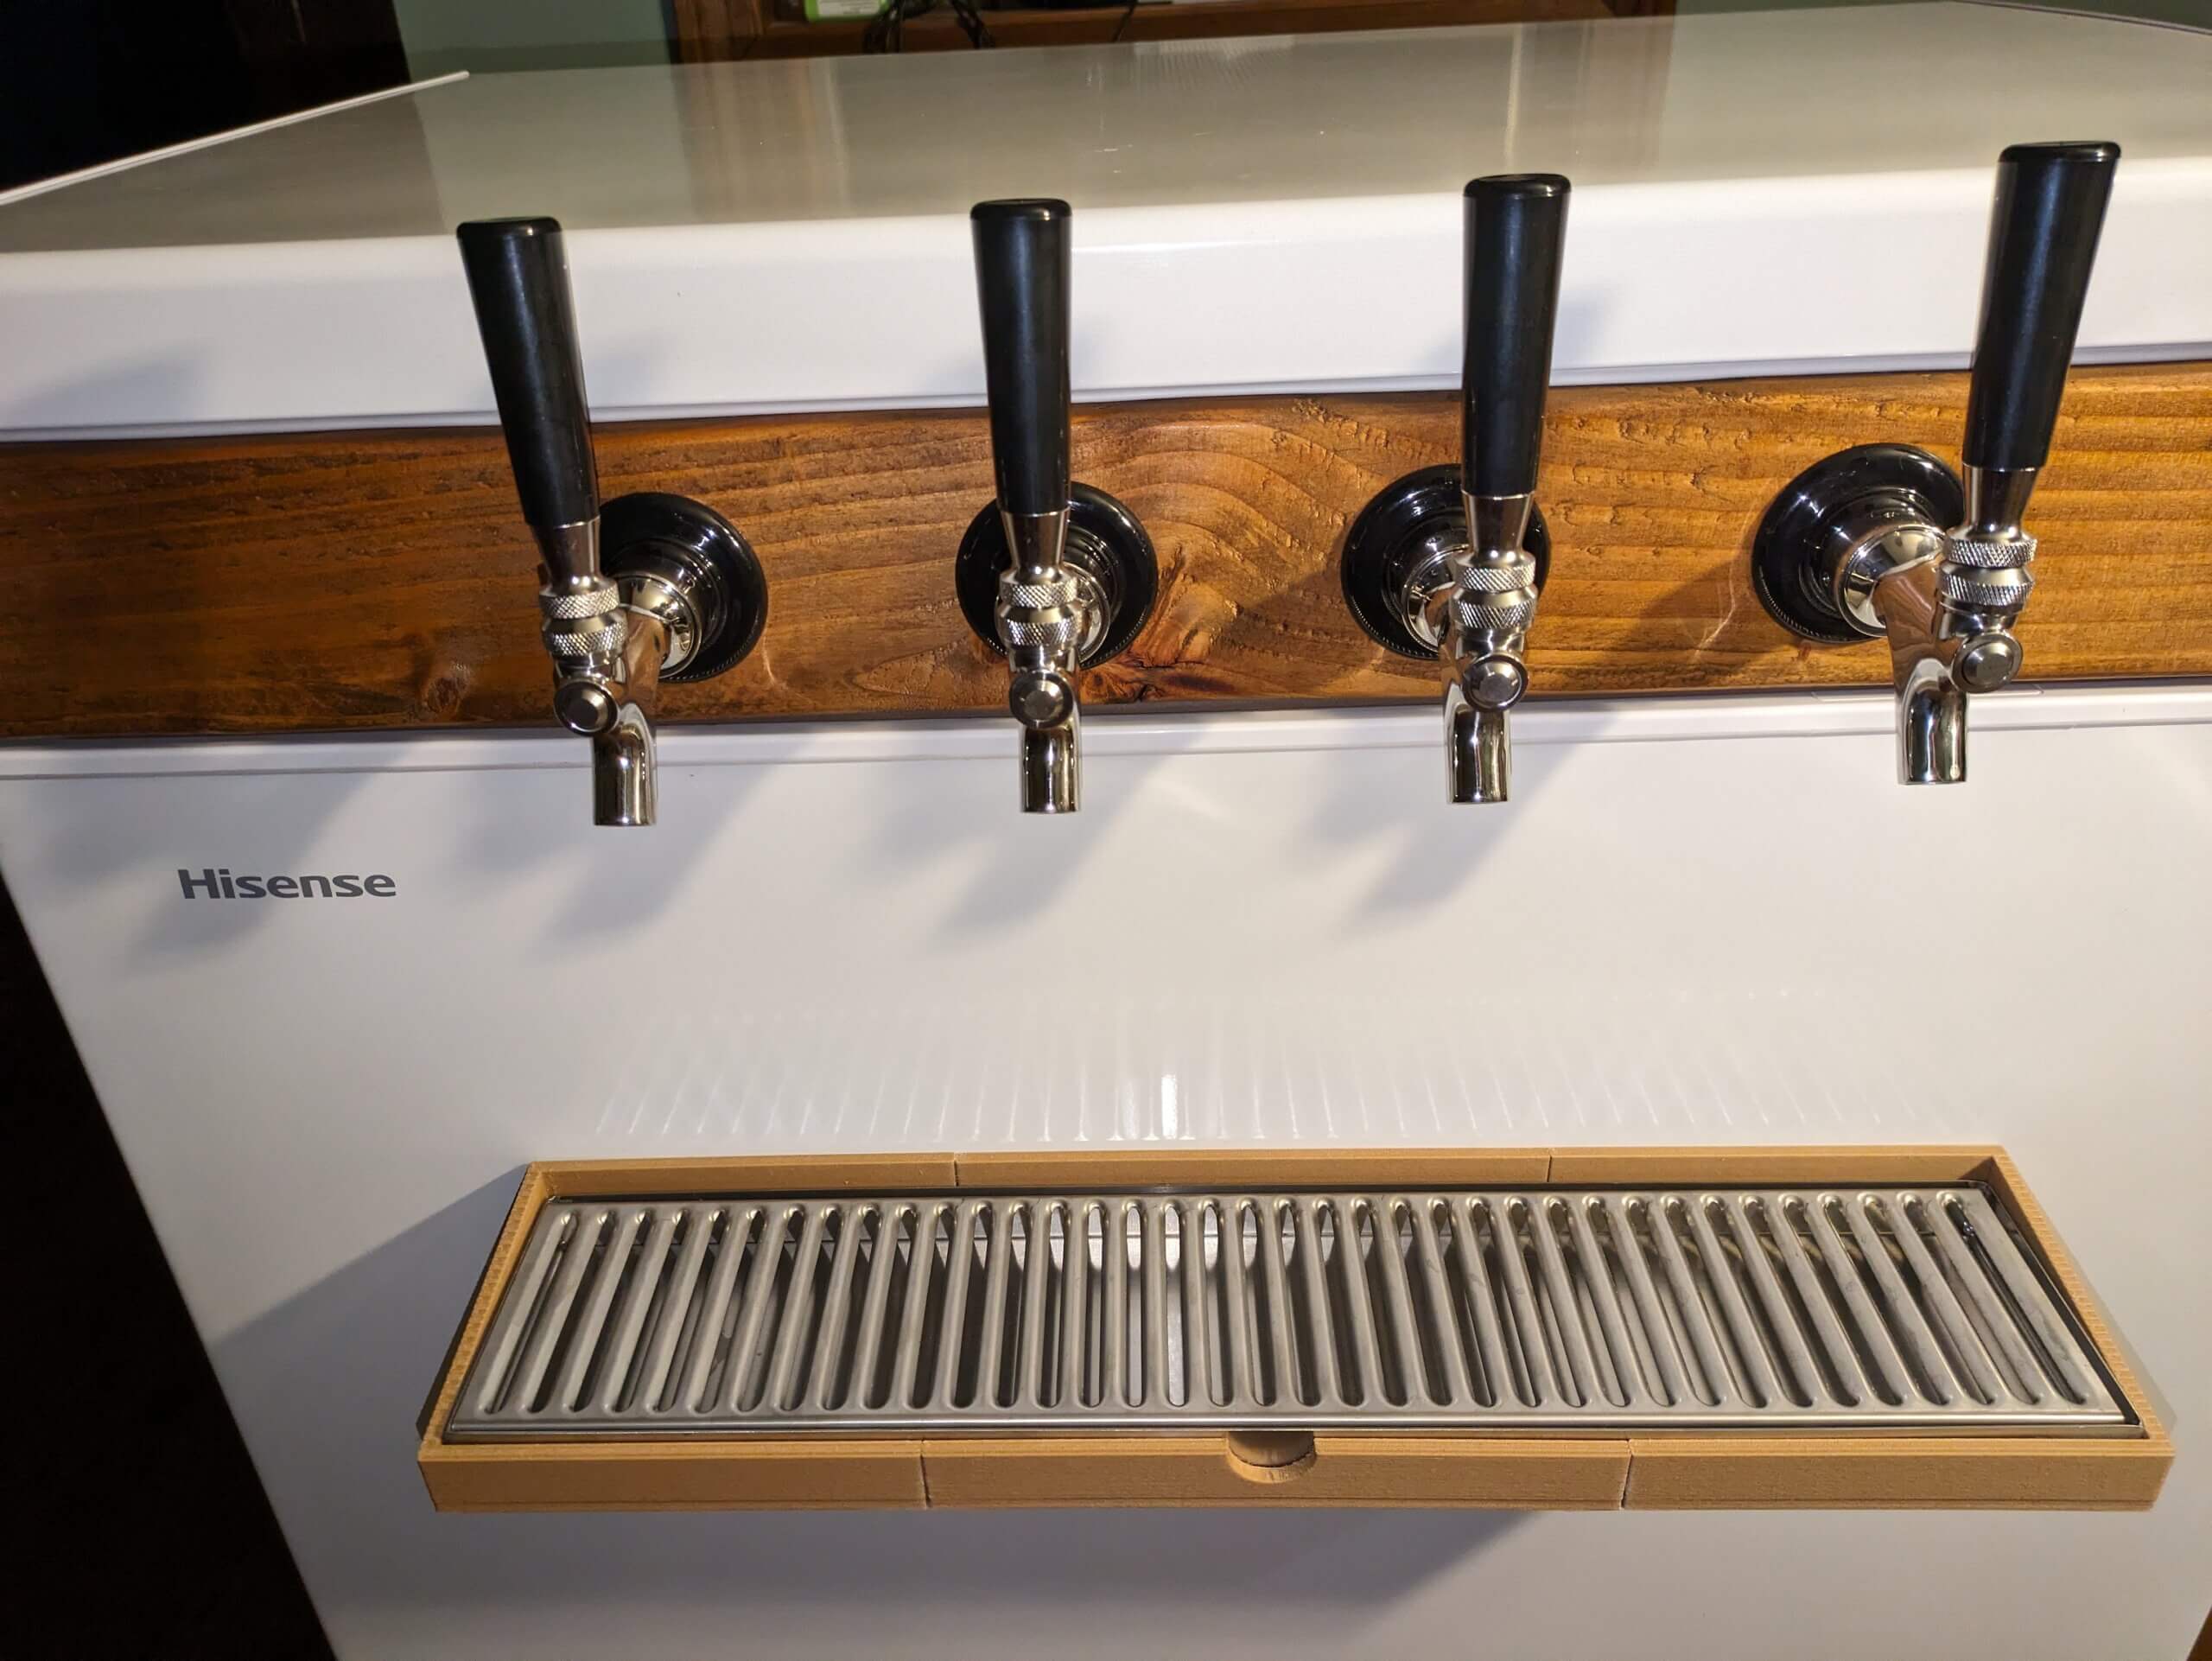
The core of any keezer build is the collar, a wood layer added between the freezer and lid through which the taps are passed and all mounted hardware is attached. I measured the outside of the lid mating surface at 31.5″ by 21 and 5/16″. These would need to be the outer dimensions of my collar. A 45 degree bevel cut looks nicer than a butt joint.
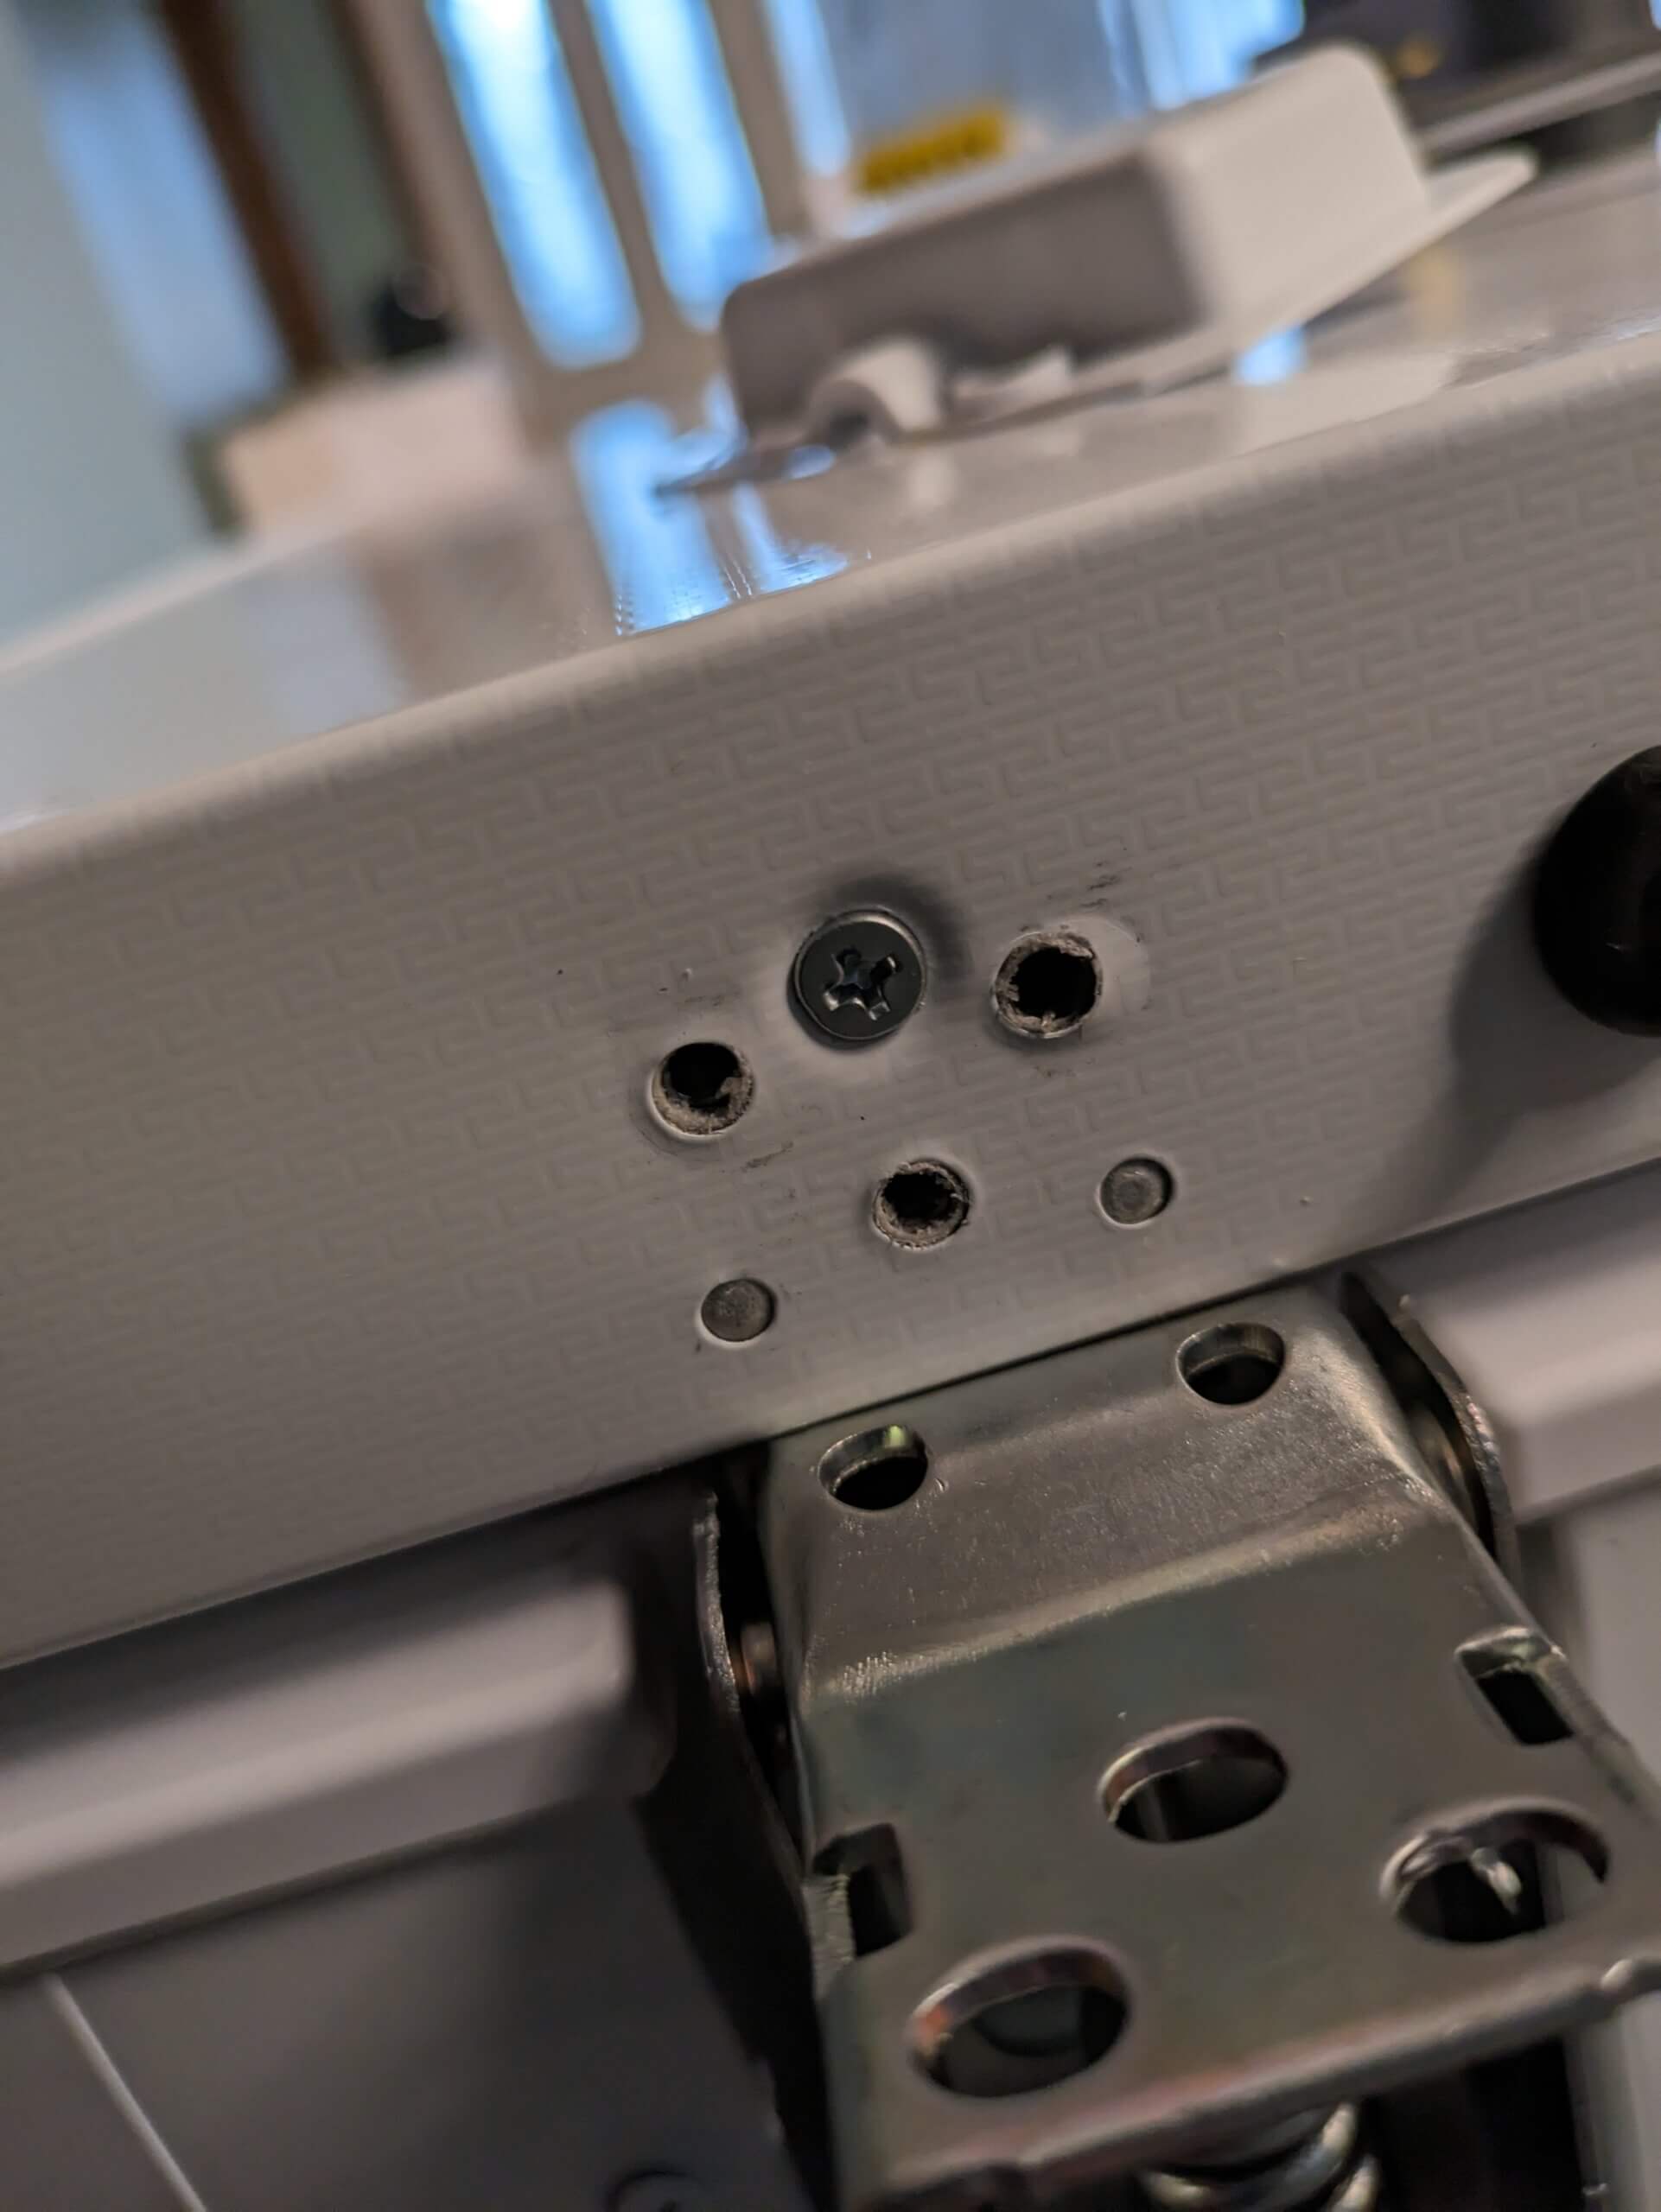
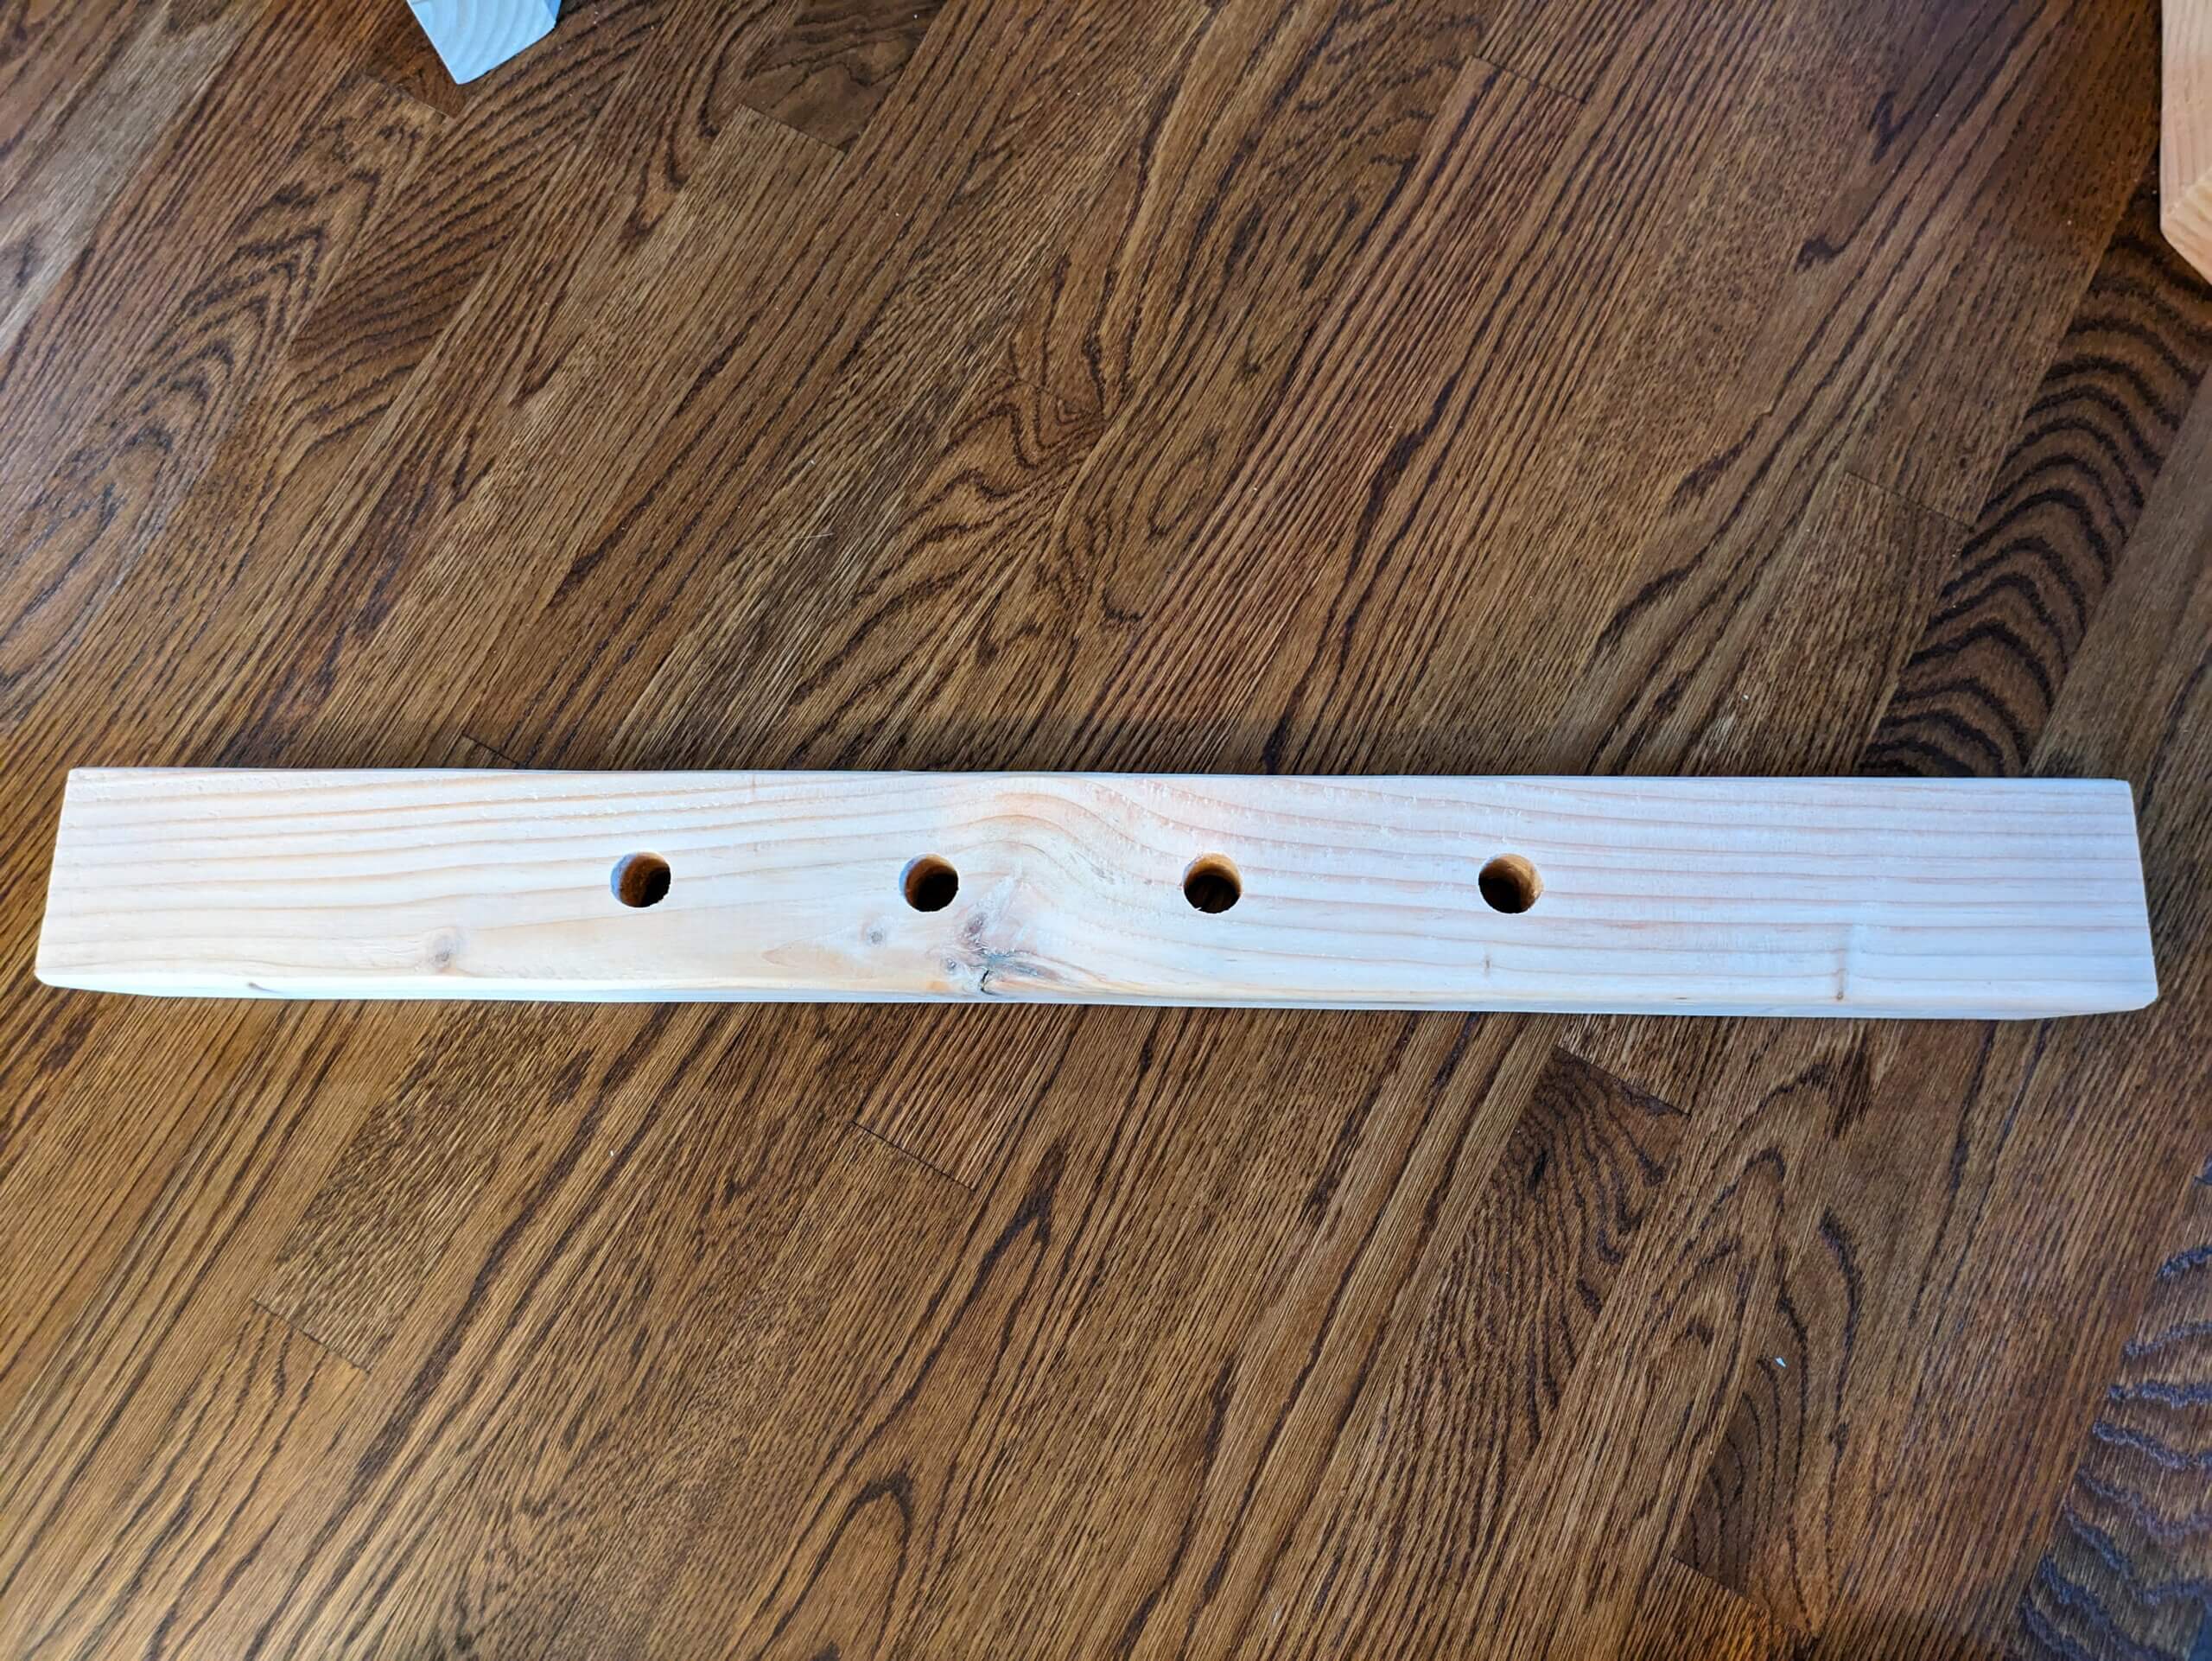
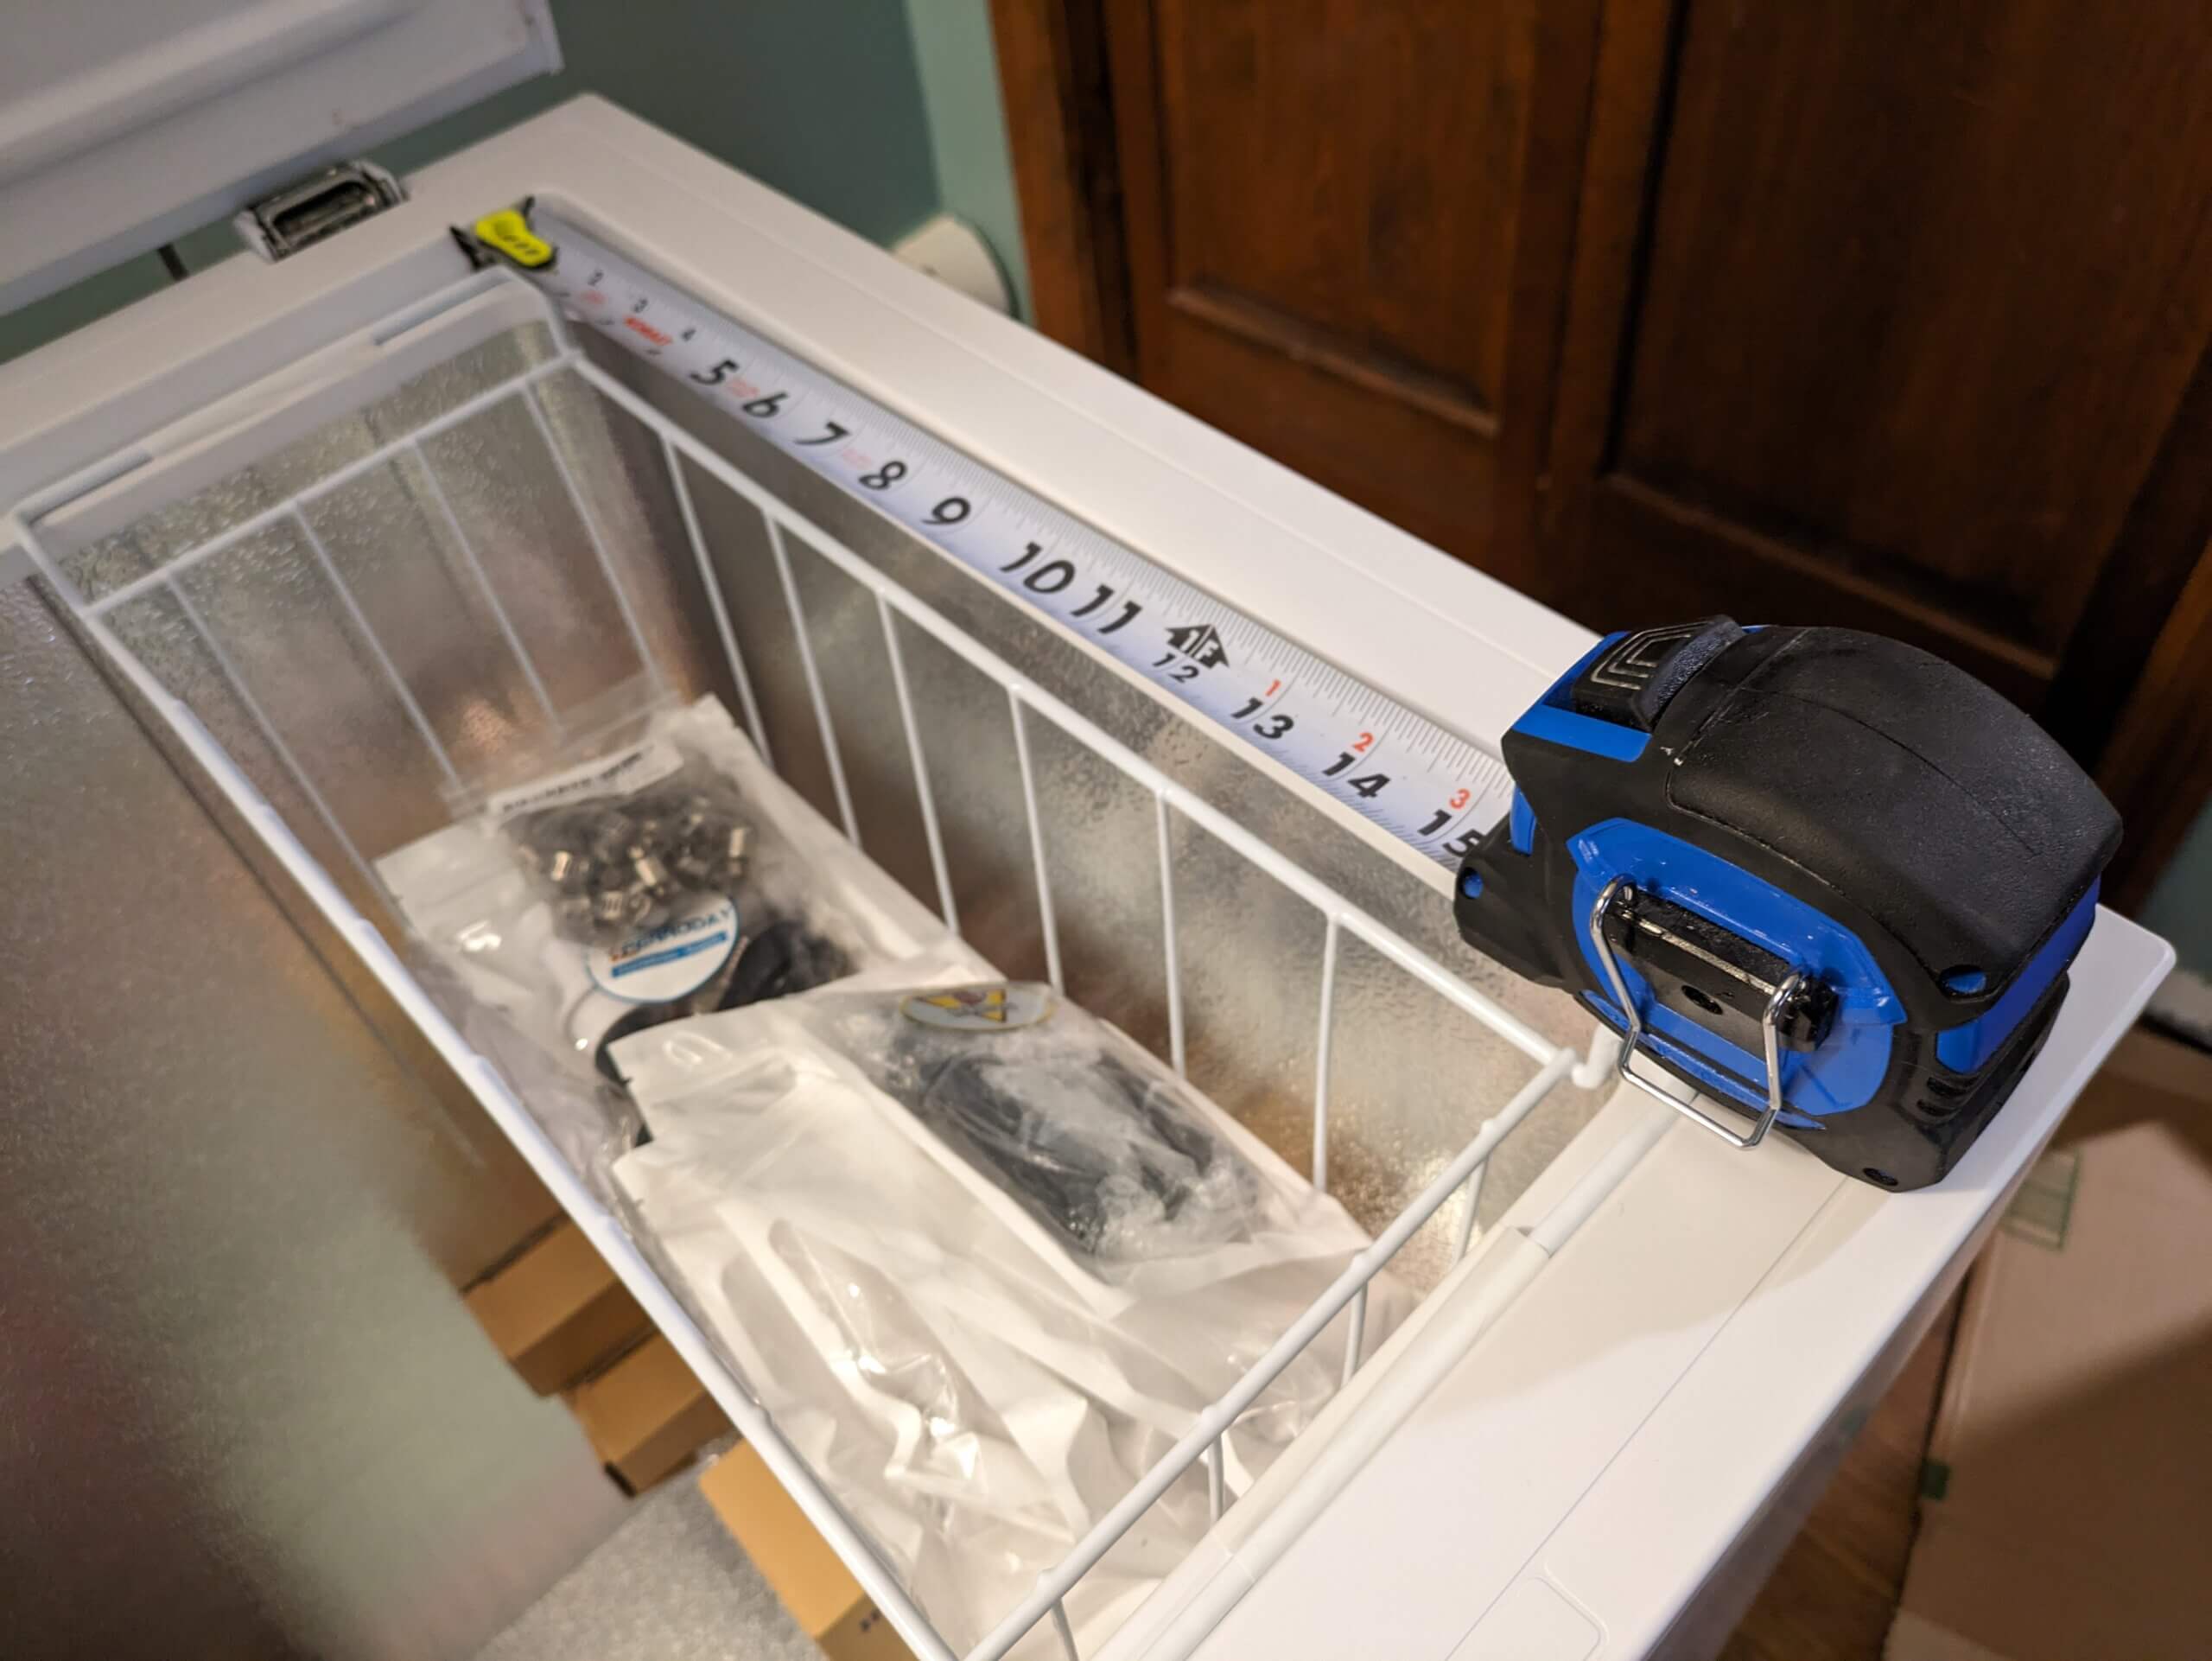
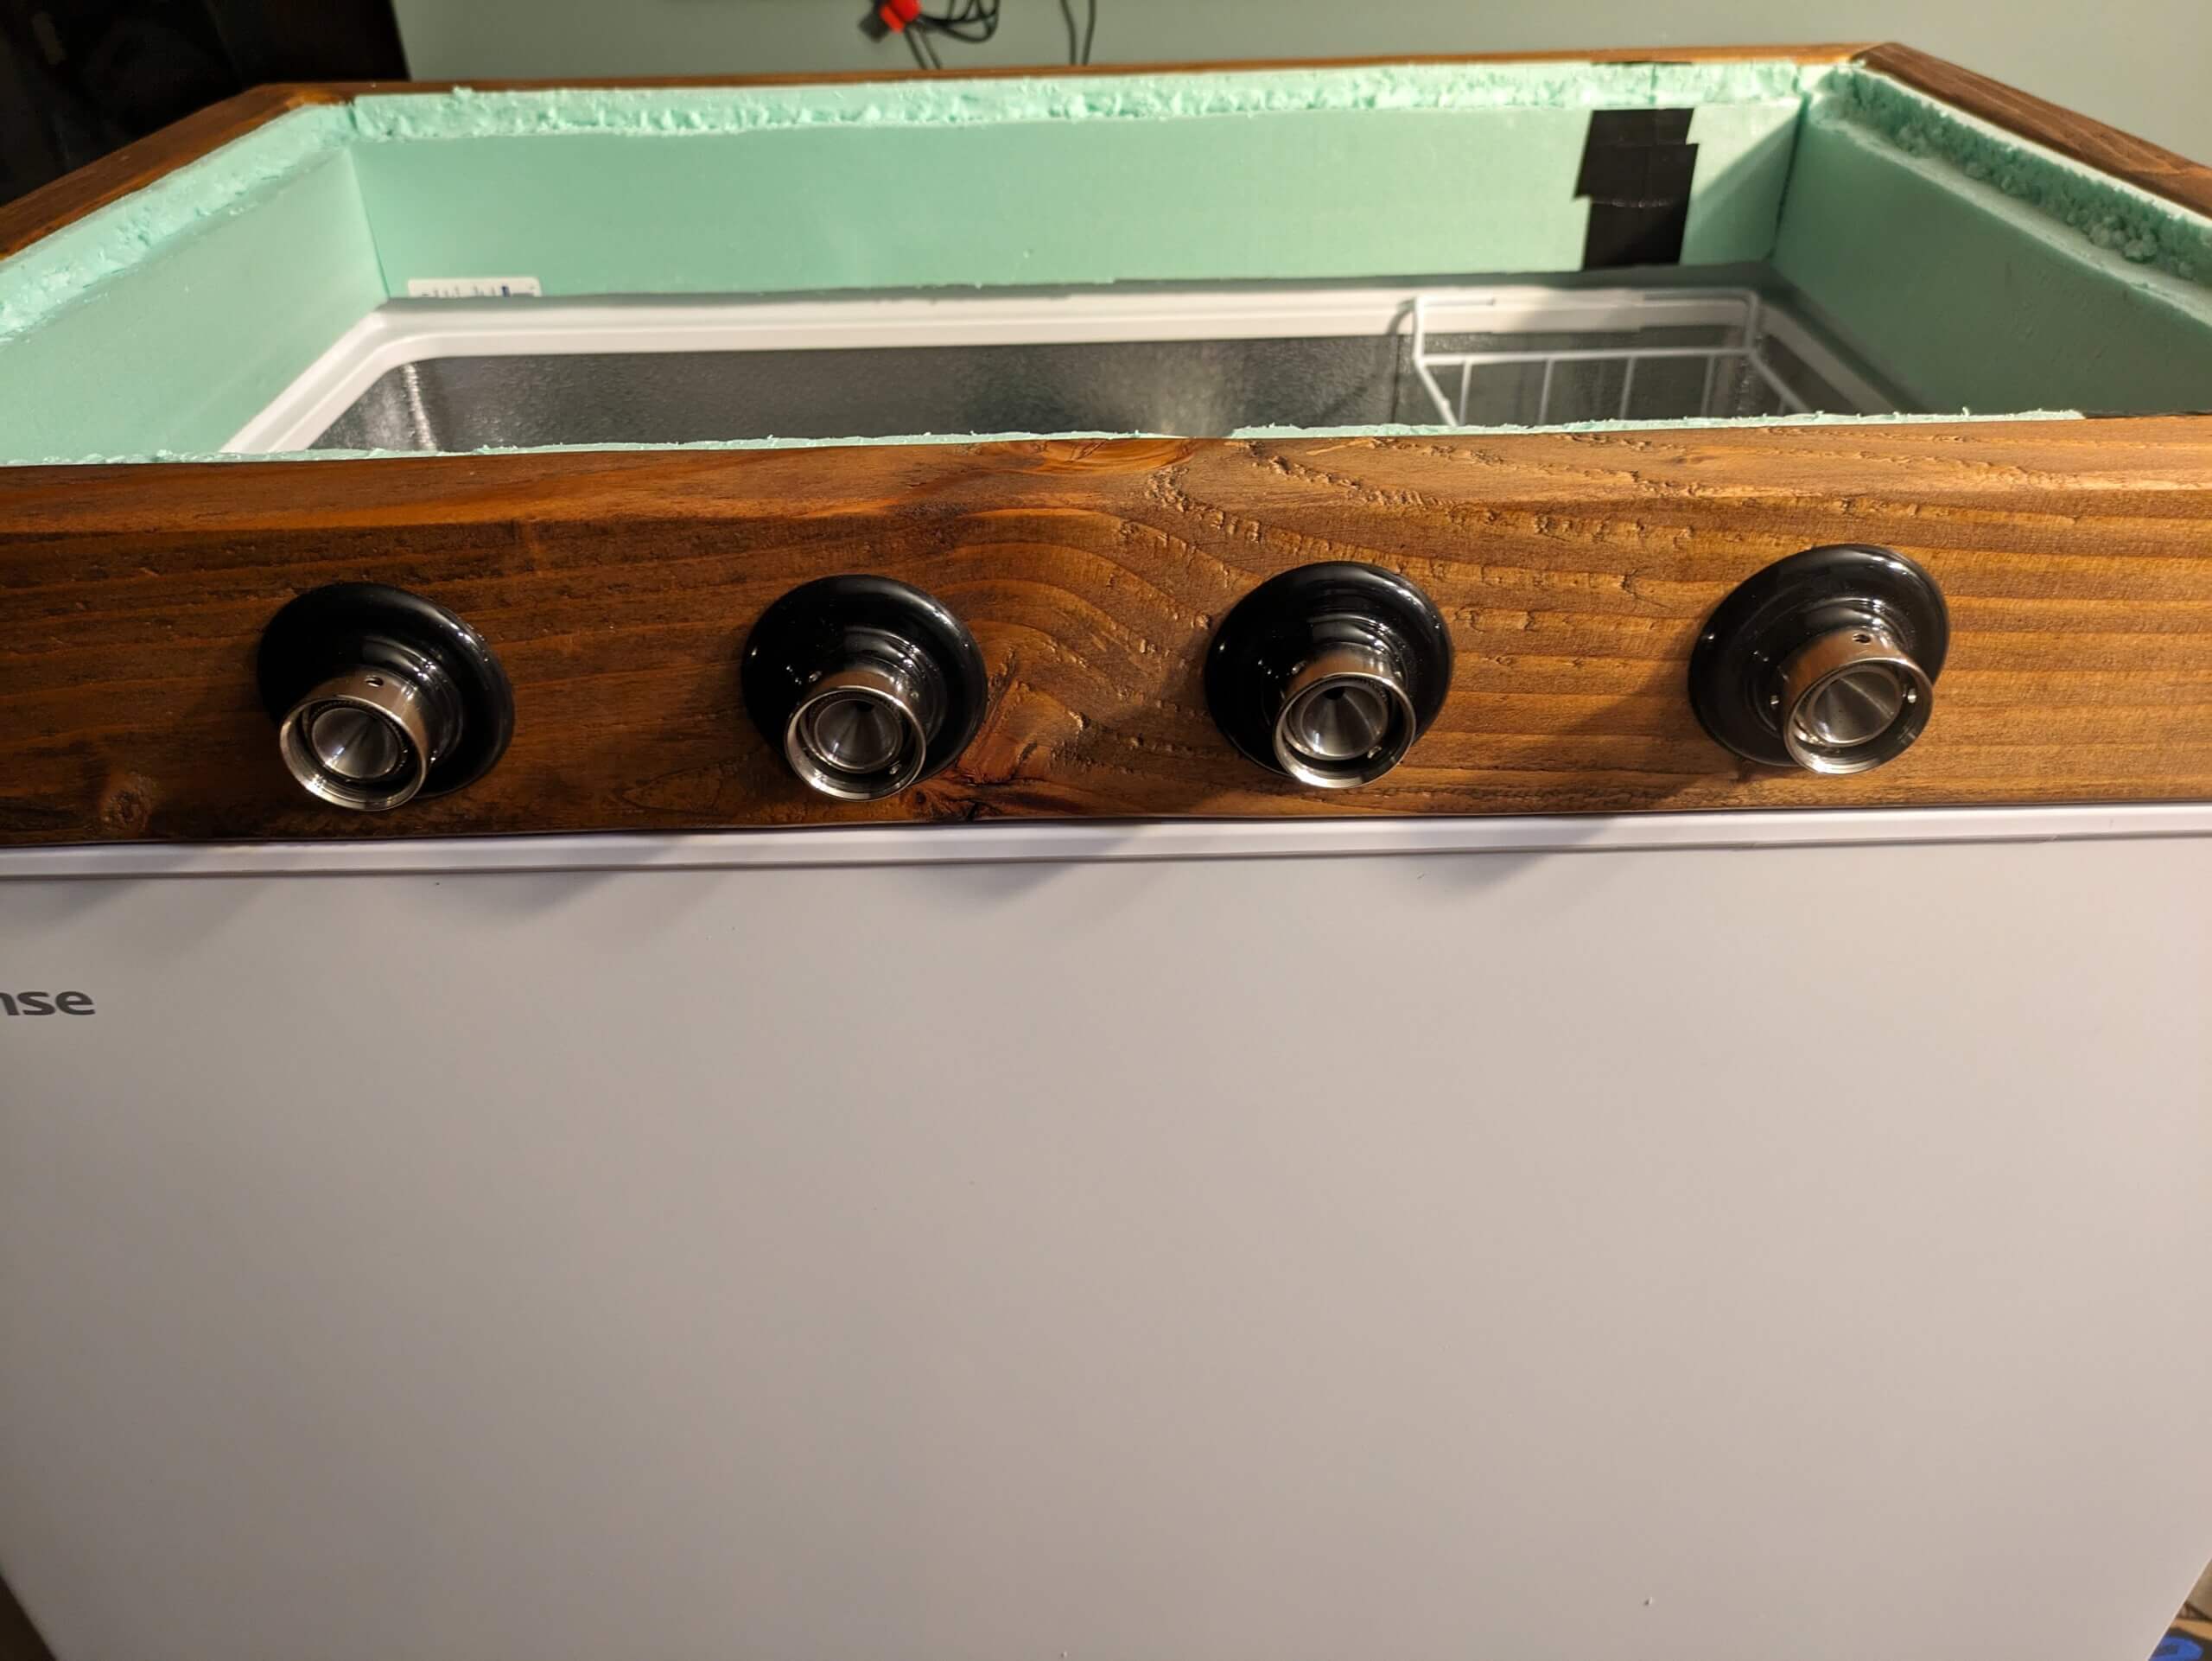
Next up was to drill the shank holes out of the front of the collar. A 7/8″ hole is a perfect fit for the Kegco brand stainless steel shanks. I spaced the holes 4 and 3/8″ center-to-center, keeping in mind that they all needed to fit over my 19″ drip tray:
Time to glue up. I used a ratchet strap to hold the collar pieces together while the glue dried, and put some cardboard in between the hardware to prevent it from digging into the wood:
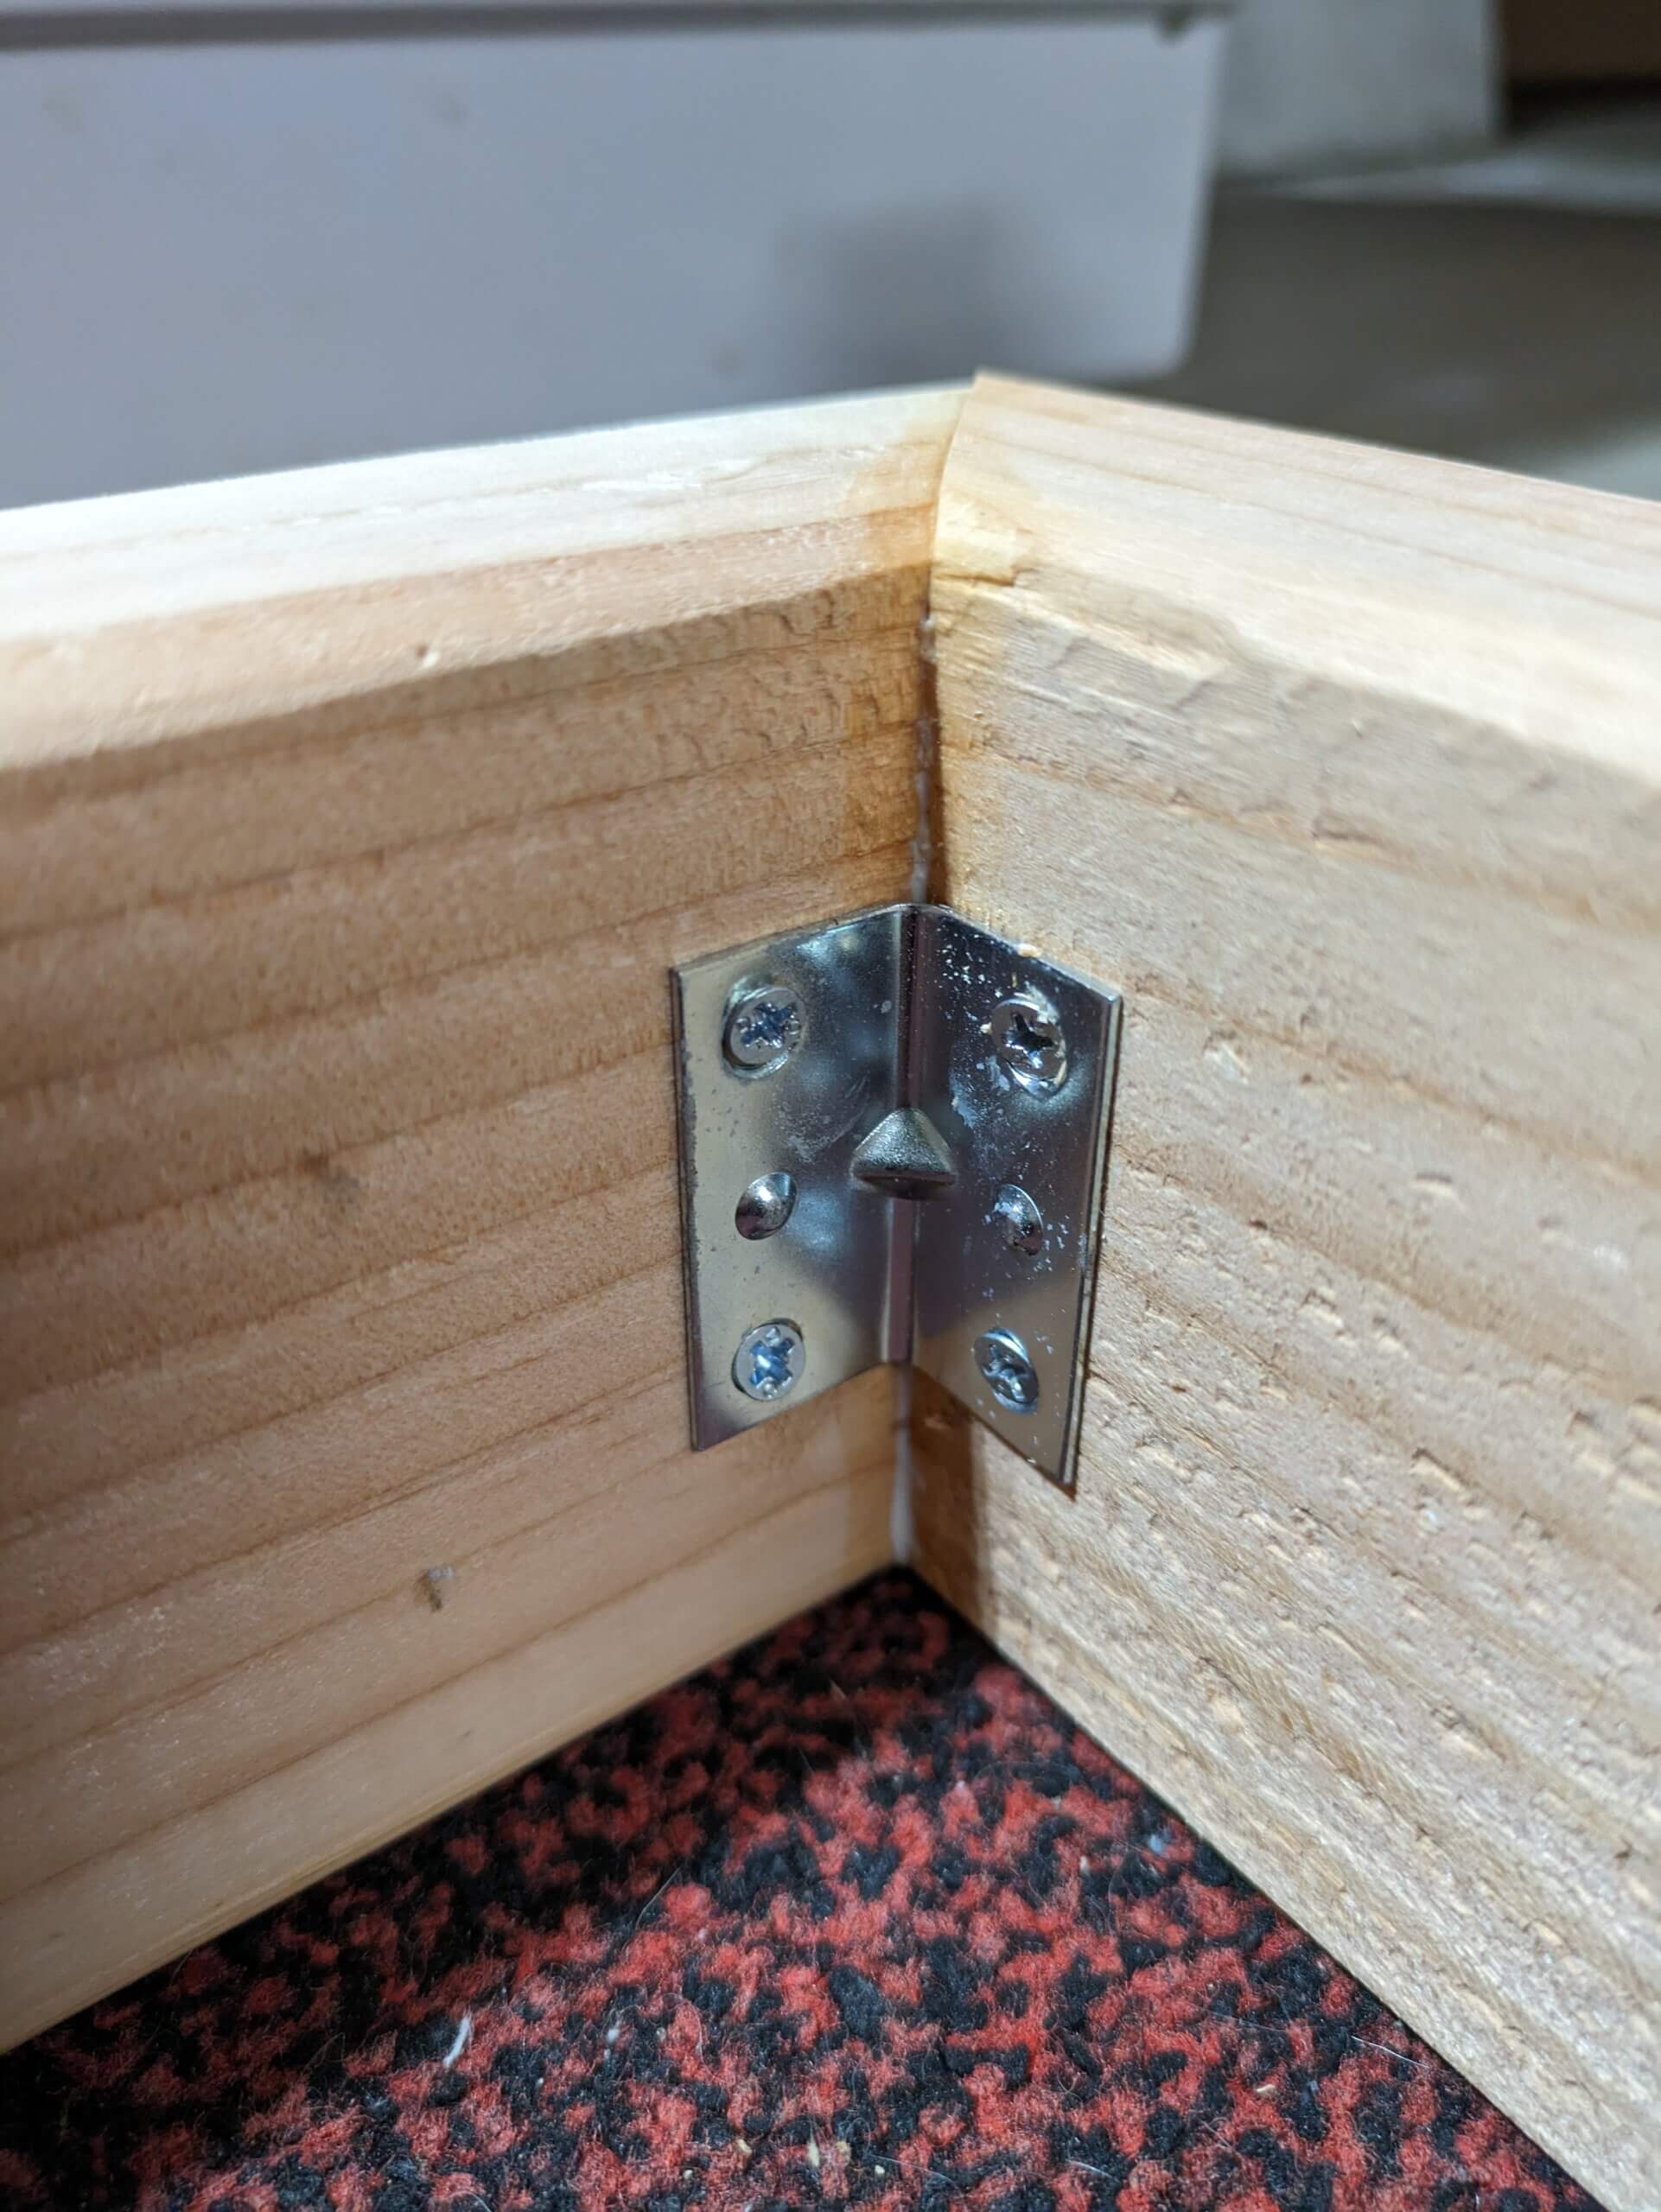
I waited overnight for the wood glue to dry, then attached the corner brackets before removing the ratchet strap:
I applied 2 coats of stain, let it dry, and did a test fit of the collar on the freezer. Looking good. You can screw the upper hinge into the wood collar at this point. I used a 1/8″ bit to pre-drill the holes which worked well for the screws that this freezer came with.

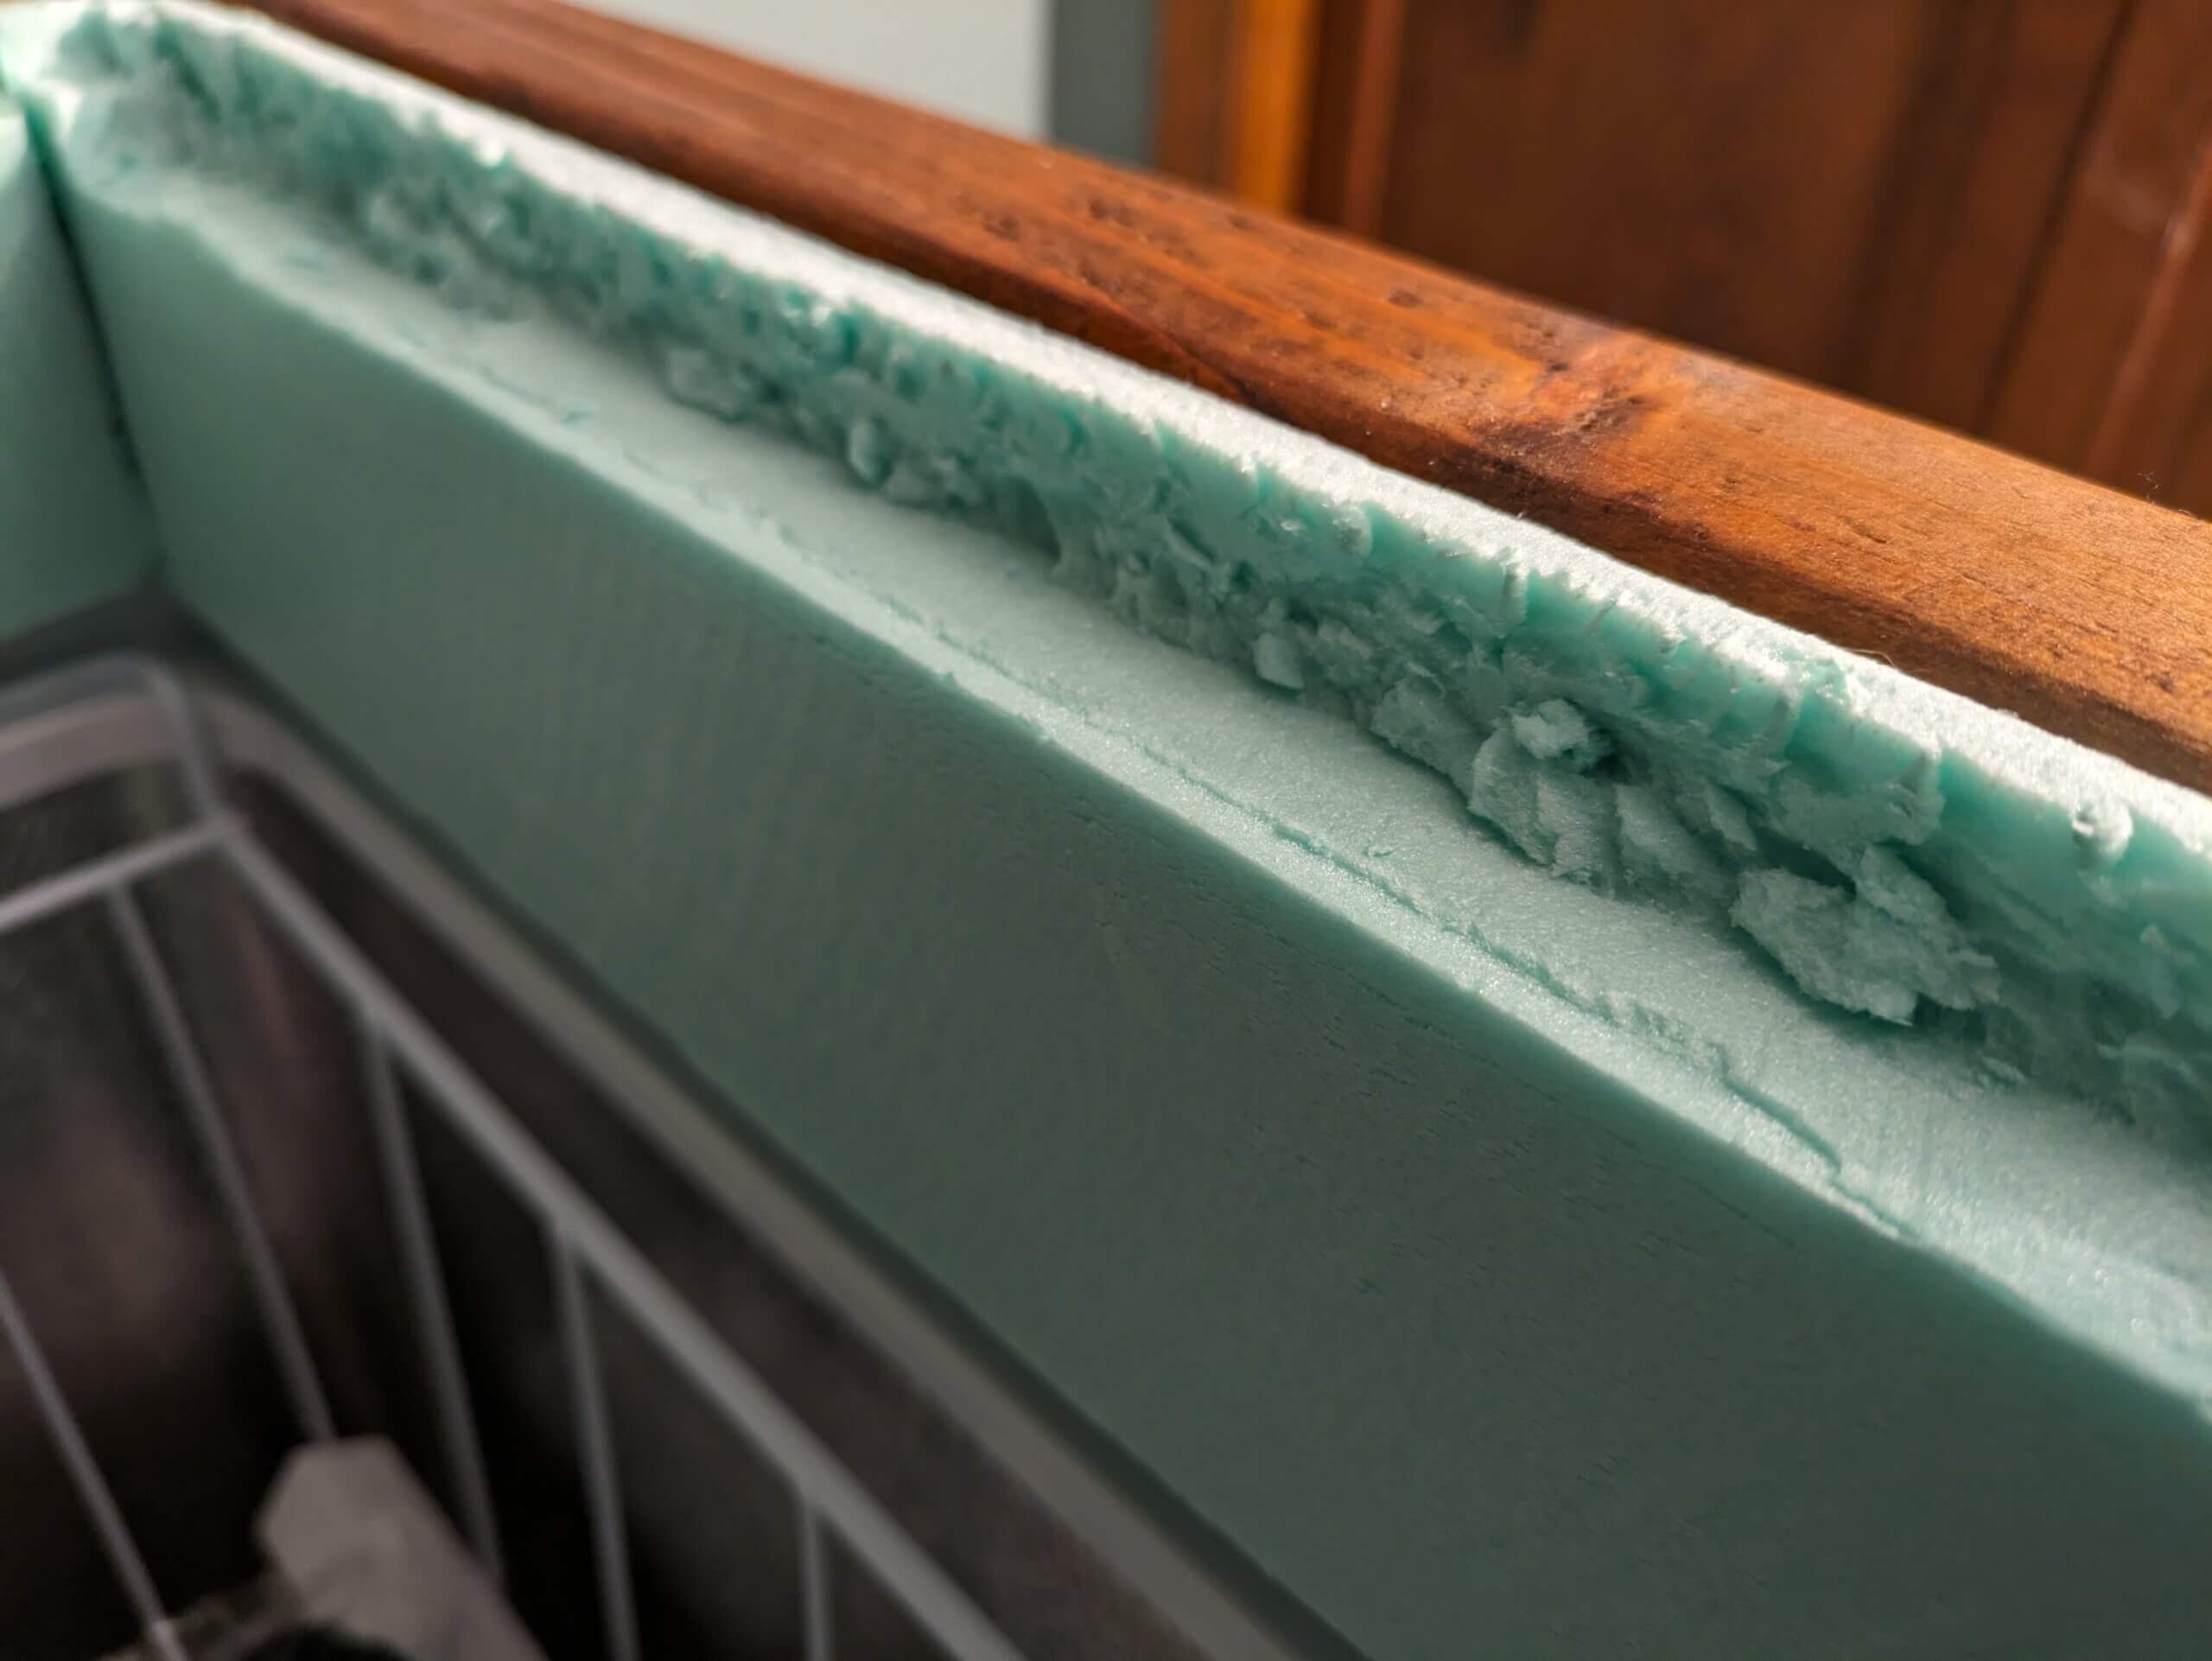
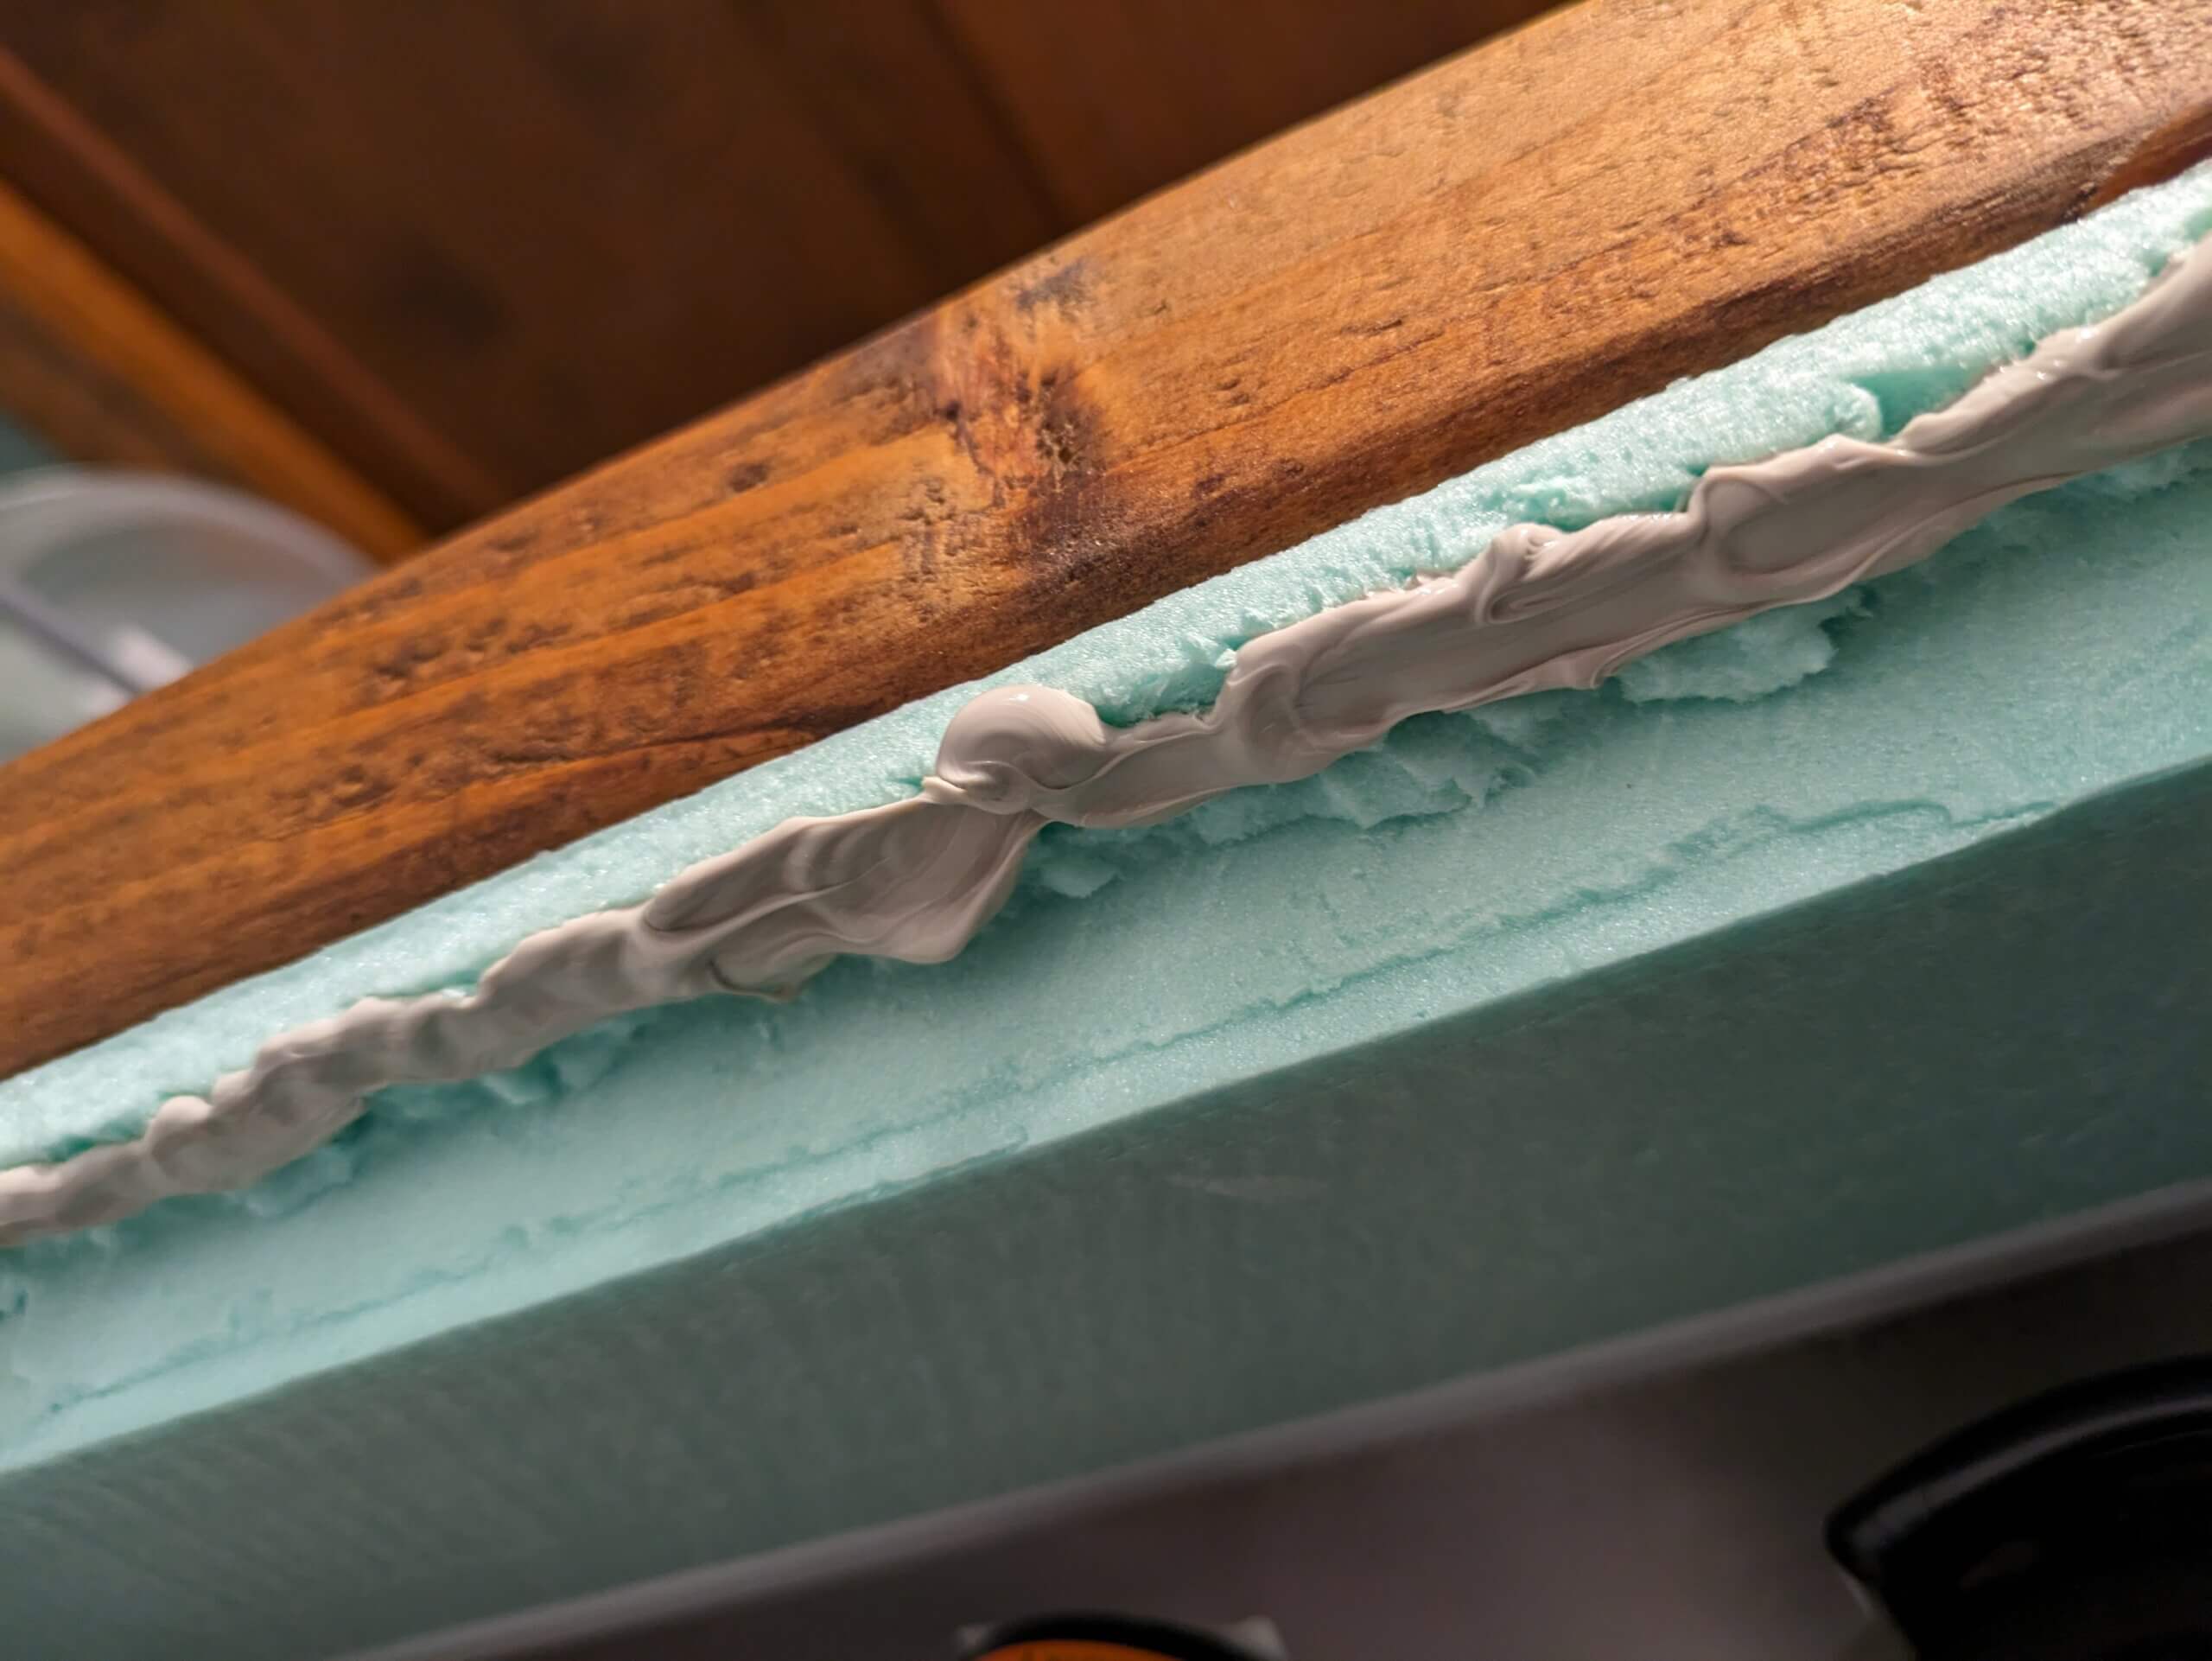
Next, I cut the R5 foam board to line the inside of the collar and attached it to the wood with Liquid Nails. The foam board wasn’t wide enough, so I taped 2 pieces together for the longer sides. Wood is a poor insulator and the 2×4 has an R-value around 2, so adding the R5 foam takes the collar up to around R7 which will save some money on electricity and help prevent the compressor cycling on as often.
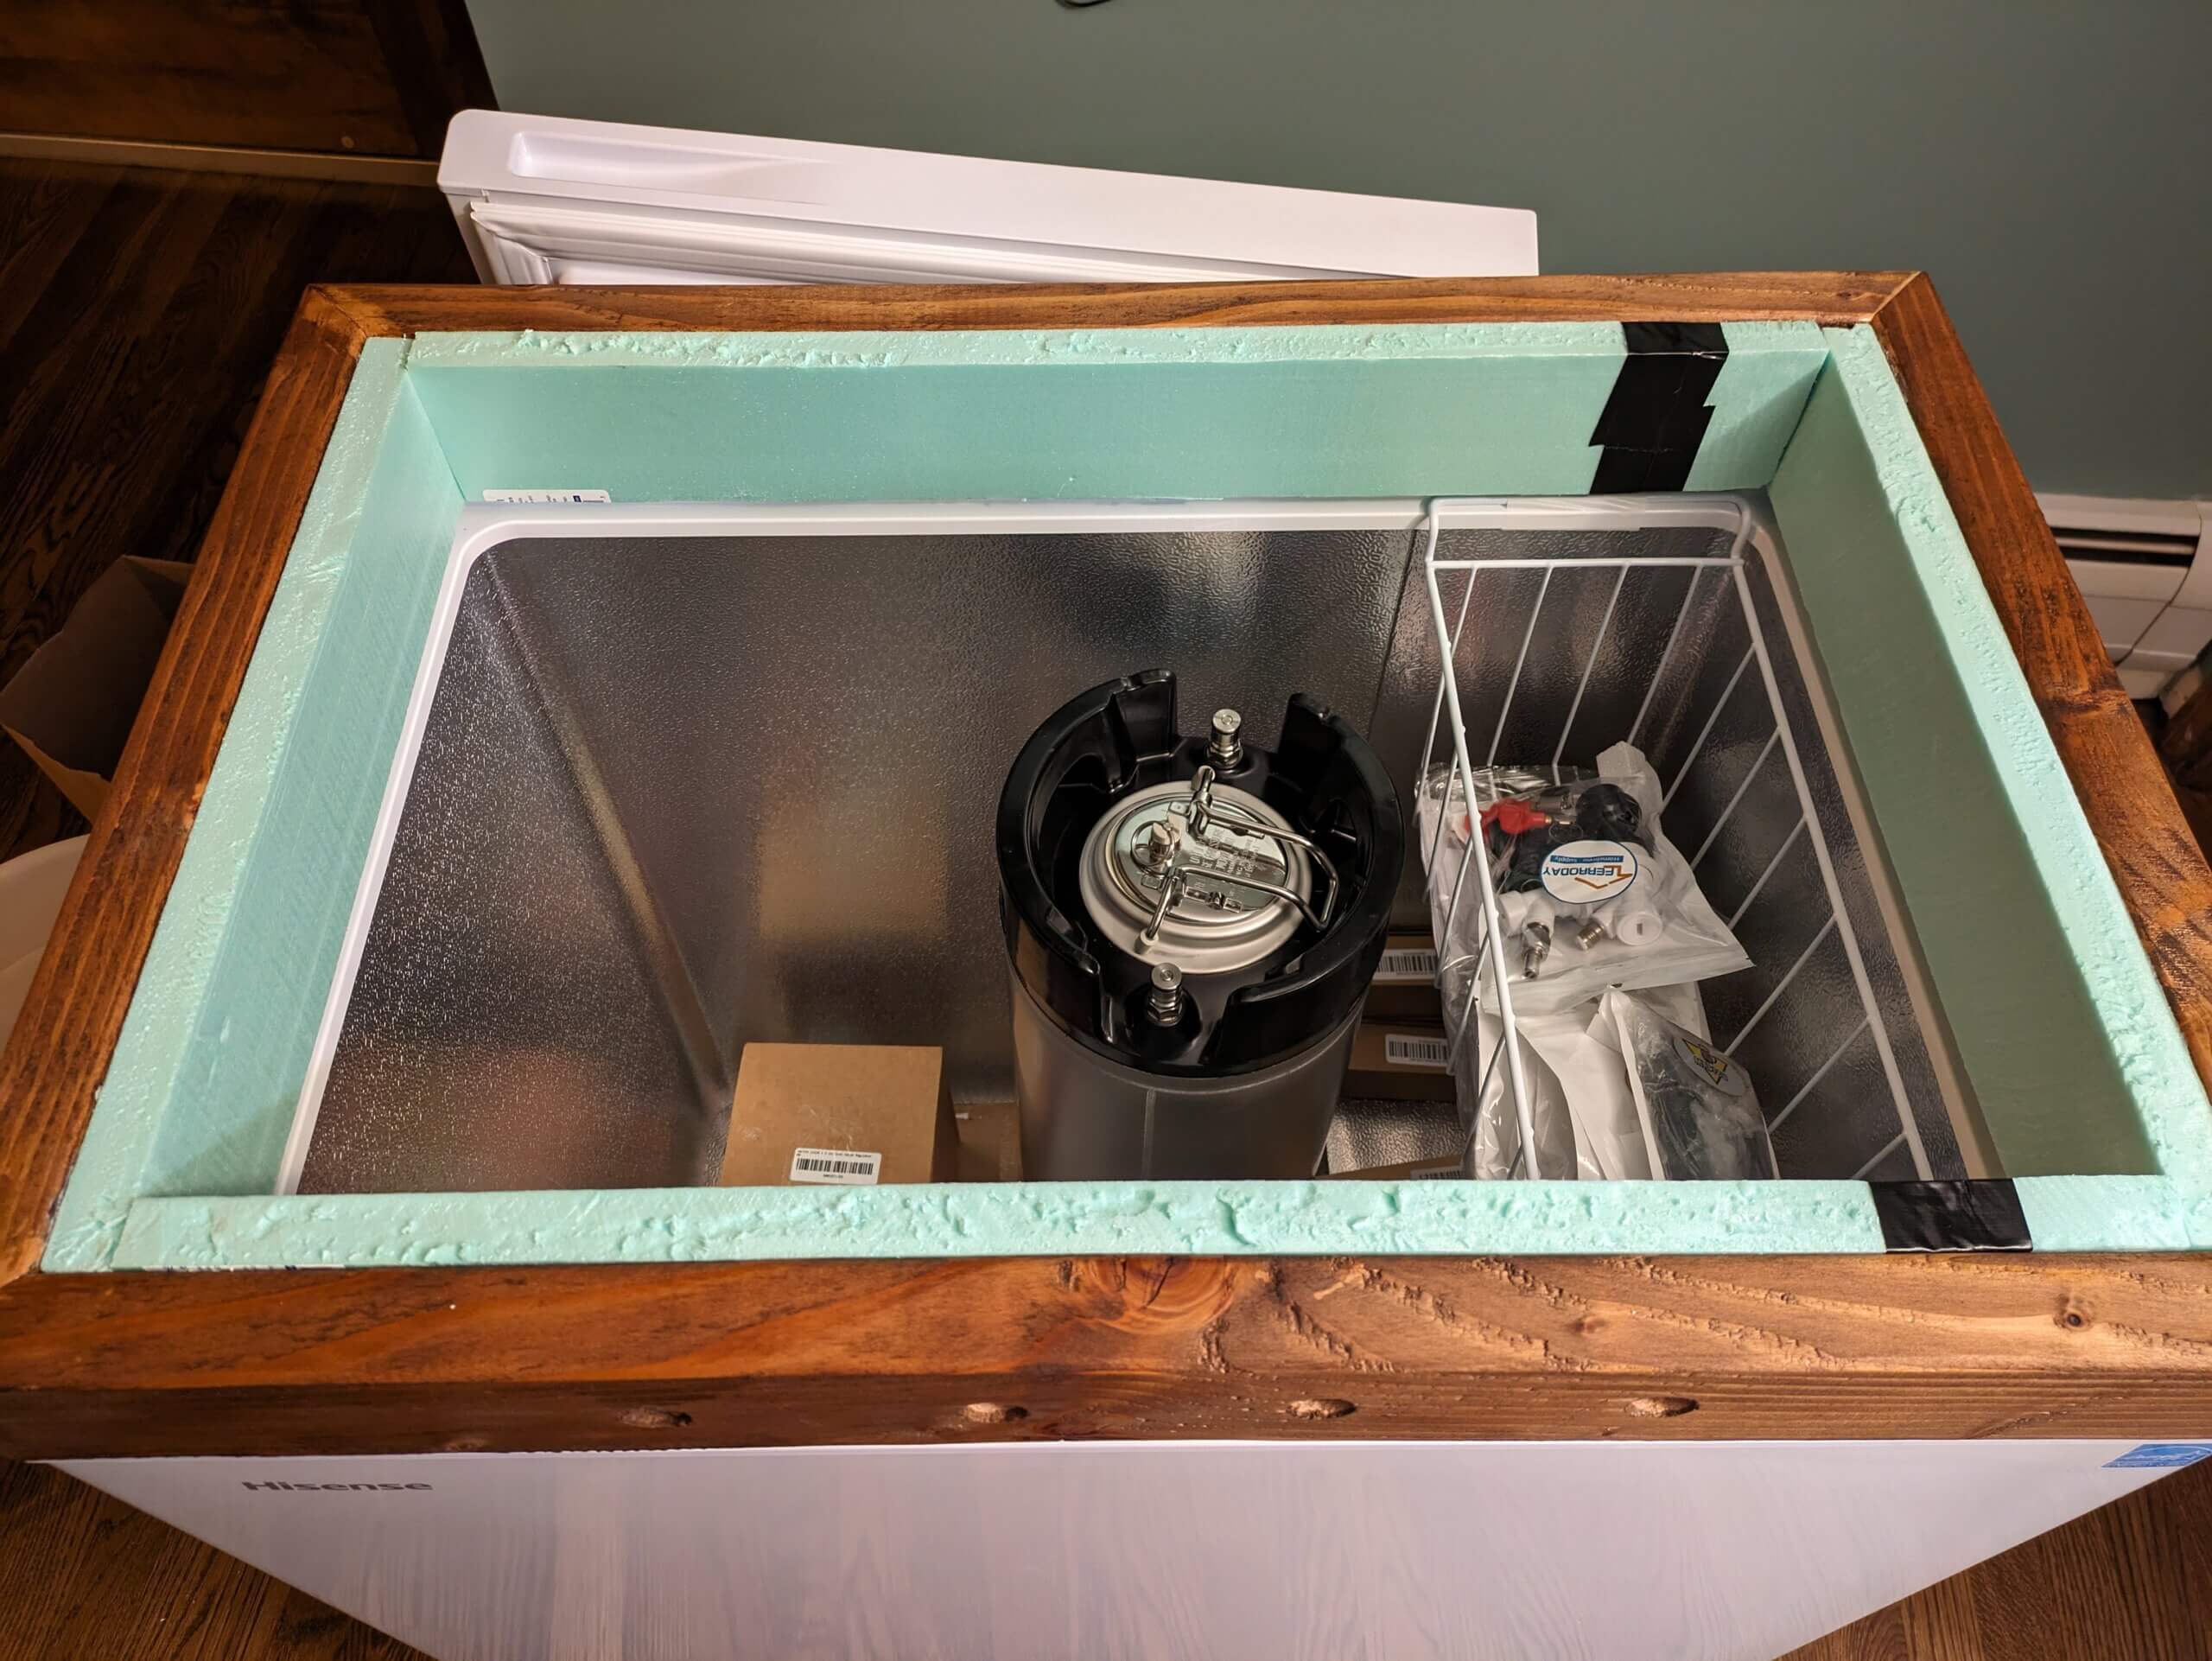
Of course, the wood and foam together is too thick and the lid will no longer seat properly. So I had to cut out a little inset for the lid to seat into. Luckily we can just take the measurements of the lid seating surface from the freezer, then cut that size into the foam.
It’s not exactly pretty, but nobody will see it. I actually messed up here and cut too deep, I cut 1/2″ deep which I measured off the protrusion on the freezer lid, but I forgot to account for the gasket around the freezer lid offsetting some of that. Probably 1/4″ deep would have been more appropriate.
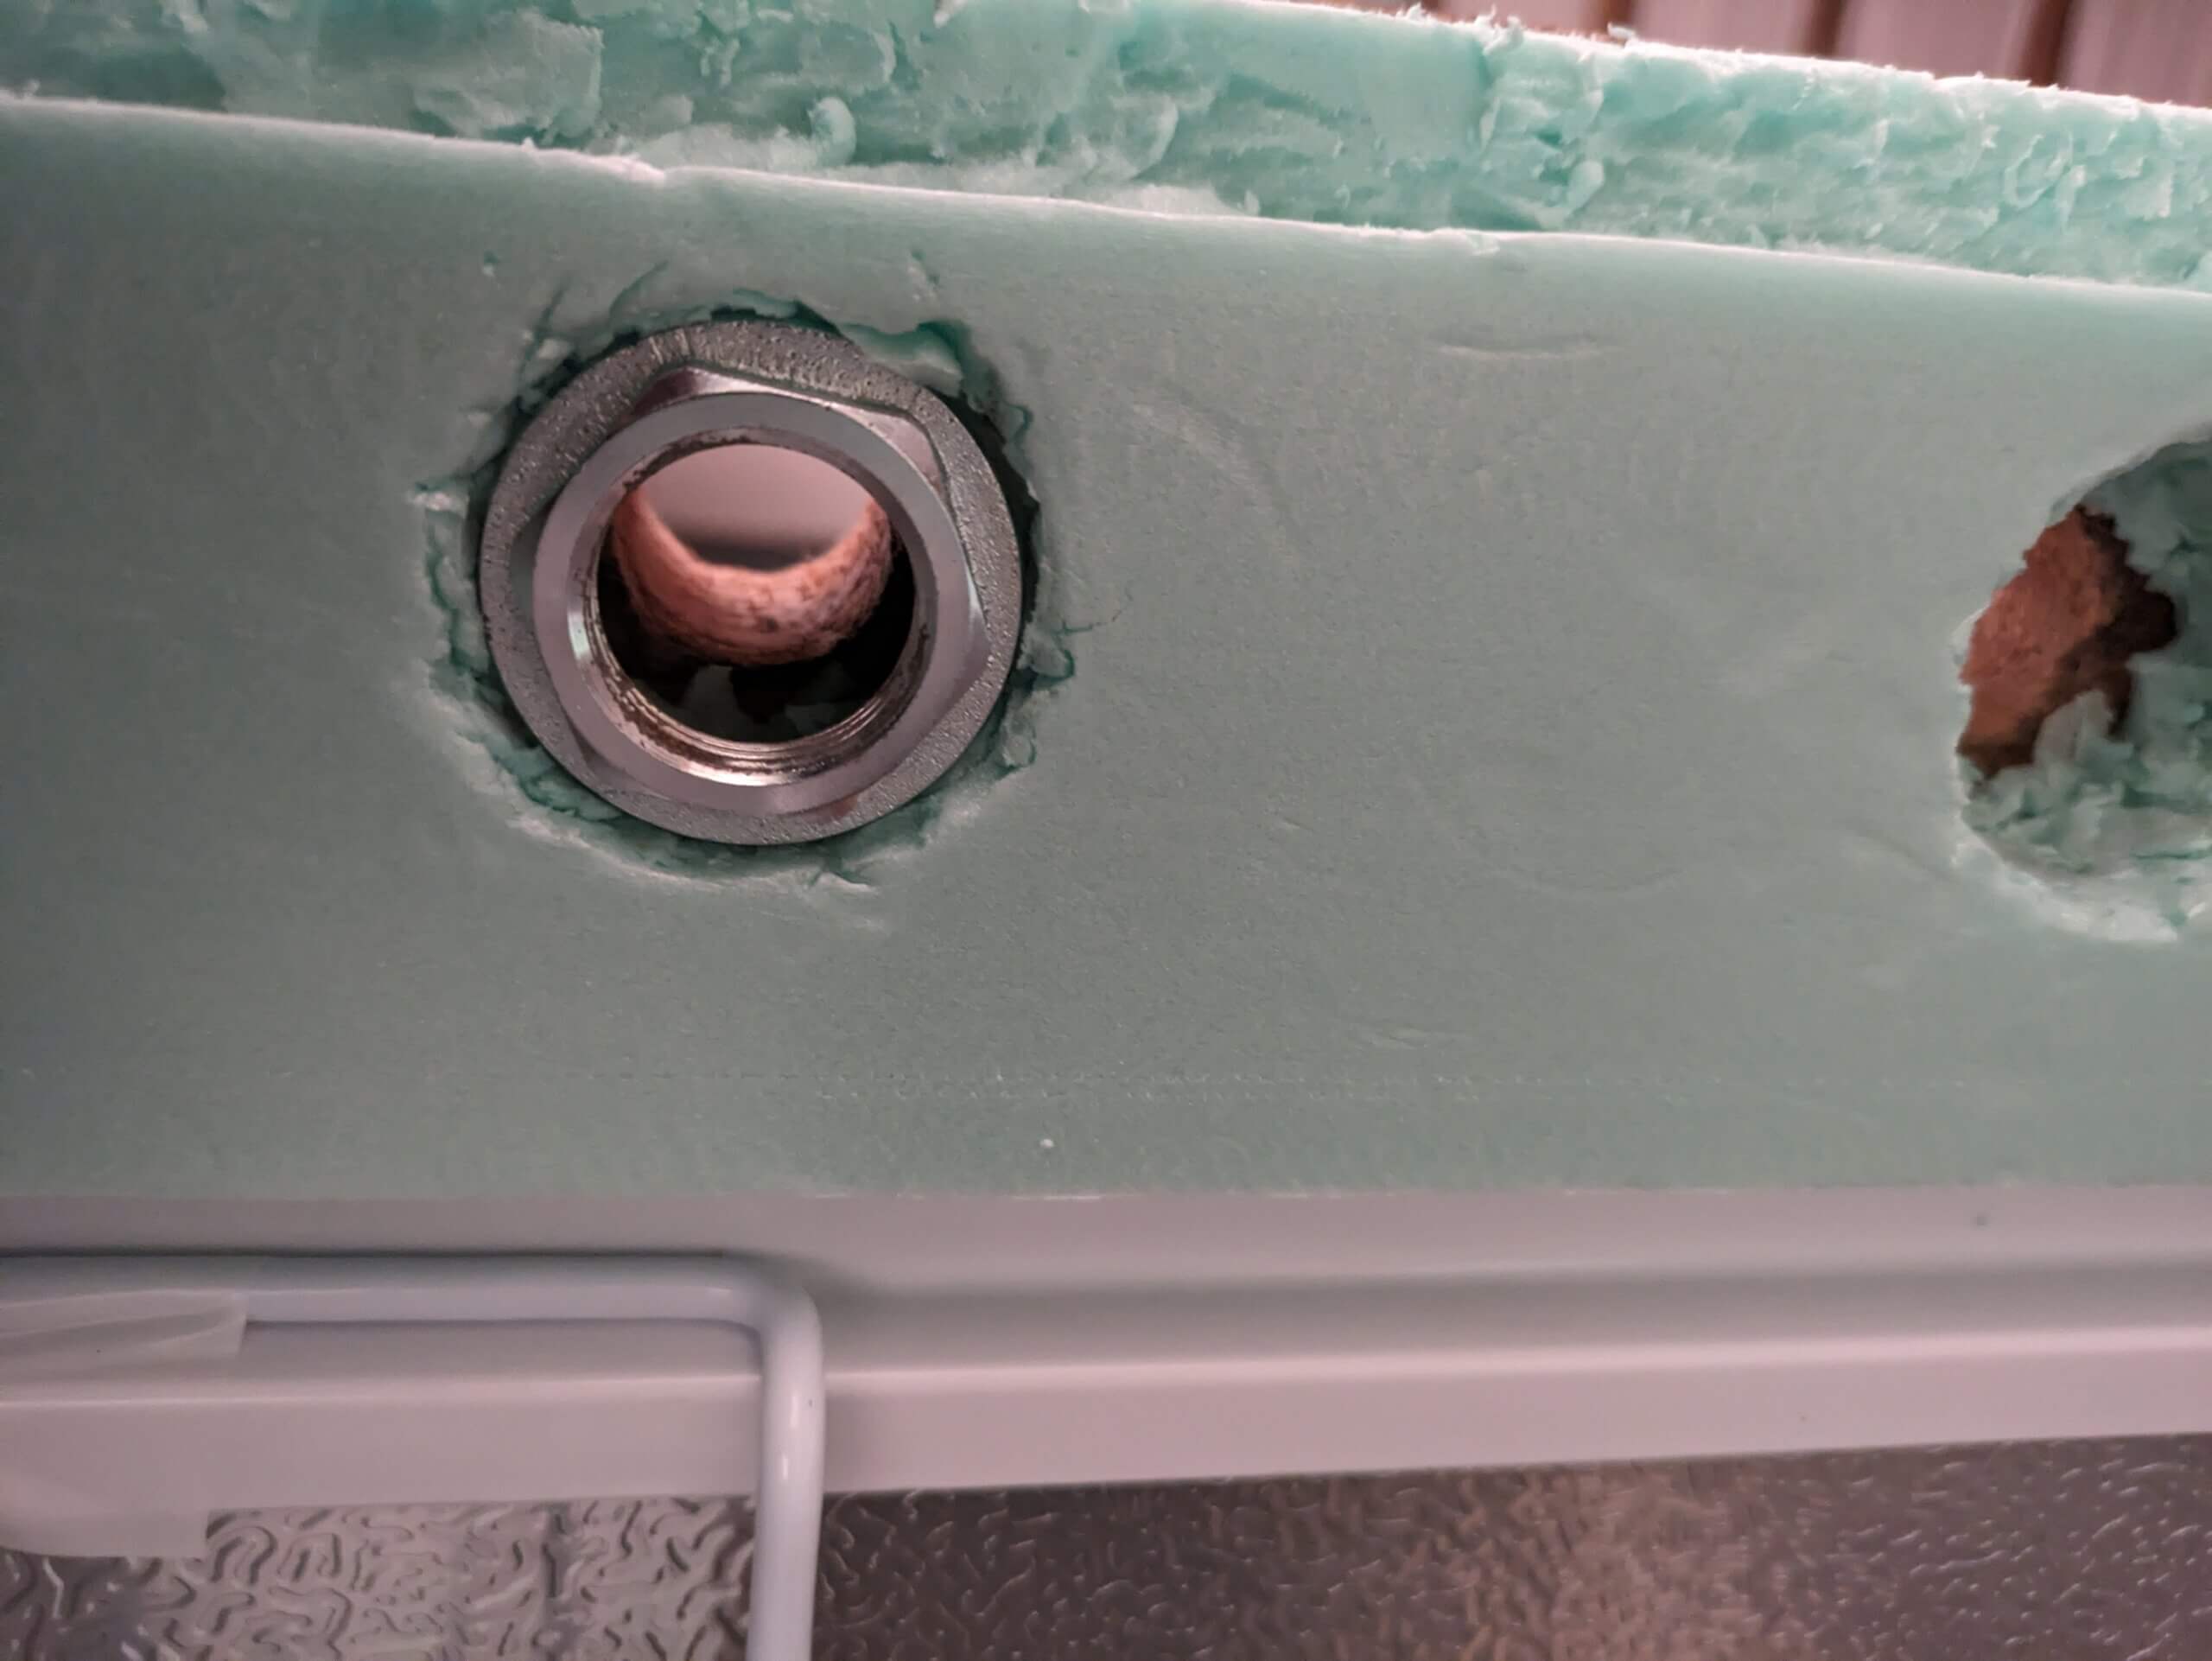
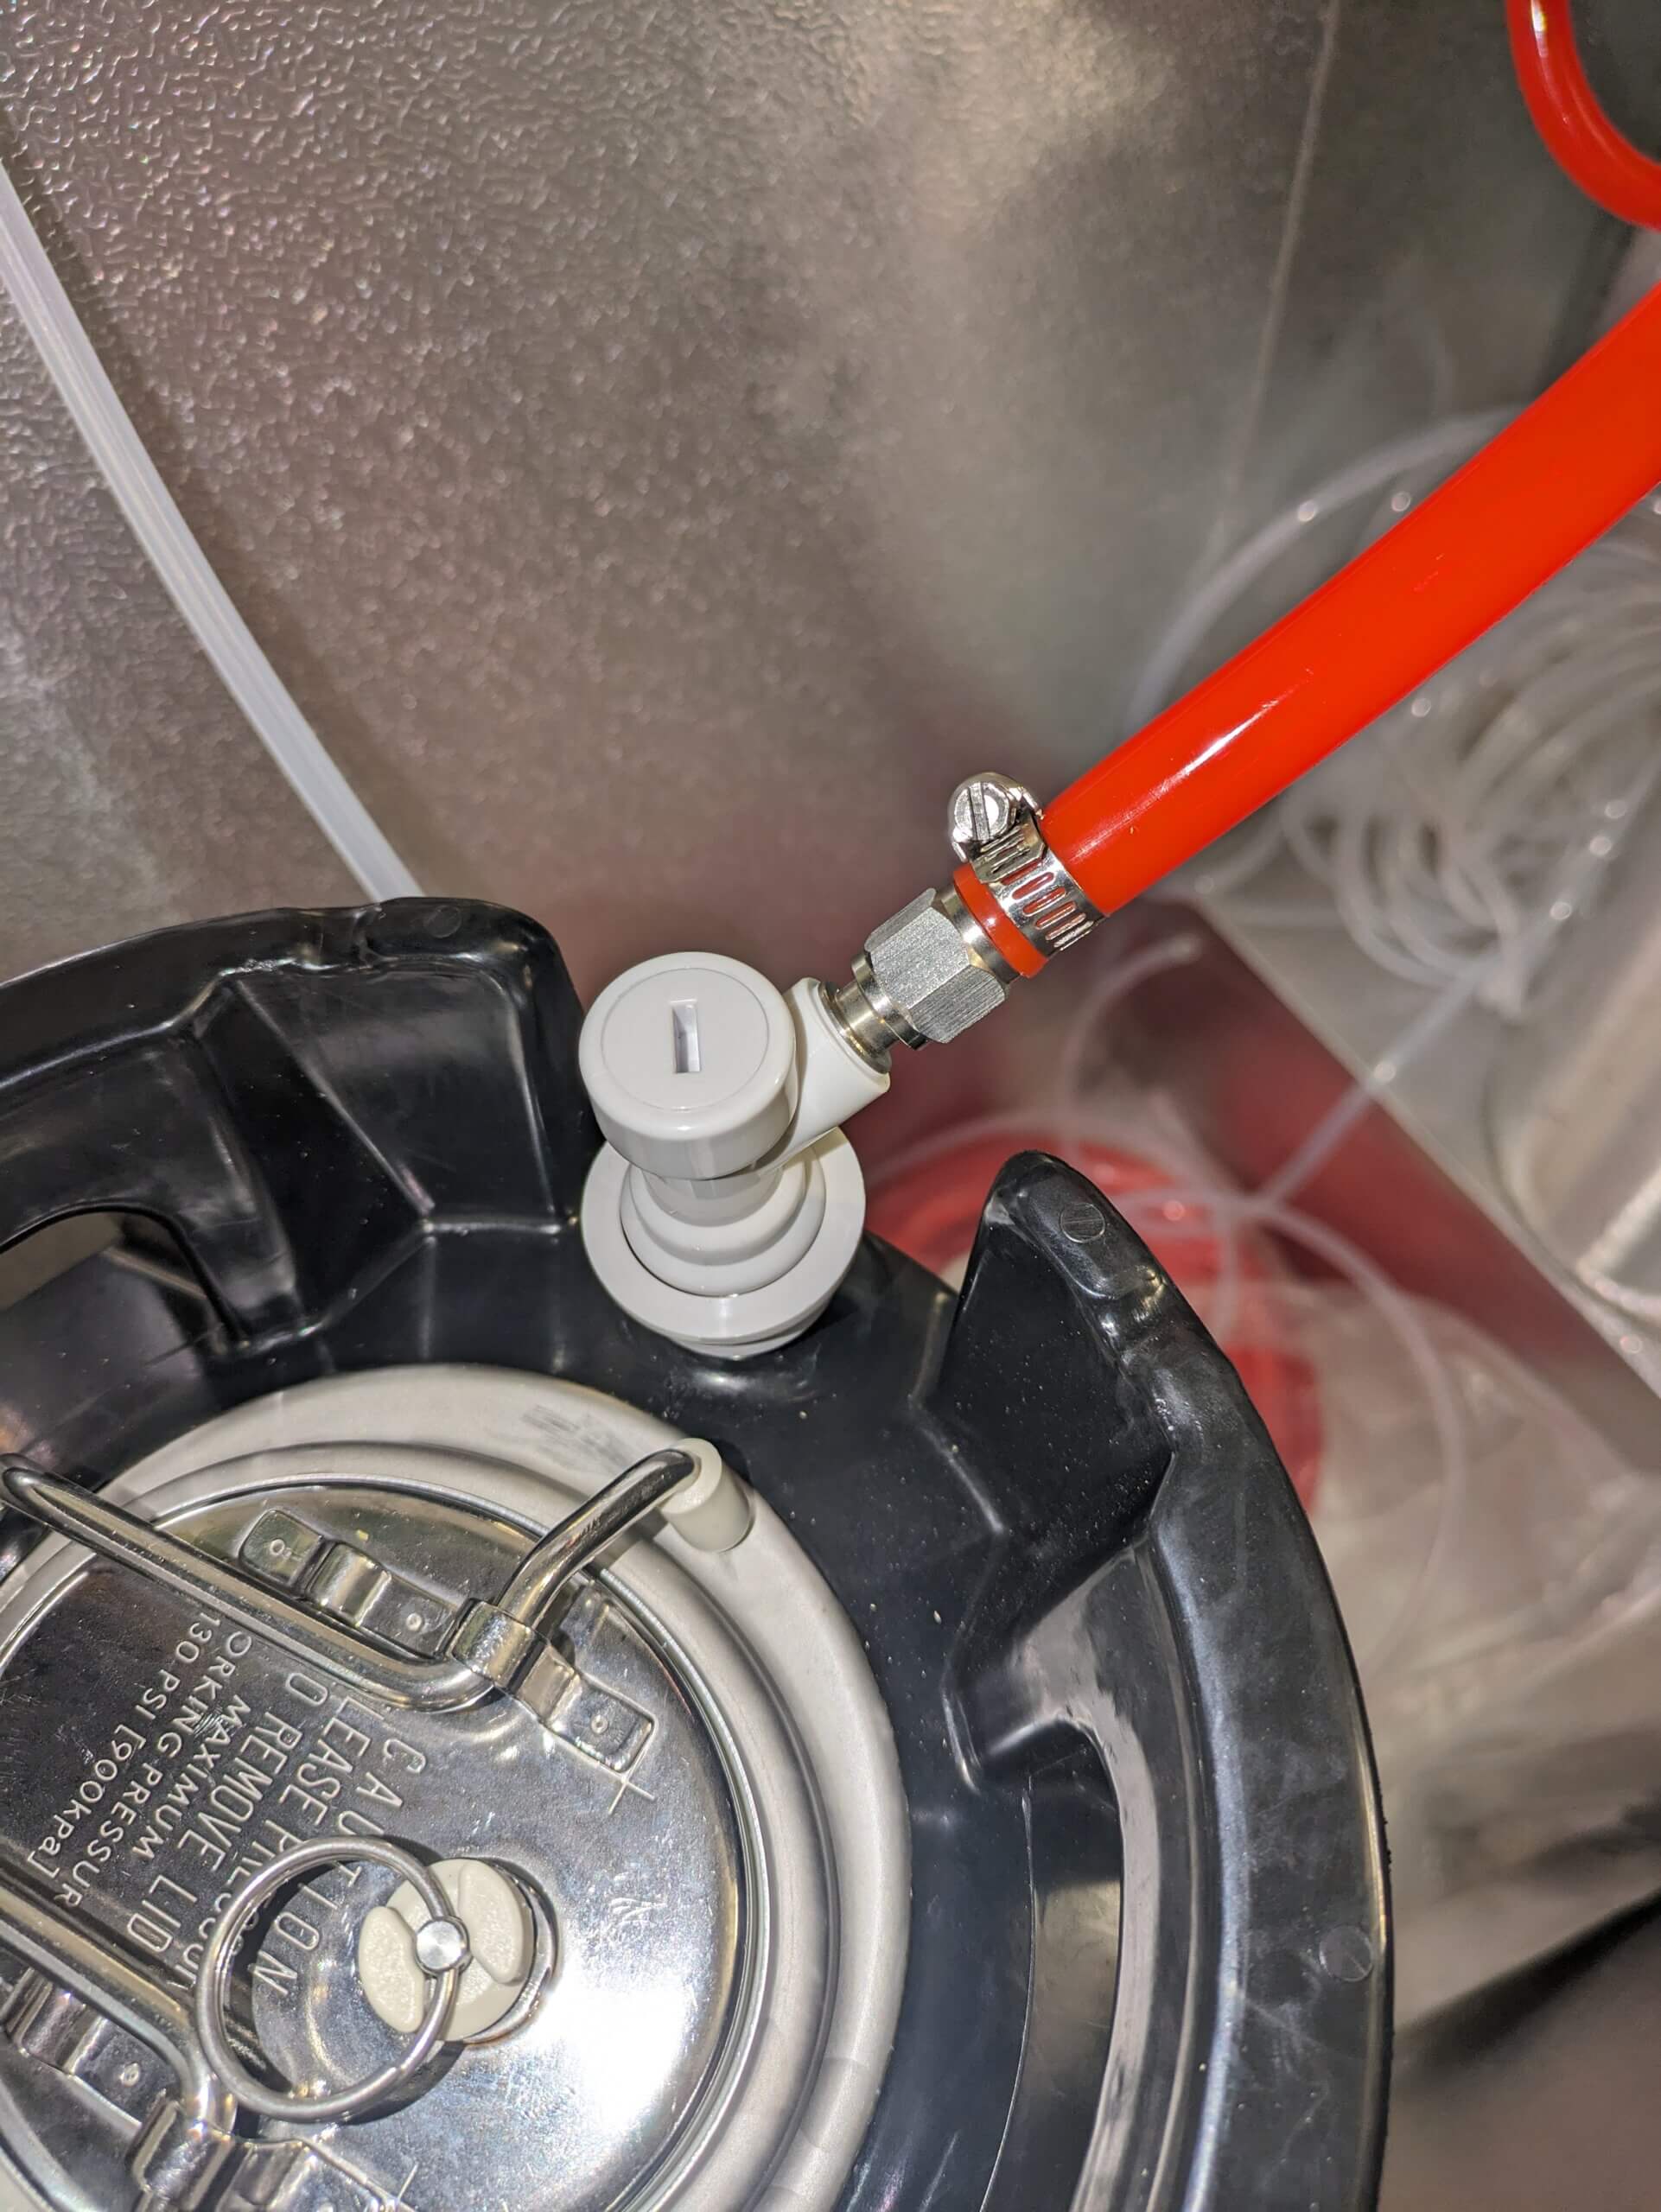
I used the 7/8″ spade bit to drill out the foam through the shank holes I had already made. Then I centered the shank washer over the hole and traced it to determine how much of the foam to cut away so the washer could seat against the wood.
You can buy some sort of tap wrench to tighten the shanks down, but I was able to crank them pretty tight using only my hands with a grippy pair of gloves. I also screwed on the faucets at this point, but forgot to take a picture of that. Make sure not to loosen the shank nut as you tighten the faucet on.
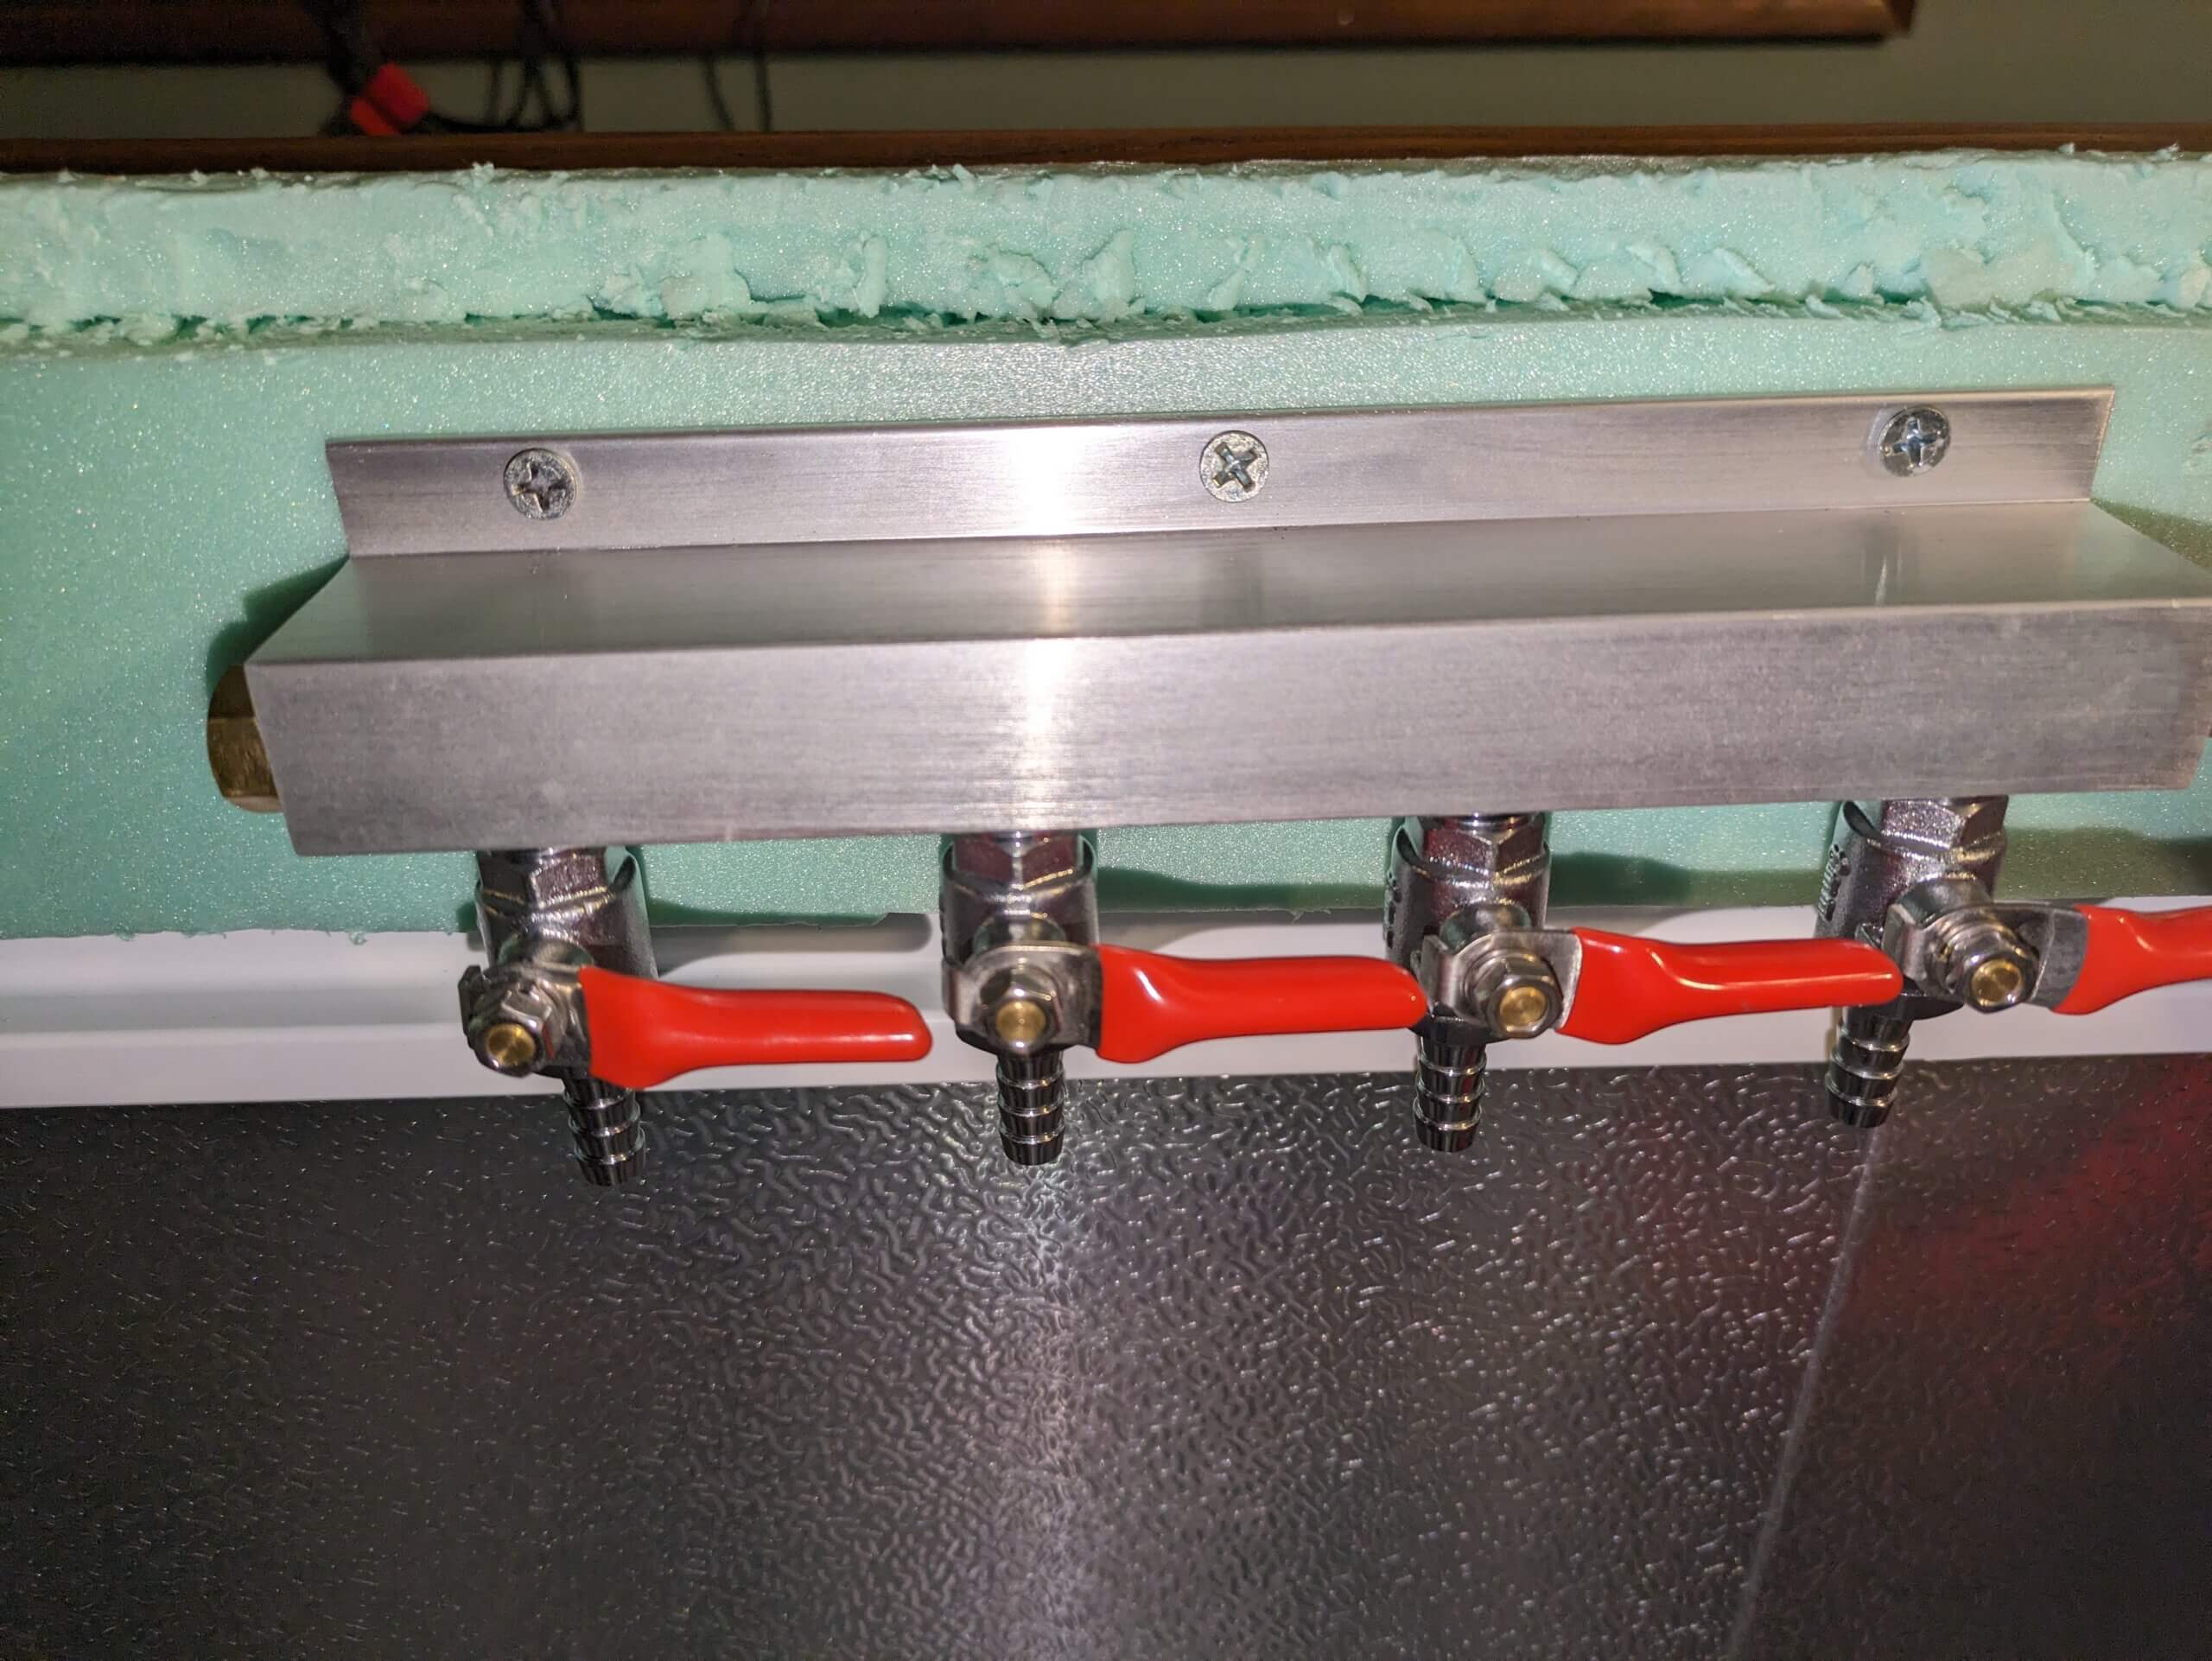
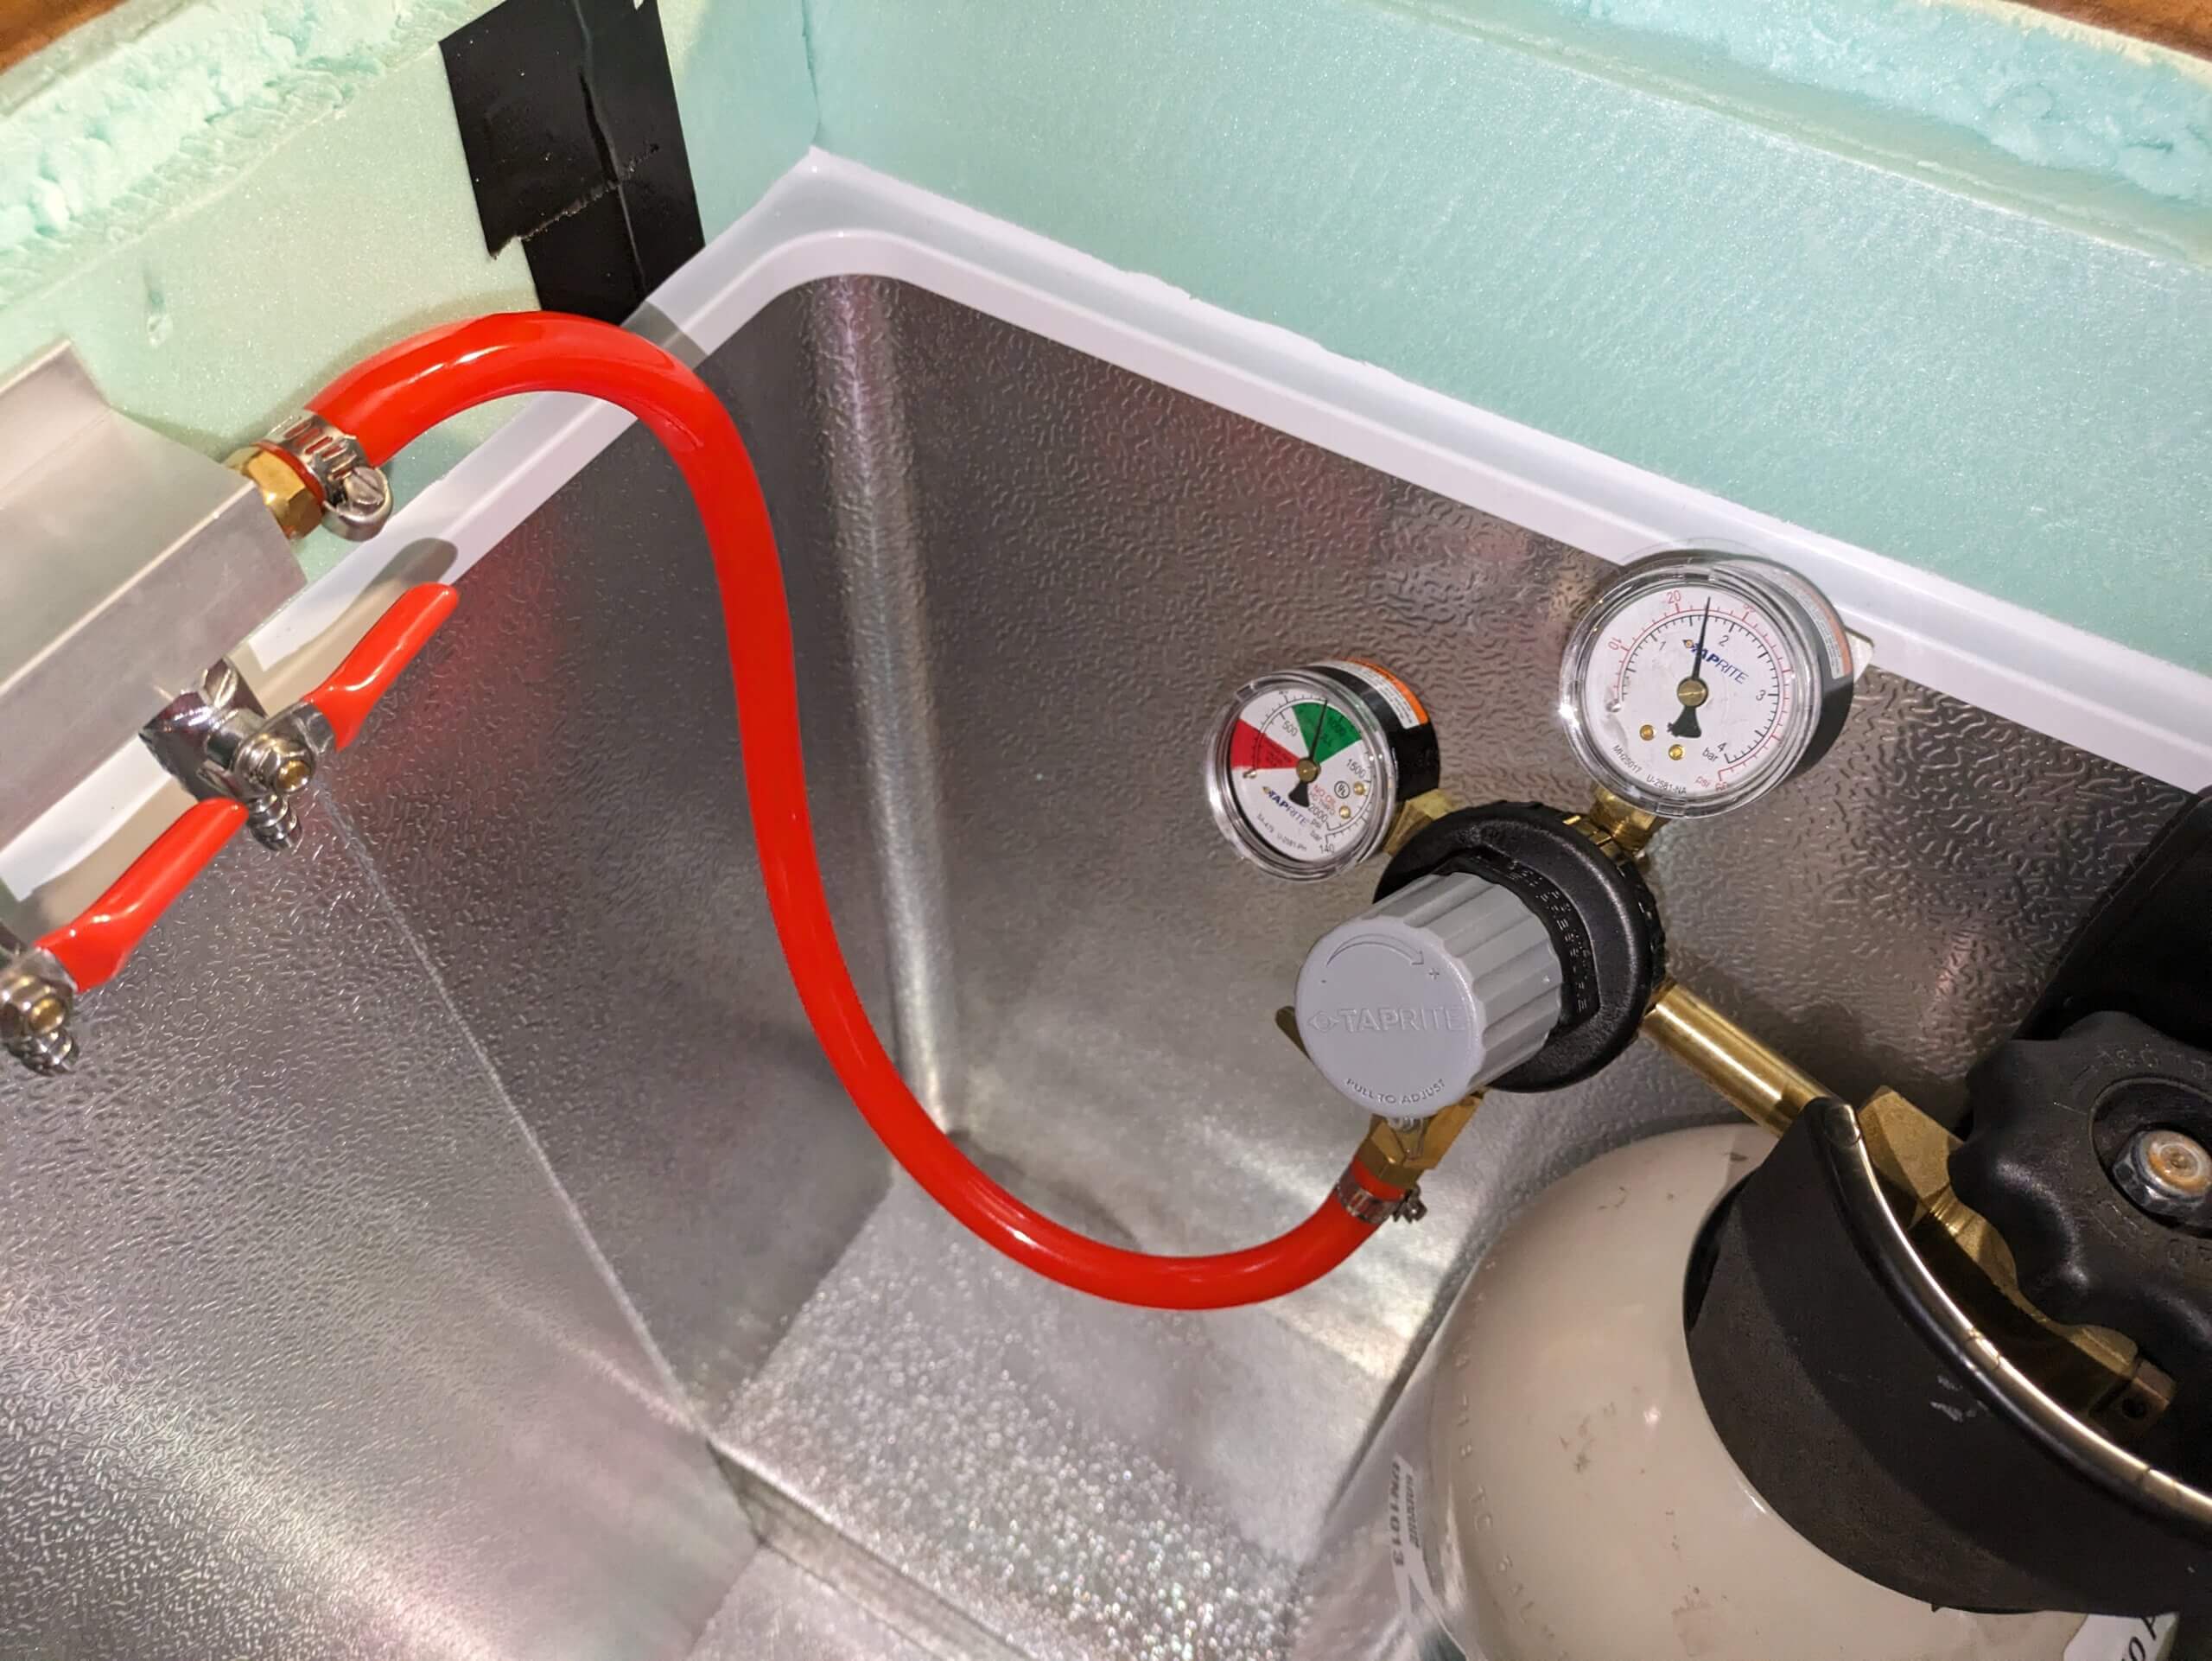
I mounted the gas manifold inside the collar using 2.5″ carpenter screws:
I put a deposit on a 10 pound CO2 tank at my local homebrewing store, so I can just head over and swap it when it runs out. Note that there are grades of CO2, food grade CO2 is 99.9% pure whereas industrial CO2 for welding can contain 0.5% impurities, so where you’re sourcing it from does matter, contrary to what random people on Reddit or brewing forums claim.
I wrapped the tank connector threads in teflon tape then wrenched the regulator onto the CO2 tank outlet. The red gas tubing was very easy to cut and connect up with the hose clamps for extra security.
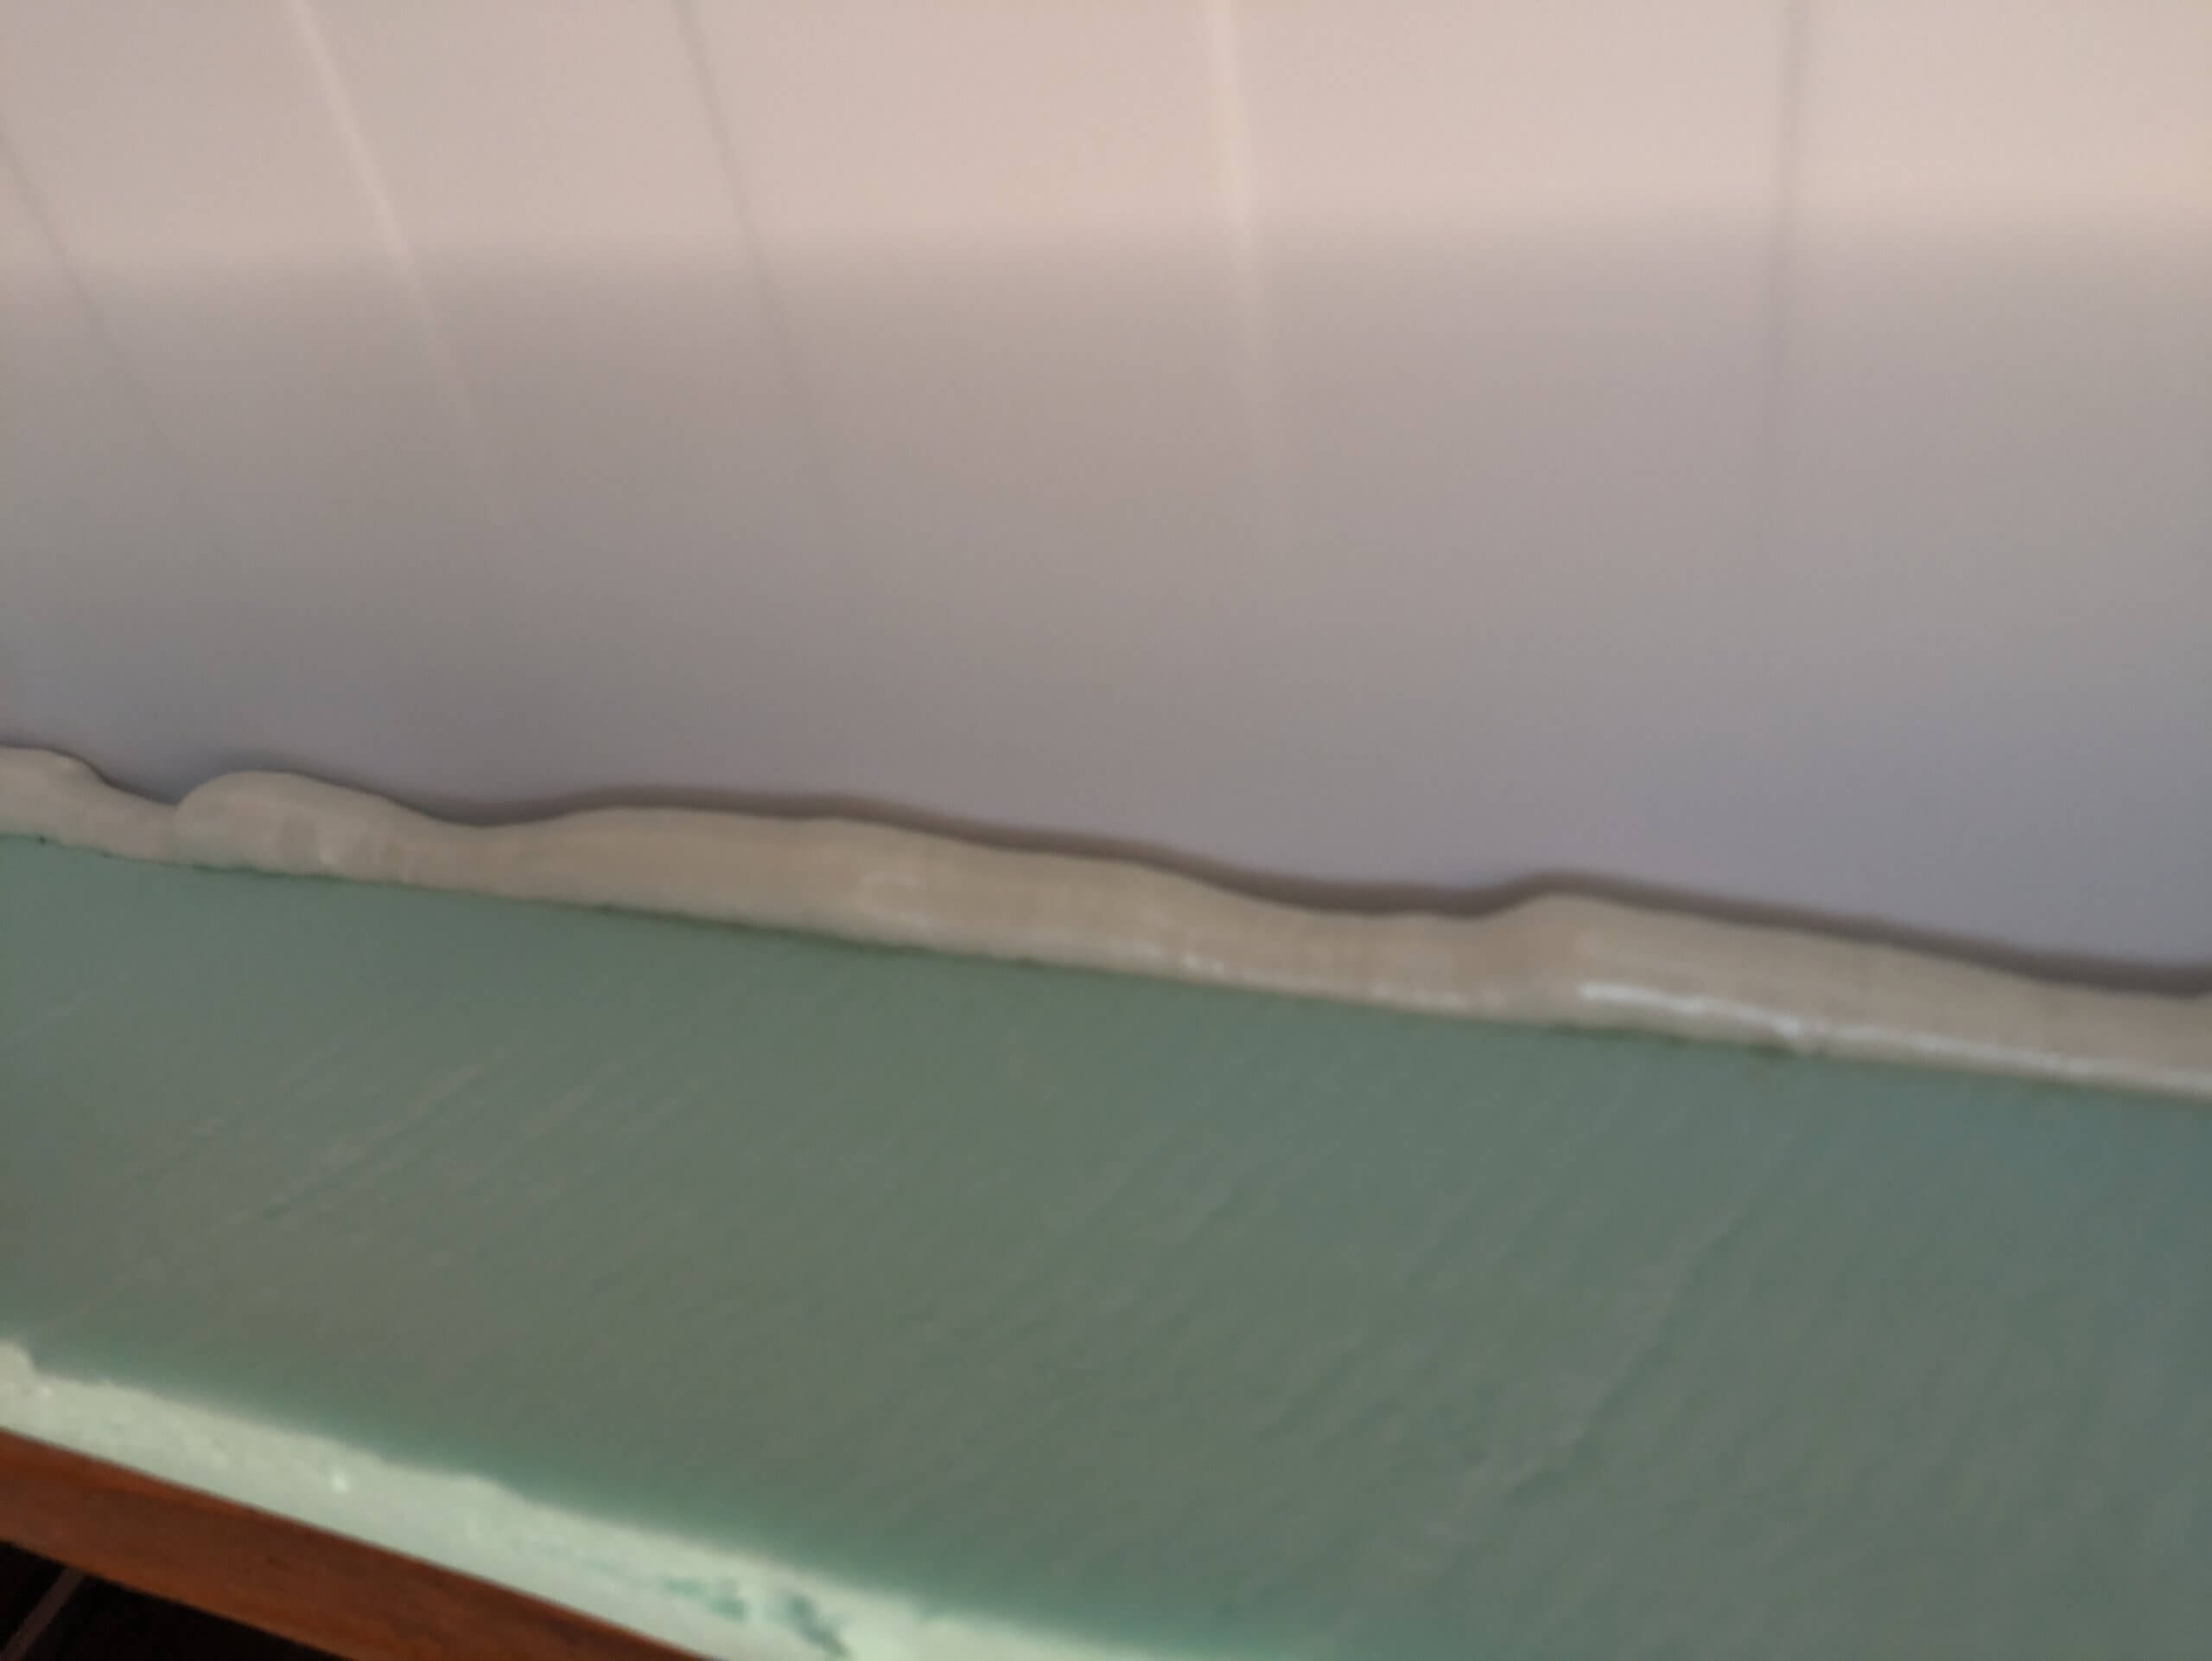
Now that the hardest of the interior work was done, the lid can be re-attached. GE brand silicone caulk has a tensile strength of over 200 psi. I put a healthy bead around the lid sealing surface I cut from the foam.
Five gallons of beer in primary fermentation makes a good weight to hold the lid on while the caulk cures. I left it for 24 hours.

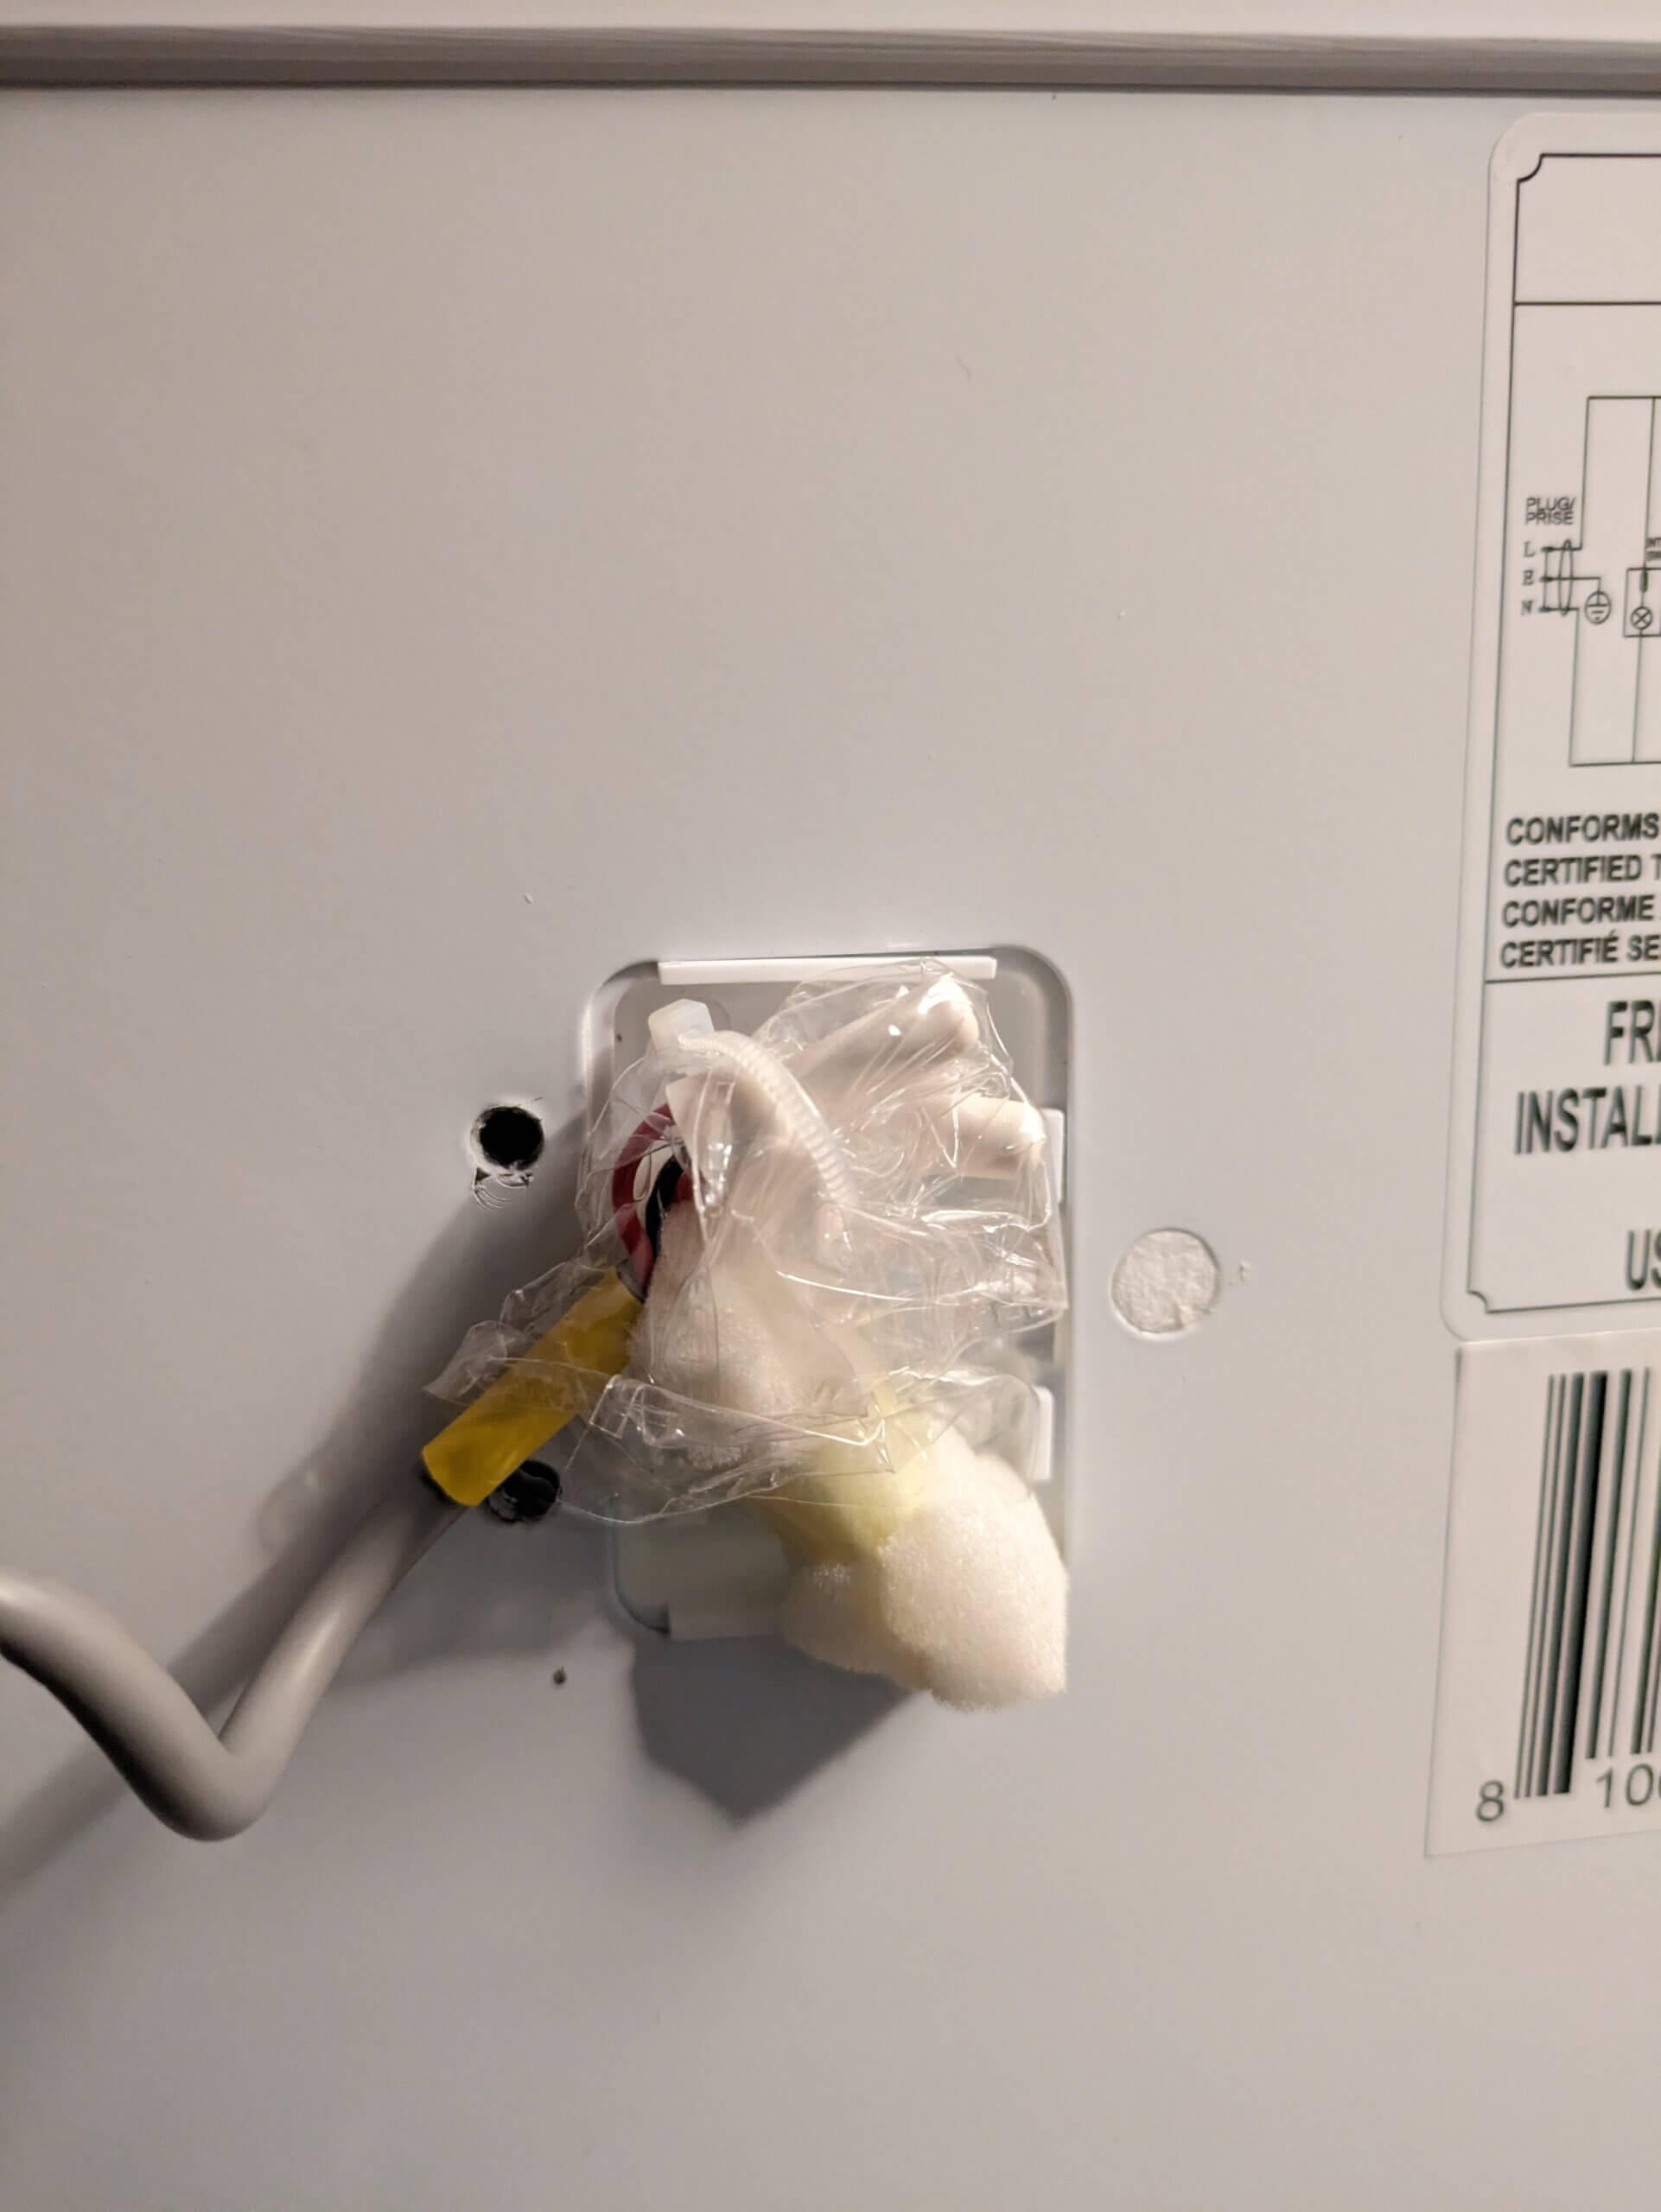
The lid seems pretty secure, and the caulk easily holds the weight of the collar when using the indented handle on the lid to pull it open. Expanding spray foam came to the rescue to fill in the gap between the lid and the foam board that I cut too deep earlier.
I also put some spray foam around the shanks, to replace the foam I had to cut away to make holes big enough for the shank washers.

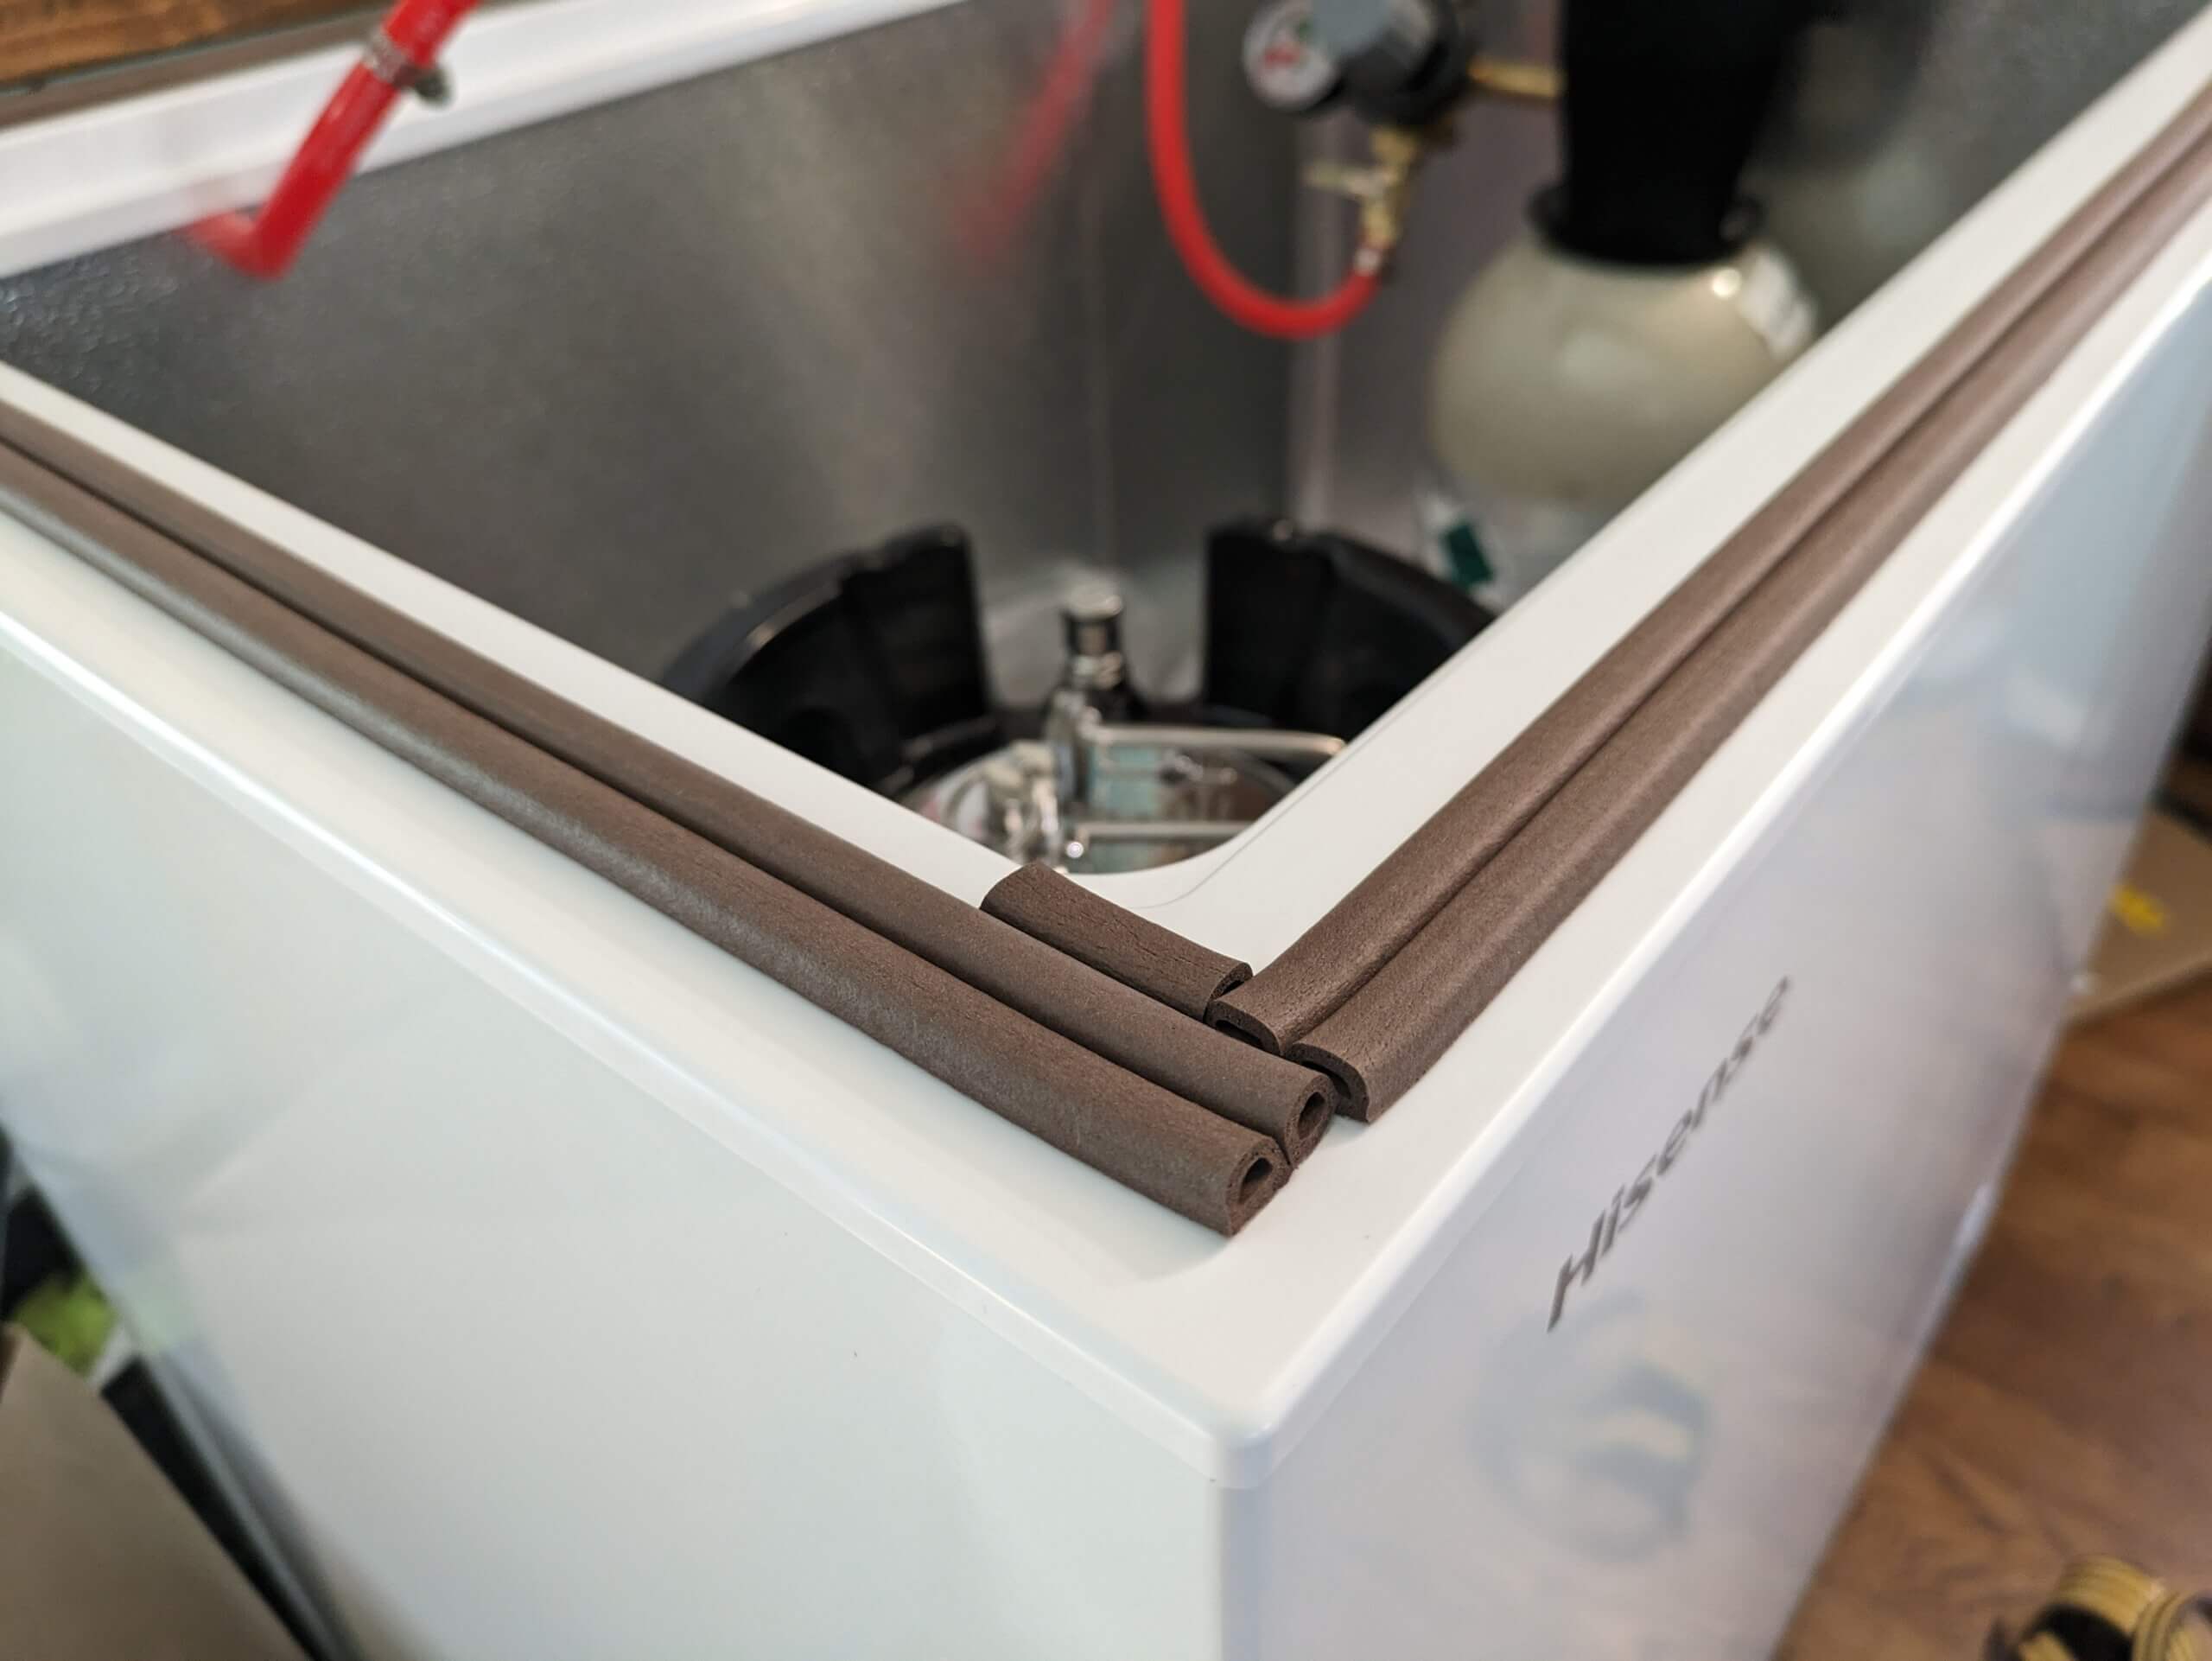
I had this weather stripping laying around, and I used it to make a better sealing surface between the wooden collar and the freezer.
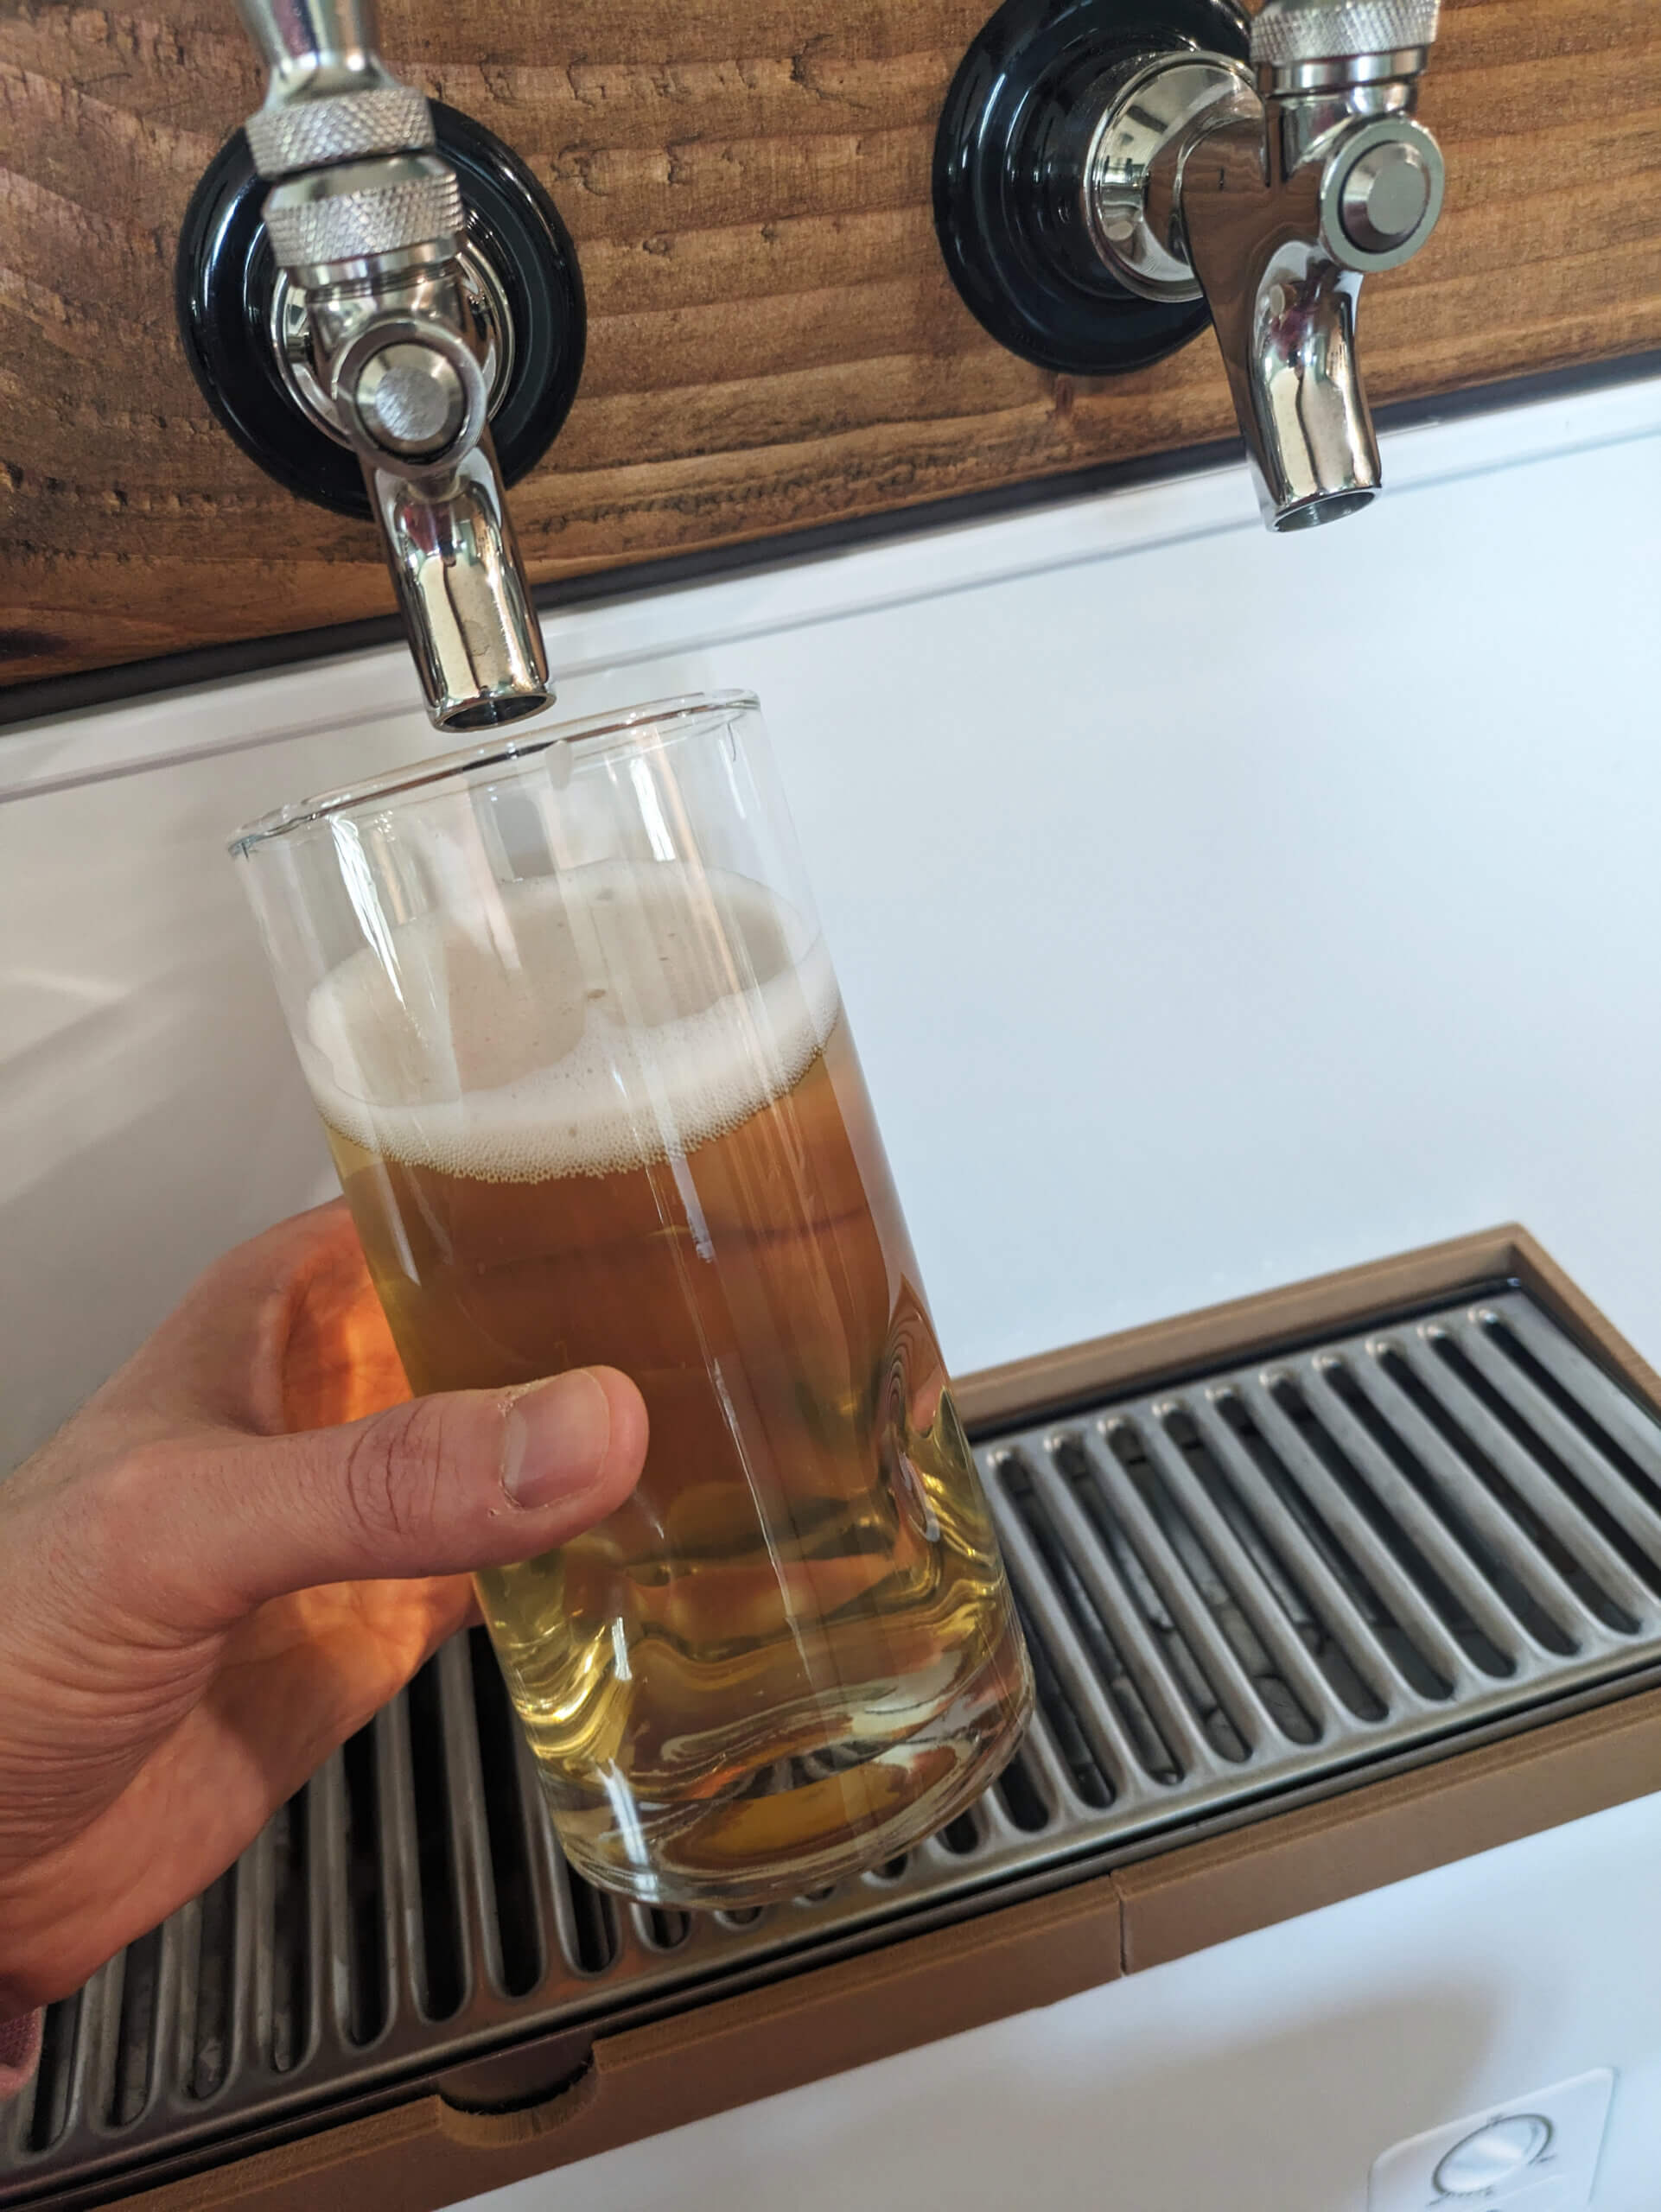
It’s time to start carbonating. I filled a keg with cold filtered water and ran some more red gas tubing from one of the manifold valves, connecting it to one of the ball lock connectors with a 5/16″ barb. I opened the CO2 and set the regulator to 25 psi. It should carbonate in a few days. Now is a good time to put some soapy water on the connections and check for any gas leaks.
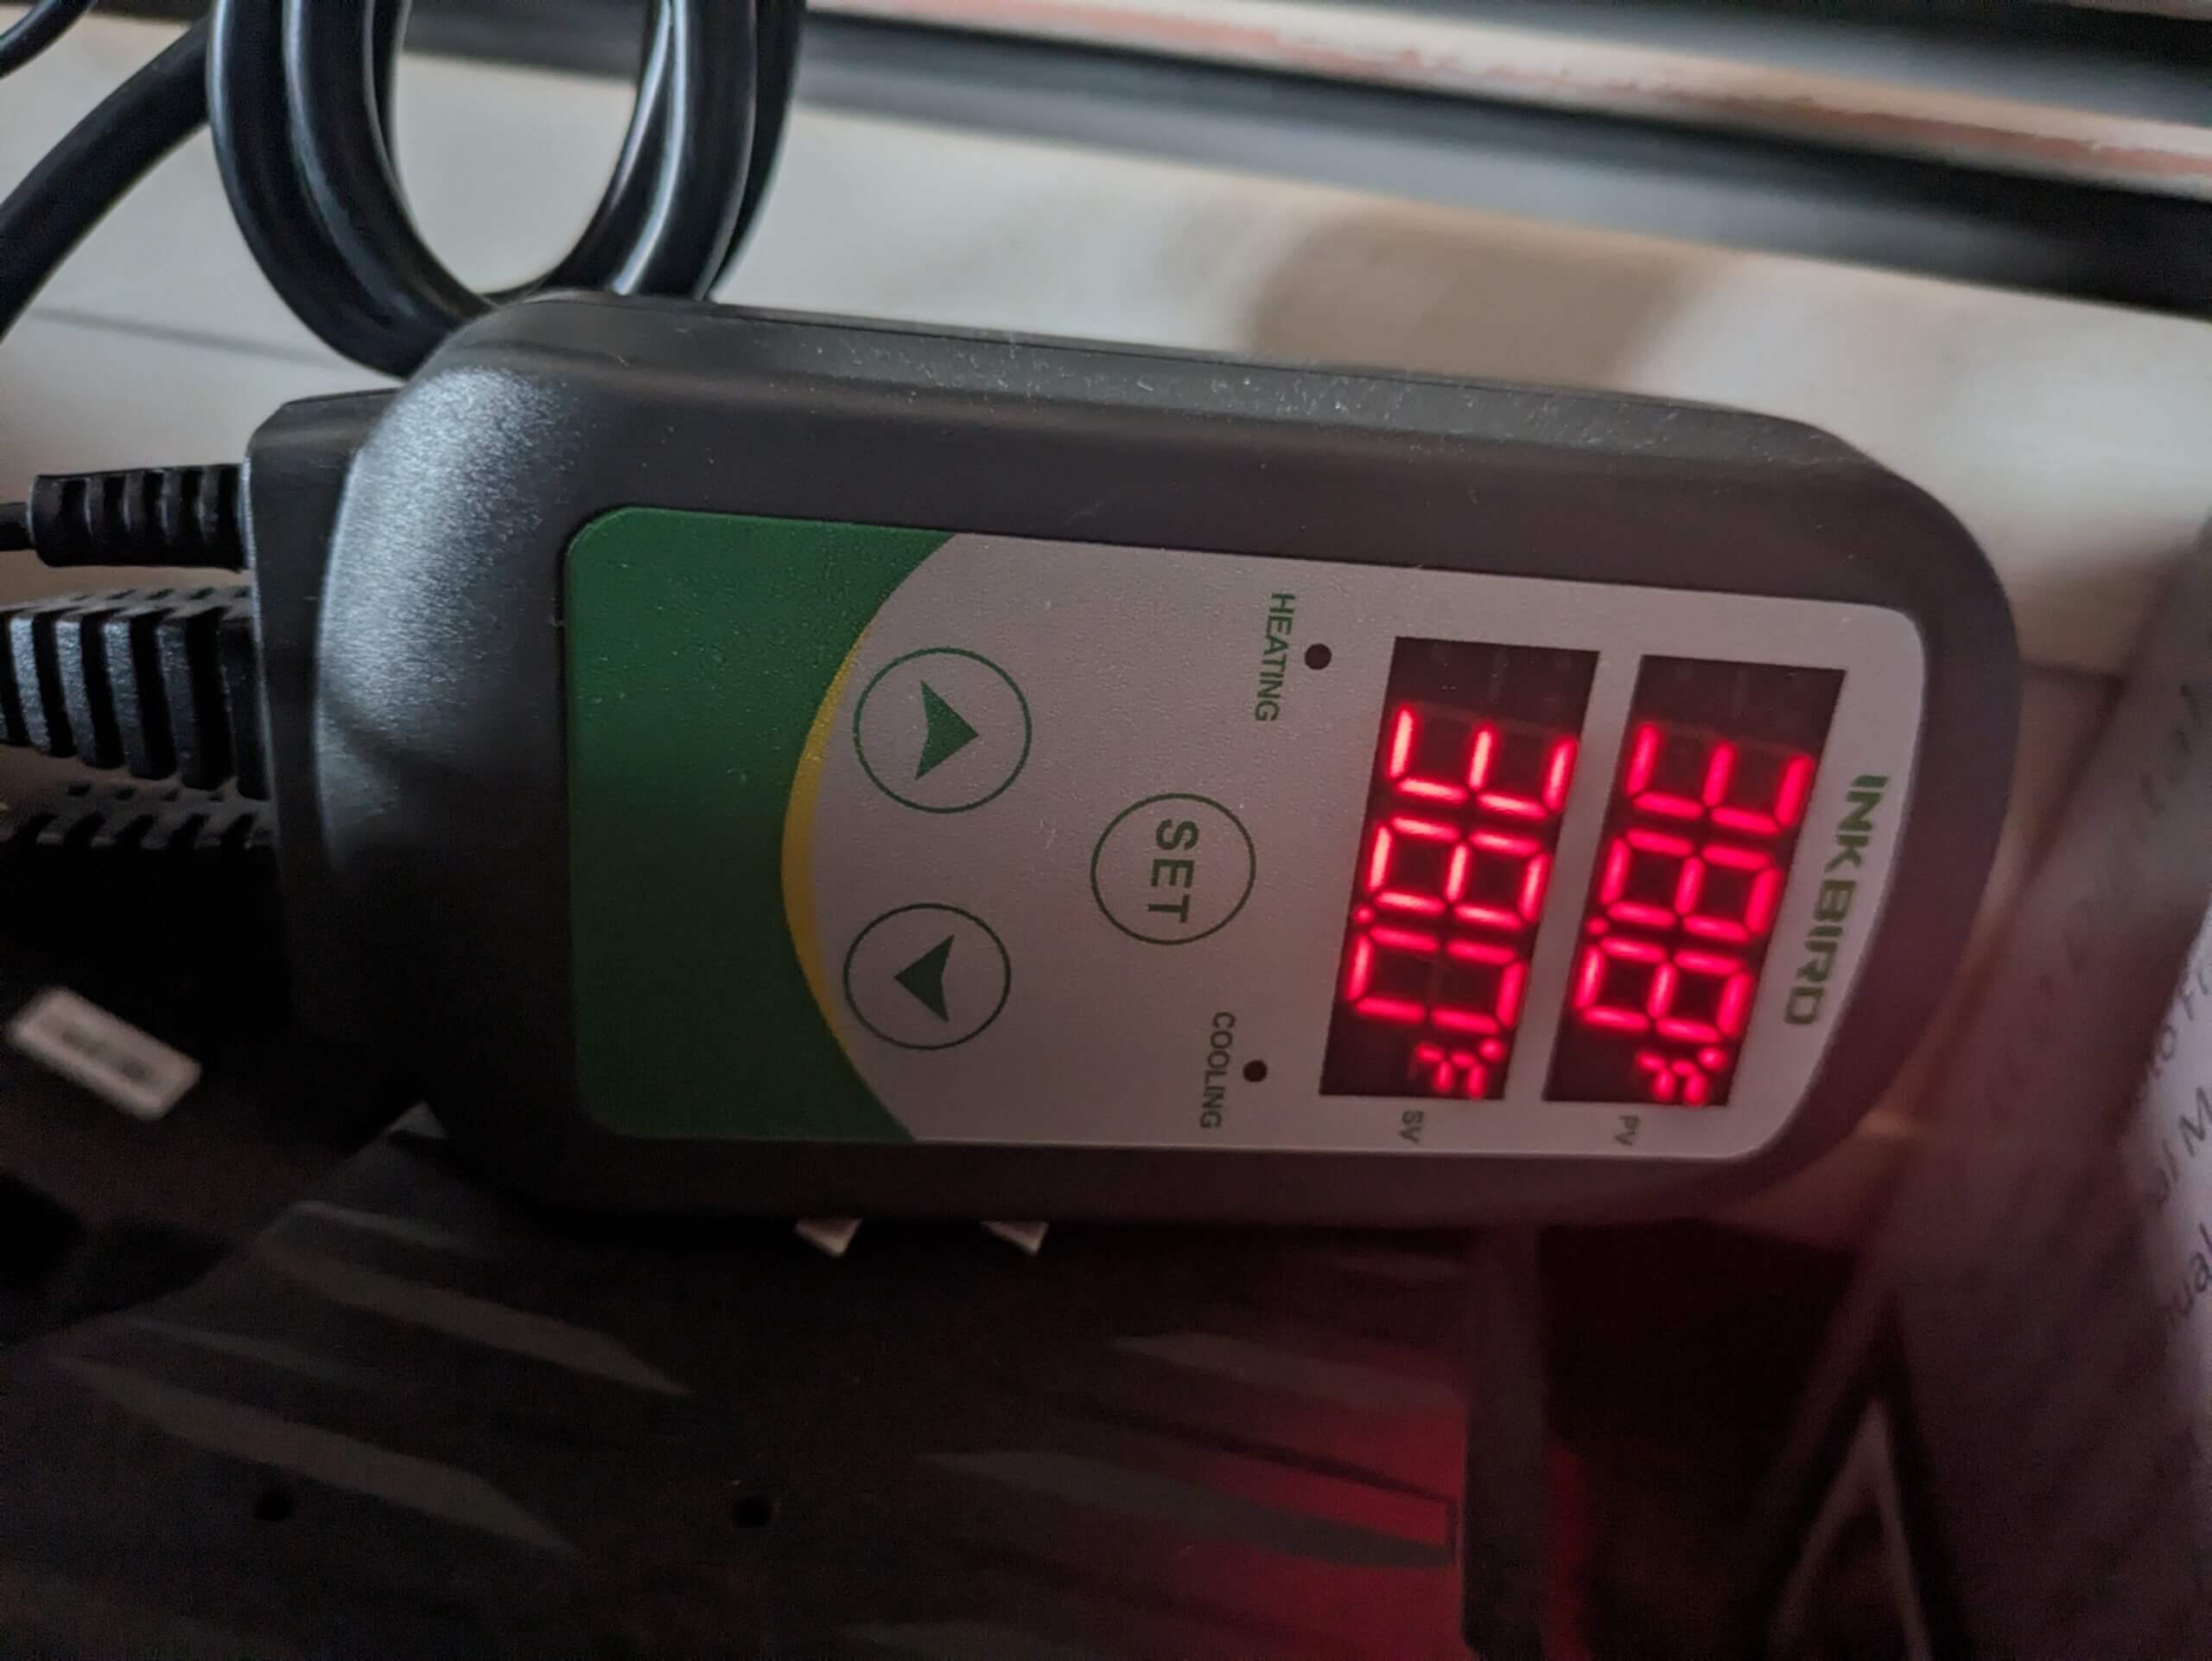
The temperature controller will ensure that the liquids don’t freeze. I set up the Inkbird ITC-308 according to the provided instructions with a 38F setpoint and a 4F cooling differential. For equipment longevity, you generally want the compressor to cycle on less frequently, and to run longer when it does.
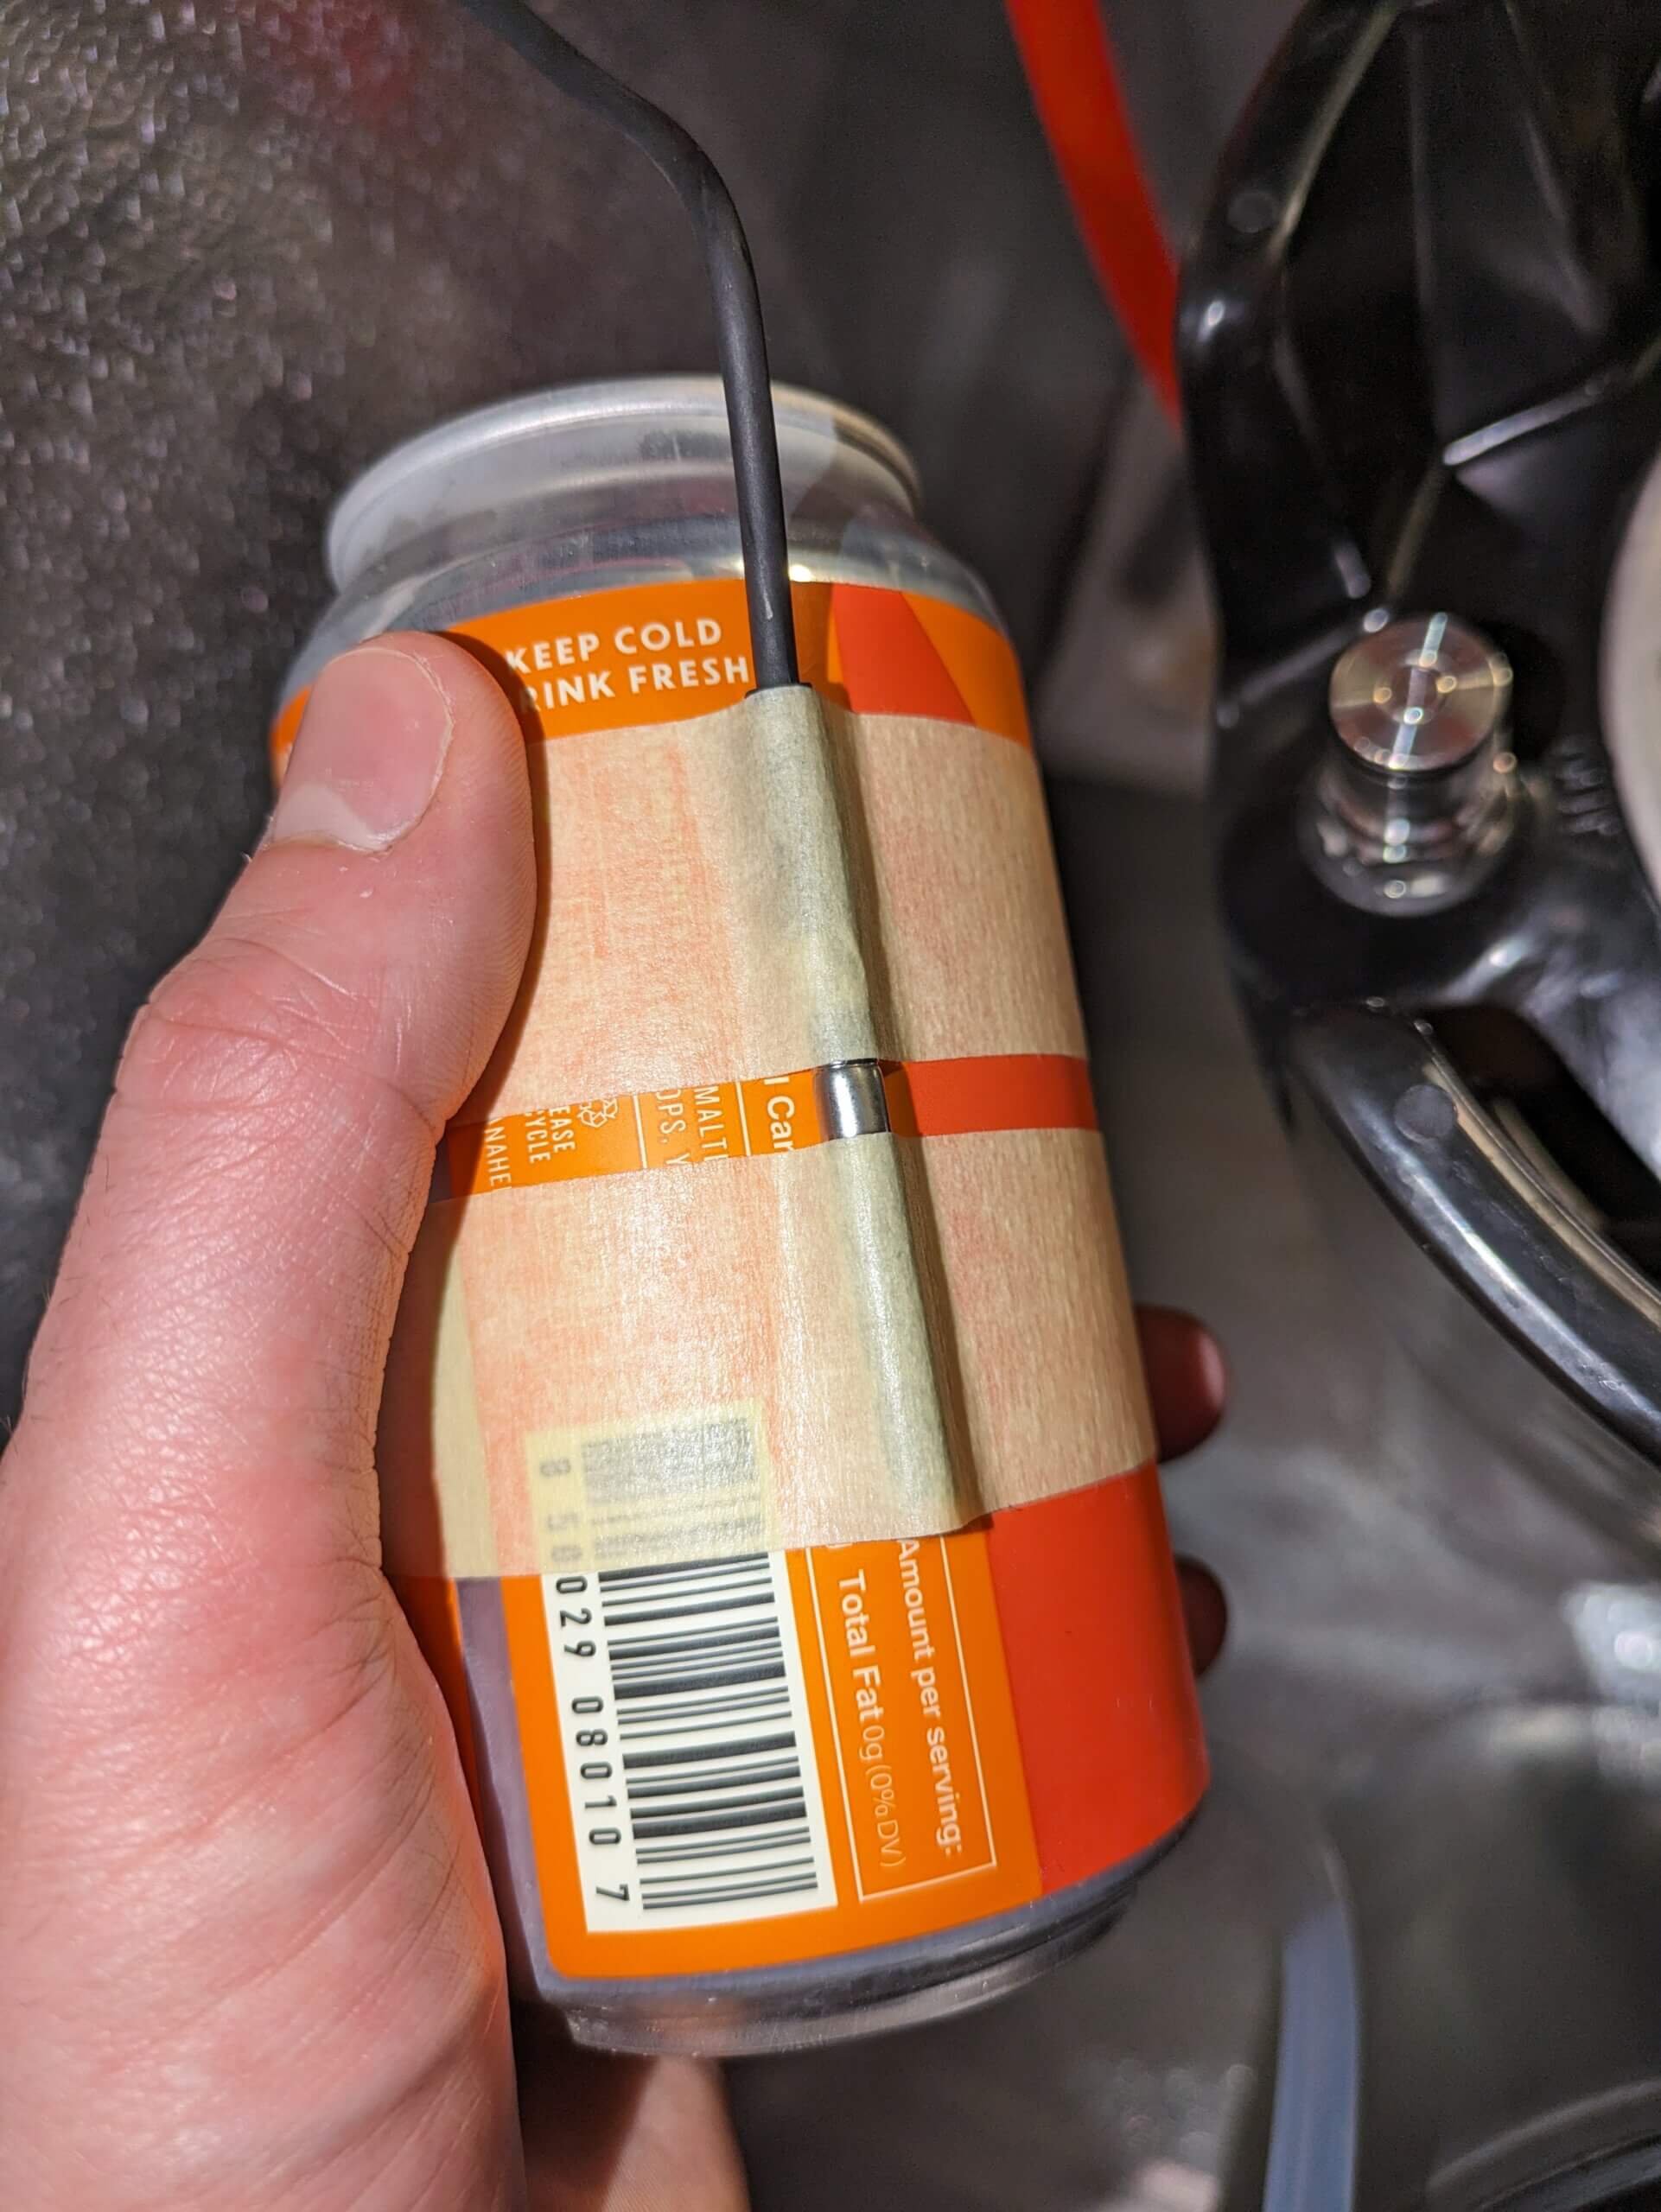
I ran the temperature probe of the Inkbird in under the collar by the hinge and over the gasket, and taped it to a can of beer. The thermal mass of the beer helps to lower the volatility of the probe measurements compared to just leaving it sitting in air. This further reduces compressor cycle frequency and is a more appropriate approximation of the temperature of the liquid in the kegs, which is what I care about maintaining anyway.
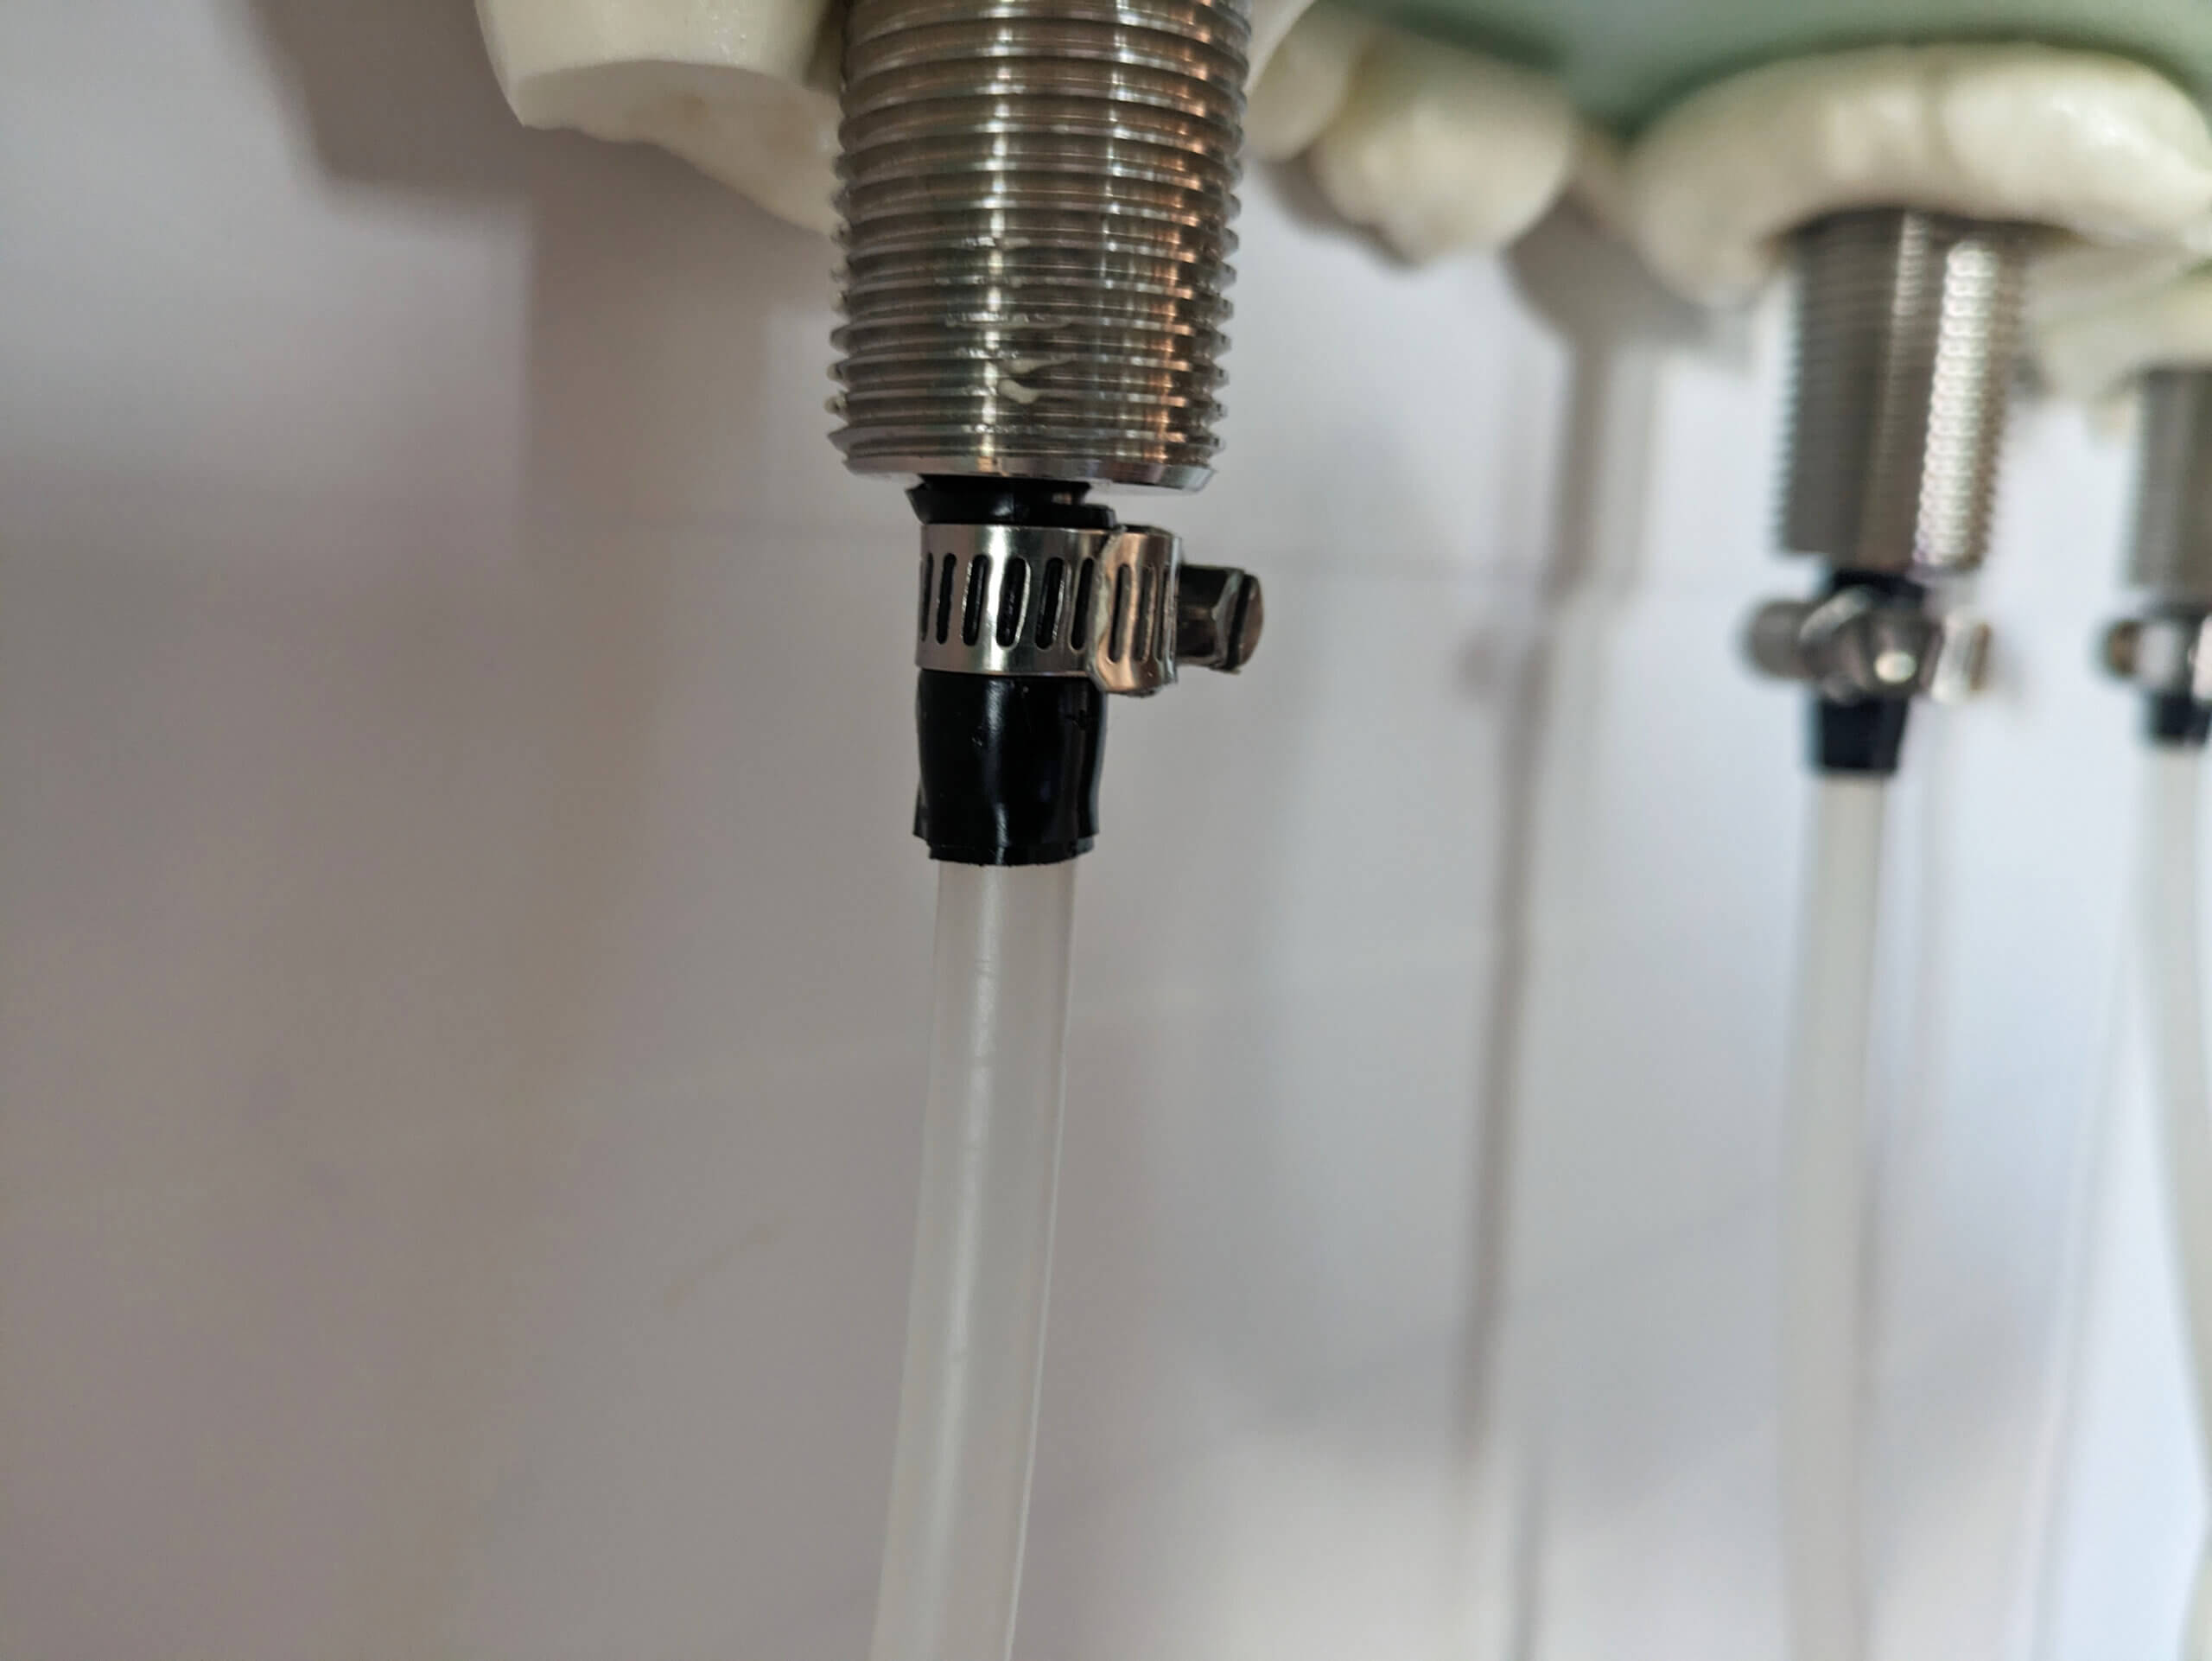
Getting the EVABarrier tubing over the liquid-side flare connections is a bear. I had to heat it by dipping it into boiling water for 30 seconds, then slowly stretched it out by inserting a couple different sized drill bits into it until it could fit over the 3/16″ flares. A swaging tool would have come in handy here. The hose clamps that I bought were pretty aggressive with digging into tubing, so I wrapped the EVABarrier tubing a couple times in electrical tape to give the hose clamp a sacrificial layer to bite into.
I designed and 3D printed a magnetic holder to attach my drip tray to the outside of the keezer. I really can’t recommend drilling into the front face of the freezer — when the compressor runs the front face gets a little warm, suggesting the coolant lines are running behind there. If you have a 3D printer and the same 19″ standard drip tray, you can download my model for free from Printables.
All done!
Lessons learned and general tips
Don’t waste your time or money with silicone beverage tubing. Even the FDA and USDA compliant (supposedly) tubing imparted a plasticky taste to my beverages. The EVABarrier brand tubing is a far superior product and you can leave liquid sitting in the lines for days or weeks without it taking on any flavor or even losing carbonation. I will never use anything else when it comes time to replace the lines.
I also recommend spending a little bit extra up front and getting stainless steel shanks and faucets as opposed to the chromed brass ones. Beer and sparkling water are acidic and the chrome plating will eventually flake off, so starting with the stainless steel will avoid a headache in a few years.
I have found that 25 psi is an enjoyable level of carbonation for seltzer.
Some notes on CO2
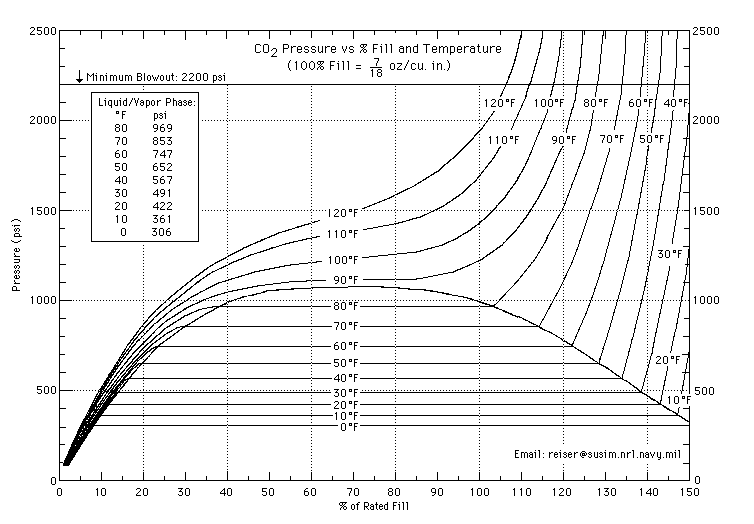
Most of the contents of a CO2 tank are in the liquid phase. The vapor pressure of a full tank is solely dependent on temperature and (at room temperature or below) will stay constant until the tank is nearly empty.
If the tank is stored inside the keezer say at 38 F, the pressure gauge will read around 550 psi until the tank has only about 15% of the initial fill volume remaining, and only then will the pressure begin dropping. It’s a good indication to start watching closely as the tank will need to be refilled soon.
The only way to get a precise measurement of how much CO2 remains in the tank is to weigh it and subtract the tare weight stamped on the side of the tank.
Electricity cost to run a keezer
The keezer is surprisingly cheap to operate. Using my PN-1500 electricity meter, I measured its power consumption over a period of nearly two weeks. My keezer used on average 0.18 kW per day. Even with the high electricity prices in Massachusetts, my keezer will cost me only about $20 per year to run.
Stacking up the savings — a worthy investment?
For beer, kegging is more expensive than bottling, assuming one is recycling glass bottles. 4 lb of dextrose is $10 at my local homebrew store, which will carbonate about 13 five gallon batches. By comparison, I paid $38 for 10 lbs of CO2 which I was told I could expect to carbonate 16 to 20 five gallon kegs. Saving the time and hassle of sanitizing and filling fifty bottles of beer is certainly worth something though.
For seltzer, DIY carbonation is significantly cheaper. I have found that herbal teas work great for flavoring water. My favorite is Celestial Seasonings Lemon Ginger. I steep an entire box in cold filtered water for 24 hours and then remove the teabags. The total cost per keg including the tea and CO2 is around $5.
Five gallons of store bought seltzer costs between $10 to $30 depending on the brand and container volume, with generic 2 liter bottles of seltzer being the cheapest and cans of name brand seltzer being the most expensive per unit volume.
Comparing to one liter bottles of Polar brand seltzer, I save at least $10 per keg (based on 75 cents per bottle sale price plus a 5 cent bottle deposit). So at an average of $2 per gallon cost savings, it is certainly possible for an avid seltzer drinker to save money over time with home carbonation, but we’re talking in the range of 400+ gallons consumed just to break even with the initial equipment cost.